Table of Contents Show
This is an in-depth guide on how to survive in the bwoking dead, from the basics to the most advanced info.
Super Animal Royale How to Survive in The Bwoking Dead
What is “The Bwoking Dead”?
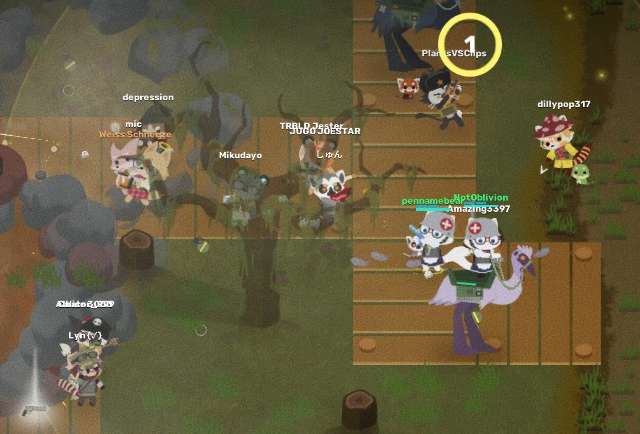
“The Bwoking Dead” mode, also known as zombie mode, infection mode, is a team mode that rotates every week with the SAW vs Rebellion mode; in this game mode there are 40 players of which 4 random players will start infected, the goal of the infected players is to infect and/or kill the rest of the healthy players before they evacuate by means of the giant eagle, the survivors must arm themselves and get together in groups to be able to defend themselves from the hordes of zombies that will be reappearing and reach the evacuation zone, marked in a yellow circle on the map.
Zombies.
At the beginning of each game, 4 players will randomly become zombies, these initial zombies will have an advantage over the rest of the zombies that join their ranks as time goes by, their life will be permanently increased to 130HP while the regular zombies will have 100HP, they will also have a 15% chance of infecting an unarmored survivor with a hit, compared to the 10% that the basic zombies have; you will be able to distinguish them by having a red color and basic zombies will have a white color, all zombies have increased speed, regenerate 5HP per second when out of combat and are immune to skunk gas, inflict 33 damage per hit to unarmored survivors and break one point of armor plus 3 damage to players with any level of armor (10% armor penetration).
When a zombie is killed, they will reappear at the edge of the gas after a short period of time, if at the moment of death, the zombies have their green bar fully charged, they will release an explosion inflicting an area damage of 30HP to 45HP, armor decreases this damage by half, you can distinguish these zombies because they present green colored growths on their body. The green bar that gives them this ability to explode upon death can be charged by eating all kinds of mushrooms (including poisonous ones that will not harm the zombie), eating coconuts, health fruits, attacking emus and players.
Zombies cannot collect weapons, armor, powerups, nor can they ride emus or hamster balls, but they can collect event items.
Weapons 1.
Although all weapons can be usable in this game mode because of their different characteristics, the best weapons you can take with you are long range weapons, that have a good damage per second, that have a high mobility, a large cartridge and weapons that quickly finish with the zombies, you should not necessarily look for a weapon with all these features because you will not find them, so you should complement a weapon that does high damage per second and has a large cartridge for when you are in groups and a weapon that quickly finish with large groups of zombies for when you finish alone on your own against 39 zombies.
 The Pistol is a weapon with low ammo but high amounts of damage per second, it has a very fast reload of 1 second, due to these characteristics, it will lack support when you are in groups of survivors, burning very fast its cartridge and having to reload constantly, but when the user is the last survivor, this weapon can be quite powerful to kill individual zombies or small groups while running away as well as maintaining high mobility when carried in hand while rolling.
Pro: High damage per second, fast reload, potential to finish small groups of zombies fast, high mobility, easy to get ammo.
Con: Very small cartridge, short range, ineffective in groups, zombies can easily hear bullets.
 Dual Pistols have the same stats as the pistol, only with the difference that it reloads in 1.3 seconds and has 20 rounds per round compared to the pistol’s 10, it can be a bit more useful than the pistol in groups and has the potential to take out slightly larger groups of zombies before having to reload its cartridge.
Pro: High damage per second, potential to finish off small to medium groups of zombies, easy to get ammo, high mobility, versatile in groups and solo.
Con: Short range, zombies can easily hear bullets.
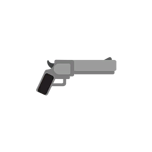 The Magnum is a high damage per shot weapon, but low damage per second and a small cartridge, it takes 1.4 seconds to reload, it is weak in groups of survivors due to its low damage per second, but it has an ability that can make it viable as a last survivor, and that is the ability to pierce a zombie per shot, causing two zombies to receive the bullet at the same time, it can be useful when you have small groups of zombies lined up chasing you, but its small cartridge makes it very little viable even in this context.
Pro: Can pierce 1 zombie, high damage per shot, high mobility.
Con: Very small cartridge, ineffective in groups, zombies can hear bullets easily, lacks good damage per second.
 The Deagle can be considered a direct upgrade of the Magnum, since it has the same abilities and better stats than the latter in almost all aspects, it has a 1.4 second reload, an 8 round cartridge and considerably higher damage than its counterpart, it has the same weaknesses and strengths as the Magnum with the difference that it is only obtainable in rebellion caches and mole shipments plus its shots can be heard in a large area around it.
Pro: Can pierce 1 zombie, high damage per shot, high mobility.
Con: Very small cartridge, ineffective in groups, zombies will arrive in large hordes as soon as you fire a bullet, lacks good damage per second, only appears in mole shipments or rebellion caches.
 The Silenced Pistol is a very strong and useful weapon when you are the last survivor, it has a small cartridge of 12 bullets, but incredible damage per second, has a reload of 1.1 seconds, has the ability to not be heard by zombies, so you will not alert large hordes as soon as you shoot, this weapon is the most useful (except for shotguns) when you are the last survivor, but loses support strength when you are in groups for the same reason as the pistol.
Pro: High damage per second, fast reload, potential to finish off small groups of zombies, easy to get ammo, high mobility, very useful solo, can’t be heard by zombies.
Con: Very small cartridge, ineffective in groups, only appears in mole shipments or rebellion caches.
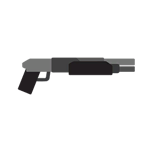 The shotgun is the most useful and strongest weapon in this game mode, it can do damage and even kill multiple infected players with a couple of shots, it has a 5 round cartridge, but it is compensated by its potential to insta-kill anyone infected that is not a red zombie, it has a reload of 1.3 seconds, but a poor range, you will need some practice to use this weapon, but it will finish in a jiffy any enemy that is in its path, excellent weapon as a last survivor.
Pro: High damage per shot, great area damage with potential to take out large groups of zombies, very useful alone.
Con: Very small cartridge, very short range, zombies can easily hear the bullets.
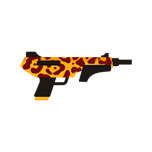 The JAG-7 is the shotgun, but slightly stronger, you can go a little faster if you carry it in hand compared to the shotgun, fires more bullets and does more damage overall, has the same cartridge size and a faster reload of 1.1 seconds, truly the strongest weapon in this game mode.
Pro: High damage per shot, high area damage with potential to take out large groups of zombies, very useful solo, fast reload.
Con: Very small cartridge, very short range, only appears in mole shipments or rebellion caches, zombies can hear the bullets easily.
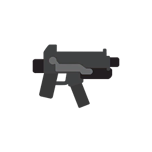 The SMG is a high damage per second weapon that will quickly destroy the defenses of any zombie, with a reload of 1.35 seconds, this weapon is quite light to use, versatile and strong, a very good option to carry throughout the game even being the last player standing, just be careful with the speed at which you spend the bullets.
Pro: High damage per second, potential to finish medium sized groups of zombies, easy to get ammo, high mobility, versatile in group and solo.
Con: Short range, zombies can hear bullets easily, burn through your ammo fast.
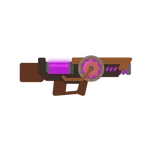 Superite’s laser is the weapon with most damage per second of the game, tied with the minigun, only they have several differences, being that the ammunition that uses the laser is somewhat difficult to get, has a large cartridge, but burns the bullets very easily, has a considerable delay at the time of shooting of 0.3 seconds and has a slow reload of 1.8 seconds, a strong weapon but not recommended in the later rounds of the game.
Pro: High damage per second, large cartridge, potential to finish off large groups of zombies.
Con: Burns your ammo very fast, hard to get ammo, slow reload, has a delay before starting to fire, zombies will hear the bullets very easily.
Weapons 2.
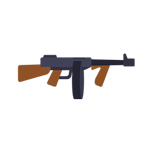 The Thomy Gun can be considered as the improvement of the SMG, it has a large cartridge, high damage per second, its ammunition is easy to obtain and has more range, it is more useful in groups, but loses some utility in solitary because of its slow reload of 1.7 seconds, it just burns even faster ammunition than with the SMG.
Pro: High damage per second, large cartridge, potential to finish large groups of zombies, ammo easy to get, useful in groups.
Con: Zombies can hear bullets easily, burns up all your ammo very fast, slow reloading.
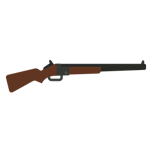 The Hunting Rifle has the ability to pierce 2 zombies, has high damage per shot and range, but lacks damage per second, and has only one cartridge with a reload of 0.7 seconds, it is quite weak in groups and is even worse solo since the bullets will be heard far away.
Pro: High damage per shot, can pierce 2 zombies, fast reload, long range.
Con: Low damage per second, very weak solo and in groups, very small cartridge, zombies can easily hear the bullets.
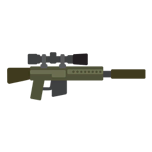 The Sniper is the direct upgrade of the hunting rifle, so it shares the same shortcomings and advantages in a fundamental way, but makes it slightly stronger, having a 5 round, incredible damage per shot and the same ability to pierce 2 zombies per shot, but again has the same weaknesses as the hunting rifle adding that it has a slow 1.8 second reload and horrible mobility.
Pro: High damage per shot, can pierce 2 zombies, long range.
Con: Low damage per second, very weak solo and in groups, very small cartridge, lousy mobility, zombies can hear bullets easily, slow reload, only appears in mole loads or rebellion caches.
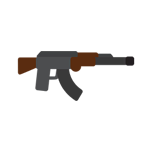 The AK is one of the strongest weapons in this game mode, a super versatile and solid weapon, one of your best options to support the rate of fire in groups, it is strong, has long range, has a large ammo cartridge, is very useful in groups and is decent solo, has a 1.35 second reload.
Pro: Long range, high damage per shot, decent damage per second, useful in groups, large cartridge.
Con: Zombies can hear bullets easily, there are better damage per second weapons.
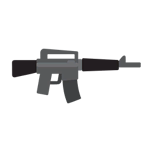 Just like the sniper and hunting rifle, the M16 is an upgrade to the AK, but both weapons are really useful in groups and quite strong, increases the AK’s damage, and also the range a bit, has the same cartridge size and takes 1.25 seconds to reload.
Pro: Long range, high damage per shot, decent damage per second, useful in groups, large cartridge,
Con: Zombies can hear bullets easily, there are better damage per second weapons, zombies can hear bullets easily, only appears in mole shipments or rebellion caches.
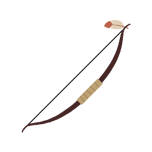 The Bow and Sparrow shares the peculiarity of putting a sparrow shaped tracker above any player and piercing 1 zombie just like the Magnum or Deagle, it is somewhat difficult to use and is a weapon that has no ammo as such, but you load the sparrow and launch it as soon as you stop holding down the click, it has high mobility and good damage, plus it is silent and the infected will not be able to hear when you shoot, weak in groups, solo potential, but there are better options.
Pro: High mobility, good damage per shot, pierces a zombie, puts a tracker on players, zombies won’t be able to hear it.
Con: Difficult to use, lacks damage per second, weak in groups.
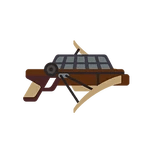 The Sparrow Launcher is very similar to the magnum only with the bow abilities, has good damage, but small cartridge with fast reload of 0.95 seconds, weak for groups, but can be somewhat useful for its ability to pierce 1 zombie and locate the one it hits, plus it is silent, so zombies won’t hear it.
Pro: Can pierce 1 zombie, high damage per shot, high mobility, fast reload, zombies can’t hear the shots and can locate enemies.
Con: Very small cartridge, ineffective in groups, lacks good damage per second, only appears in mole shipments or rebellion caches.
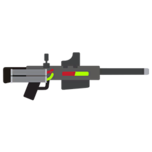 Dogna’s Dart Gun is a weapon that inflicts poison on enemies, and heals allies, it can also pierce a zombie per shot but has a small cartridge, it has a recharge of 1. 44 seconds, this weapon works as a support in groups, giving it enough utility to heal the players, the less time the survivors are healing, the more time they will be attacking, but the poison damage is too slow so it gives enough time to the zombies to kill the player using this weapon, therefore it must be protected by other players in the groups.
Pro: Useful in groups for healing, pierces 1 zombie per shot, high mobility.
Con: Small ammo, the damage per second is horrible, bad in solo.
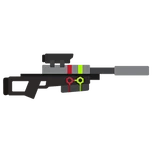 Dogna’s Dartfly Gun is the direct upgrade of the dart gun, just like all other upgrades, it takes the mechanics of the weapon and increases its stats considerably, in this case it gives you the ability to hit different zombies or allies at the same time, poisoning or healing them at the same time (each player that hits after the first, will receive less healing or take less damage), it has the same cartridge size and reloads in 1.4 seconds.
Pro: Useful in groups to heal multiple players, pierces 1 zombie per shot, high mobility.
Con: Small ammo, damage per second is horrible, bad solo, only appears in mole shipments or rebellion caches.
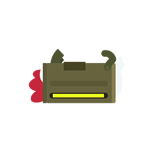 The BCG is a slow weapon that does incredible area damage and its projectiles leave a trail that slows down all players walking on that, either allies or infected, it is best to think of this weapon as a mortar, doing large amounts of area and long distance damage, a bit difficult to use and slow, it is a powerful weapon in close quarters when you are in a group, as you can be slowing down and doing massive damage to all zombies that pass through the few entrances there are, it has a slow reload of 1. 8 seconds and a 5 round cartridge, just be careful because if you use this weapon too close you will take damage from the impact.
Pro: Great area damage, long range, amazing in groups and close quarters, great damage per shot, leaves a temporary area that slows down everyone passing by.
Con: A bit difficult to use, horrible at close range, very slow, zombies will hear the bullets, small cartridge, only appears in mole shipments or rebellion caches.
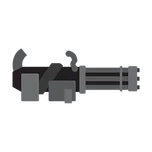 The best weapon to use in groups, and if you know how to use it, it will keep you alive for quite some time against the hordes, this weapon has long range, the highest damage per second in the game, this weapon alone pushes large groups of zombies into the hands of the right player, the few weaknesses it has can be negated when in a group, its main weaknesses are that it is a slow weapon, it burns shells quickly, it has a delay of 0. 48 seconds and a slow reload of 2.1 seconds, all this can be ignored by being in the center of a group and picking up the bullets of the players that are falling.
Pro: Best weapon in groups, can keep you alive longer alone, highest damage per second in the game, huge cartridge, ammo is easy to find, long range, will take out large groups of zombies with no problems.
Con: slow reload, lose mobility when you use it, has a delay before firing, all zombies around will kill you by having a very distinctive sound, only rarely appears in mole loads, burns bullets quickly.
Powerups.
 The claw boots allow you to cut the grass as you walk, releasing more loot than usual and allow you to go at normal speed when on ice, on the BCG yolk or on the coast, they have quite a lot of use in this game mode, due to the lack of ammo and health juice you will constantly face, not a bad option at the beginning of the game, but if you become the last survivor it will be more of a disadvantage than anything else, since the zombies can see when the grass is cut through the walls.
 The banana forker allows you to eat banana peels that are on the ground, recovering 25 health points each, it can be combined with an alternate strategy that I mention at the end of this guide or simply used in dangerous situations to recover large portions of life quickly.
 The ninja boots are made for this game mode, they decrease the sound that the player produces by 50%, prevents the zombies can see the trail you leave through the walls and allows you to go 5% faster, which although it does not sound great thing the latter, it has really helped me to keep more distance on the zombies and sometimes overcome them in speed, it is also quite useful the fact that they do not see your trail through the walls, this combined with that you will hear less than usual. It will make it harder for them to chase you inside buildings, really one of the best powerups if not the best.
 The snorkel allows you to take 10% less damage from the gas and increases your speed by 25% while in the gas, excellent powerup in the beginning of the game especially for looting and has potential to be used in the last circle if you are the last survivor as I will explain in the alternate strategies section.
 The Cupgrade can be quite useful in moments when you are in a group, while looting areas inside the gas, when you are fleeing and you are the last survivor, it is a versatile powerup, it increases your healing speed by 25%, the less time you spend healing, the more time you will spend attacking.
 The Super Tape just like the Cupgrade is very versatile, only, instead of healing your health faster, it will repair your armor 15% faster, taking into account that armor is the first priority when healing, this powerup is quite useful in times of urgency, along with the Ninja Boots it is one of the best powerups.
 The Bandolier is a powerup that increases your ability to carry ammo, bombs, and one more belt, due to the lack of resources in this game mode, you can serve as a container of bullets in case the group needs, serving as support for the team, or you can keep all the bullets for yourself and not have the need to save them during the game, the best advantage would be that you can carry 1 more belt, which can be crucial in groups when you do not have the opportunity to loot again by belt.
 The Super Juicer allows you to create your own health juice and increases the amount of juice you can carry up to 300 health units, you can create juice when you have full health and try to consume a health fruit, a non-poisonous mushroom or a coconut, it is useful at the beginning of the game when you need the juice the most, especially when you come back from the gas with no health juice and low health.
How and where to loot?
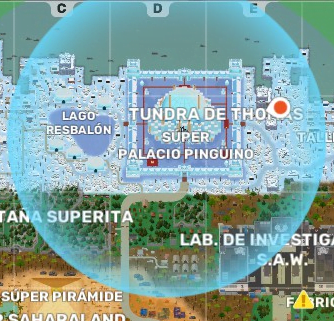
At the beginning of the game, your location will be very important to find a good or decent loot for the start of the game, if you appear in desolate areas such as the snow north of the map, you will have little chance of finding something decent, also your teammates may steal all the weapons and armor of the place, for this you can go to another location with a large structure that is near you or you can venture into the gas, for this it is recommended that you do it right after starting the game, if you do not feel confident you can pick up to have 80 health juice before entering, I recommend you to be in there only 4 rounds maximum.
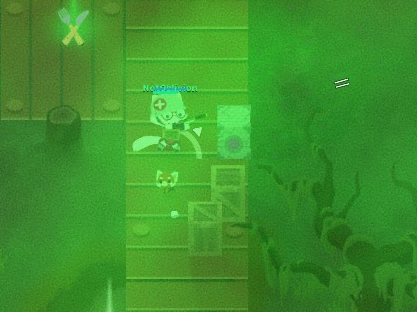
(2 rounds where the gas advances and 2 where the gas stops) if you find a snorkel you can use it to take less damage from the gas and go faster in this, always heal yourself before falling in red life and heal yourself from 70 to 100%, if you only have 25 health juice left, It is better to risk running than healing yourself, since the damage you will receive and the slower walking will not be worth it, the biggest advantage of being hidden outside the circle is that it is very difficult for a zombie to chase you because you will be far away from the main area and they will think that you will die because of the distance.
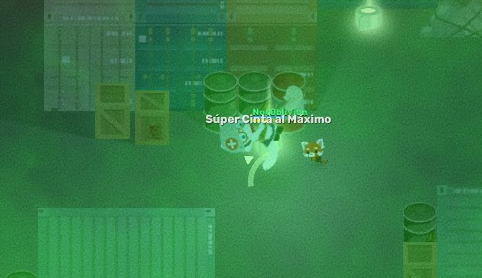
Duration of the game.
This section is still lacking research due to how difficult it can be to keep track of the count of each round for various reasons, so it may have some errors. However, I hope this can give you an idea of how long a game lasts:
- Round 1: Consists of 44 seconds to go to the circle of life plus 5 to 6 seconds from the time your character stands up until the counter appears.
- Round 1G: The gas in this round takes 65 seconds to close.
- Round 2: Once the gas closes completely you have 27 seconds to get to the next safe area.
- Round 2G: After finishing the previous count, the gas will take 45 seconds to close completely, I recommend that you finish looting and start going to the safe area in case you have ventured into the gas, since the damage you will receive will start to make your search for items very difficult.
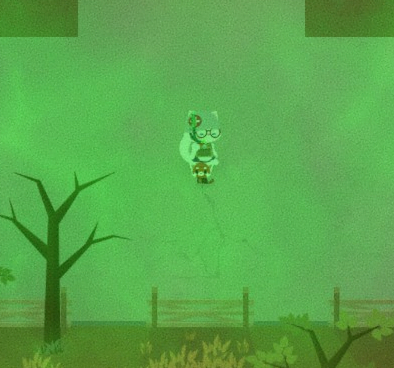
- Round 3: From this point, you will enter the middle of the game, you will have 21 seconds to reach the circle of life, at this point you should start looking for a group because the zombies will begin to grow in number and the “snowball” effect will occur, save your bullets and bombs because they will serve you in the late game.
- Round 3G: From this round, the times of each circle should be studied more thoroughly, because I have had games where it takes 35 seconds to close the gas or only 30 seconds, this may also be given by the number of players in the game, the fewer players there are, the shorter the time of each round, this is only a hypothesis at present.
- Round 4: For this round you should already meet with all the remaining players and be in a large group to withstand the following rounds of zombies, again as in the previous round the rounds can vary from 18 seconds to only 15 seconds,
- Round 4G: As soon as this round starts, you will officially be in the late game, the numbers of survivors will start to drop and you will find yourself on your last strength, you will have 30 or 25 seconds to be in the circle of life because the circle will start to close.
- Round 5: 15 seconds will be all you will have in this round, be prepared because it may be the last or the last round before the evacuation, if you find yourself in the need to run and hide, you still have a chance to escape as the last survivor from this point.
- Round 5G/Final: This is the round that needs more research, since it can begin to close the circle in 25 seconds or appear the evacuation zone making the final count of 30 seconds, maybe my data on this round are incorrect, but can serve to give you an idea about how much time is left.
Final Round: If the previous round was not the last, if or if this will be 30 seconds to escape and flee, all the information you need for this round in the following sections, just remember that the bullets you saved will be very useful in this round.
One piece of information that the Super Animal Royale wiki gives that you can take into account, is that the reappearance of zombies changes depending on how much time has passed in the game, being that they reappear every 10 seconds when you are in the early game, 14 seconds in mid-game and 16 seconds in the late game, this information seems to be quite inconsistent or given in intervals, personally I have not researched enough to be able to explain this information.
What number of players is safe?
In all the games there will be 40 players, either bots or real people and of these there will be 4 infected obligatory at the beginning of the game plus those who disconnect or are infected by the initial attack, it is essential to be aware of the number of players in a game and at what time. Here I will leave the magic numbers and how to interpret them 30 survivors. There are quite a few survivors left, if this number is in the last rounds of the game and when everyone is in a group, you can rest assured that they will hardly lose.
![]()
20 survivors. A solid number, you will usually find this amount in the middle of the game, when the group of survivors is starting to form, if you keep this group until the end you won’t have to worry about it.
![]()
15-18 survivors. These numbers start to look low, you can still survive against the constant waves of zombies, but you will have to be careful that no more survivors die and a “snowball” effect will start to occur in which the more players die the exponentially more difficult it will be to survive, if you reach the end with this amount, you can win with some minor problems.![]()
13 survivors. As soon as you see this number run away, it is very difficult for uninfected players to survive against all the zombies that will come to kill them, unless there is a player who knows how to use his minigun well or it is the last two rounds, in any of these cases, you can stay to fight, these conditions will favor the survival of the group for long enough before the evacuation.
![]()
10 survivors. Hide, there is no salvation.
![]()
1 survivor. Pray that Banan will have mercy on you.
![]()
Last Circle.
Once it is time to evacuate you will find yourself in one of two situations, you are either with a group of survivors still holding out against the ferocious hordes or you are the last man standing, I will talk about the first scenario and then explain what to do when you are the last survivor.
Suppose you are in a large group, at this point you should stop saving your bullets and use them as much as you can, the group should gradually approach the circle avoiding stopping as much as possible, although even walking have more than enough time to reach the circle, it is advisable to always move to not be easy prey for the zombies and not stay outside the circle when the counter reaches zero, stay close to the group and do not move away to lead the assault or stay behind straggled by the zombies, as soon as you get separated they will finish you fast since the zombies start to reappear in hordes together and because of the lack of space there will be many zombies together, once you are in the evacuation zone, throw all your bombs as far away from you, if you can and the geography allows it, throw everything in bottlenecks where many zombies accumulate trying to kill survivors, do not throw any bomb near you since you will end up killing yourself.
Now, if your group is 13 survivors or less, you should be a little more discreet and careful, remember that this amount of players cannot consistently defend themselves from the hordes of zombies, much less at the time of evacuation, you must stay with your group to resist the last waves, several will die if not almost all, so you must be alert and be moving and jumping constantly to avoid as much damage as possible, again spend everything you have either on the way to the circle or in the evacuation zone itself, if you feel really overwhelmed or your group is outnumbered by the zombies you can move between the obstacles inside the evacuation zone and go throwing grenades after you to kill the infected, stay outside the outskirts of the evacuation zone will give you some breathing space and maneuver to jump inside at the last moment, you can also separate from the rest of the group if you see that it is attracting too many zombies but it is recommended that you this at the last moment to approach the circle on your own or hide and heal yourself for a moment.
Last survivor.
Finally, if you are unfortunate enough to be the last player standing and it is time to evacuate or it is the final circle, you will need the following items in order of priority to increase your chances of victory.
- Uncommon Shotgun (Minimum) or JAG-7
- Armor Level 3 without damage
- Ninja Boots
- 4 Grenades
- Dual Pistols, Silenced Pistol, SMG, Thomas Submachine Gun, AK, M16 (any can work)
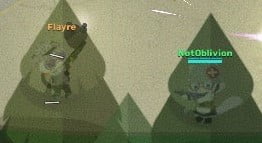
All these items are essential to survive, if you don’t have any of them, your chances of defeat will increase considerably. At the moment when the number of players drops to 13, flee to a hidden and remote place, where you are not visible to the naked eye and it is difficult to find you, your main mission will be to hide and that NO zombies see or hear you, if you do not have a place that is good enough or that will be consumed by the gas, try to hide between boxes, obstacles that obstruct your vision or between trees and pines, if you have a skin similar to the color of the terrain you will have a little more advantage because the zombies will be able to overlook you, there are some places especially useful to hide such as houses or inside Thomas’s workshop, always keep close to the gas since most infected will stay in the center of the evacuation circle, remember if you can’t see a player or zombie they can’t see you either. (Note: none of these hiding places work against bots except for obstacles that obstruct your line of sight and that of the enemy).
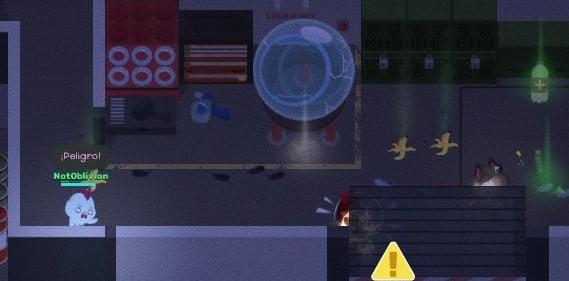
While you are hiding, reload your weapons, heal yourself and keep your shotgun in your main hand, if you have a weapon that does not make sound then have that as your main weapon, the goal at this point is to hide as much time as possible until it is time for evacuation, once the time comes you must run without missing a single jump to enter the area at the last second, as soon as you shoot a bullet from a weapon that does not have a silencer, or a zombie that is not a bot finds you, leave immediately from that hiding place because several groups of infected will try to get to where you are, but with the ninja boots they will not follow or hear your trail, plus you will keep a little more distance between them. if you have a fast emu use it, don’t let it die, this is the only emu that can consistently outrun the zombies in a straight line.
The escape plan is as follows, as soon as the final countdown starts, open the map and put a mark where the last circle is and make a mental note of where it is or what is around it (for example if there is a rock in the way, is it inside a building or is it in a forest), prepare to quickly switch between your shotgun and your melee weapon or between your grenades and your melee weapon, (you can make this easier by having a hotkey to your last weapon, so you use the mouse scroll to your melee weapon of choice so you just press that key, use the weapon and switch quickly to your melee weapon, personally I use the right mouse button on my mouse), so you use the mouse scroll from your melee to the weapon of your choice so you just press that key, use the weapon and switch quickly to the melee weapon, personally I use the right button of my mouse) the idea is to switch in the middle of the jumps to the shotgun, shoot the zombies, switch to your melee weapon and jump again, with practice you will get used to this move, along the way you should also throw grenades as much as you can, and then you will be able to jump back to your melee weapon, you will need to use your melee weapon and then switch back to your melee weapon, with practice you will get used to this move, along the way you should also throw grenades as near to you as possible while you are running, if you do it right you will not take damage and you will kill several infected behind you giving you some space to reload or keep running, always keep a considerable distance if you are going to reload your shotgun or weapon damage per second, never heal unless there are no zombies nearby, and if you do just heal one level of tape and keep running, if you see that there are still a couple of seconds left, you are in the circle and there are still several zombies in the center, move away a little and move in circles or between obstacles to avoid dying and quickly enter the area.
You can start running from your hiding place between 15 and 10 seconds remaining, your decision should depend on how confident you feel to arrive just in the last second and how far you are from the evacuation zone, a strategy you could use is to listen to the music to know how much time you have left, being the first 11 seconds, when the bass is the protagonist of the melody, your last seconds to prepare yourself, once the bass plays that more mournful melody in the 12th to 14th second you know it is the moment in which you should be ready to run at any time, as the bass is losing volume and the violins increase slightly in intensity in the second 15 to 21 is when you should be starting to run, as soon as the melody turns dramatically with the change of melody in the second 22 to 23 means that you will not reach if you are too far from the circle and that your time is running out, you must run to the circle, culminating in the seconds 24 to 30 in the most cardiac seconds you can experience in the game trying to dodge, shoot, run and throw grenades to reach and be rescued as the last survivor, link to the theme on YouTube https://www.youtube.com/watch?v=P5CdwGhey2M
Alternative Strategies.
The following are alternate strategies that have potential for use, have a very small niche or are difficult to execute, use them at your discretion.
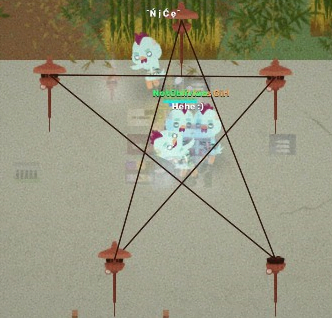
Make a path of zip lines all around the center of the map so that players can move quickly or make a figure like a pentagram to distract the zombies, the first one has the disadvantage that zombies can easily reach and ambush the group plus it will take you a little time to make the line of zip lines, plus many players can die from being on the zip line in an oversight, The second strategy has the problem that it will distract your allies and they will be on the zip line instead of shooting, but when you are the last survivor I can say from experience that most of the infected will stay on the zip line without looking for the last survivor, either doing emotes or getting on the zip line, giving you less zombies to worry about.
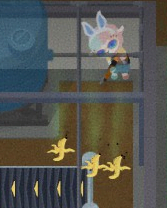
Use bananas to block an entrance/round a corner or to make them slip as the last survivor, the first strategy can be very useful, especially if you have a reliable partner who also has bananas to replenish the ones used while you shoot with your shotgun, the problem is that any player (and believe me they do it very often) can go and slip on all the bananas or throw a grenade and explode all your defenses, it is recommended that you do this strategy in the SAW security room with reliable people and several with bananas, The second strategy consists of using the bananas as grenades to make the zombies fall and you have time to reload and kill them all, it can be very useful when you are the last survivor but you run the risk of falling into your own shells and lose the game, you can combine this strategy with the banana fork and recover life quickly when you need it, it is useful, somewhat risky but it may be better to carry grenades and just kill the zombies.
Use bow and sparrow as the last survivor, is a strategy with potential for the great mobility of the bow and you can keep shooting and running constantly, in addition to pierce zombies, the problem is that you must know how to use the bow very well to use it, it can be complicated to use and has many weaknesses, so you must be careful using this strategy.
Use a fast emu with a partner, this strategy is the best to escape, while one of you drives the emu, the other player will spam the speed boost, with this strategy you will consistently outpace all infected, just be careful when making turns, the only disadvantage is that you must know how to use the emu well to survive, because as soon as it dies, your friend and you will die too, that and it only works with the fast emu, which is something rare to find in the games.
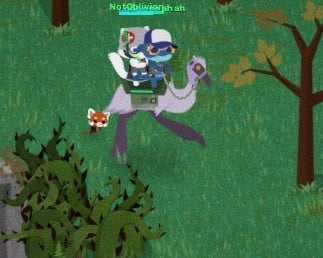
Using the snorkel as the last survivor instead of ninja boots is possible, but the damage you take from the gas during the last circle is really massive, it takes 3 to 4 seconds to leave you in red life, which will leave you as easy prey for the infected, even worse, the evacuation zones are usually not too close to the gas, they are almost always a bit off or inside buildings with many obstacles, anyway if you are good enough to not take damage from the zombies, you can use this powerup instead of the boots to take more distance between you and the zombies.
And that’s all, I hope this guide is helpful, always practice and never give up.
