Table of Contents Show
Introduction & General Tips
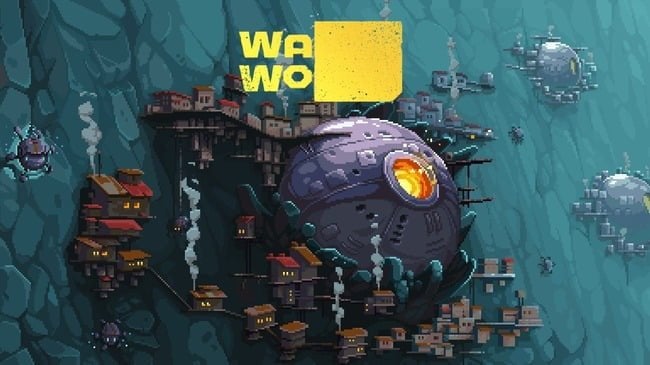
Here is an extensive guide to WallWorld. Whether you’re stuck on something in particular or want to take in new ideas, there is plenty of useful information to boost your next playthrough.
Combat Tips
The #1 Tip is to undock from the wall and move during combat. If you have spider movement speed upgrades, then you can easily dodge all of the ranged projectiles. There is also an upgrade so that going up and down along the wall essentially tramples the melee units on it.
In terms of which enemies to shoot at, you want to limit the sources of damage as fast as possible. Sometimes you must let weak enemies attack you while you focus on greater threats. The highest priority is suicide bomb units, and the lowest priority is the large flying spawners.
Boss Mechanics
There is a timer at the top of the screen. When this timer reaches zero, the boss will attack you. There are three phases of this attack. When all the boils are destroyed, the phase will be over and the boss will hide and turn on the next timer. For more tips about the boss fight see the boss section.
Cave Tips
The key to getting ahead of the curve during a playthrough is SPEED. You want to minimize downtime in between various tasks. If there’s one enemy left, launch a missle and instantly start heading into the cave to mine. The enemy will die and the wave timer will start when you’re already in the middle of mining, which will extend how long you can mine before coming back.
If your vacuum is full, keep mining as long as you can so that you don’t waste time sitting around waiting for the wave. Only start vacuuming when you get the far side so that the remaining resources are closer. On your way back to the spider, either try to be carrying a utility module or mining the sides that you missed before. Also, you can vacuum juggle many resources back to the spider to save time. (See below.) Drop the resources off right next to the spider so that you can vacuum them in very short trips.
Leaving a weak enemy alive to clog the wave timer is also an option. With the shield upgrade, this is worth it, but taking health damage for the sake of this delay is rarely worth it.
Resource Juggling
Wiggle your mouse up and down for best results. If you are juggling only a few resources, they can sometimes get sent flying. Trying to juggle too many resources can also slow you down as seen in the GIF.

Routing and Upgrade Path
Optimizing your upgrades involves putting as many upgrades into your exosuit as possible while minimizing damage from the waves. When you’re starting off, you will not be able to focus entirely on your mining economy, but later on you can be very greedy. If your first mine is a moss cave, exit the mine and look for a diamond cave. You should mine 6 cobalt to get the plasma cutter, and then run back and get the upgrade. For your second trip, return either when you have 16/4 for the second plasma cutter upgrade or the wave starts, whichever comes first.
After finishing the first diamond cave, look for a moss cave to get the third plasma cutter upgrade. At this point, you can either continue clearing caves in the starter biome or rush to higher tier biomes. How aggressive you can be with skipping lots of mines and trying to max your exosuit first depends on how many permanent upgrades you have.
Map
Biomes:
The player starts in the starter zone. There are cave nodes on the wall that contain different biomes depending on where the player is on the map. Generally, as you go further from the center, the enemies will get more difficult and the rocks will be more difficult to mine. At the transition between different zones, there are clouds.
When you cross the clouds, extra enemies will be summoned to attack you. If the enemies spawn outside of a wave, then the wave timer will not stop counting down. If a wave is currently in progress, then the enemies from the clouds will combine with the wave enemies, and the wave will be considered complete when both the wave enemies and the cloud enemies are defeated. To make best use of this mechanic, you can try to leave one wave enemy alive and then activate the cloud enemies, so that you don’t get overwhelmed by a double wave, also leaving you with a full wave timer to start the next mine afterwards.
*The emerald biome randomly replaces some of the diamond biomes in the starter zone (and L1/U1). Similarly, some of the caves in the non-starter zones will have the biome of one tier less, e.g. diamond caves instead of sponge caves in the L1 zone.

Zones/Resources

| Depth | Biome | Resource |
| Upper 3 | High-tech | Energy |
| Upper 2 | Ice | Amethyst |
| Upper 1 | Cubic | Cubes |
| Ground | Rocky | Diamonds |
| Special* | Mossy | Emeralds |
| Lower 1 | Sponge | Pearl |
| Lower 2 | Blood | Cells |
| Lower 3 | Magma | Bones |

Anomalies
Within each cave, aside from the ores you will also find anomalies. There are several types of anomalies:
Weapons
Deep to the right of the cave, you will sometimes find a narrow tunnel that leads to an open cavern with a destroyed spider in the middle. Run up to the destroyed spider and interact with it to unlock a new weapon for that run.
Equipment
Free the trapped module from the rock and bring it back to your spider to unlock an equipment item for that run.
Blueprints & One-off Upgrades
You can find special rooms that will have treasure inside. The reward is either a special hidden upgrade for one of your weapons or equipment, or a blueprint that gives a new permanent investment. Note that the blueprint only unlocks one tier of these upgrades, so many blueprints will have to be collected to max out these spider upgrades. Crypto keys, needed for completing the game, also generate in these rooms.

Weapons
The player starts with the machine gun, and can obtain more guns by exploring the map. The guns can be found in special caverns that can be accessed by a narrow tunnel at the far right in some caves. The weapons are grouped in tiers based on where they are found: Tier I, Tier II, and Tier III.
See next for comments on each weapon.

Machine Gun
The starter weapon. Good against swarms of weak flyers, and has good upgrades; weak against large enemies and the boss. While this weapon can take care of everything up to the 2nd boss phase, heavy investment (i.e. upgrades past 3rd row) is not recommended because of other stronger guns. A tier.
Bomb Thrower
Found in Cubic, Starter, or Sponge zones [unconfirmed]. Difficult to hit moving targets and targets that are far away. C tier.
Stake Thrower
Found in Cubic, Starter, or Sponge zones [unconfirmed]. With upgrades, it has excellent long-ranged DPS and it perfect for targeting weakpoints and the boss. Additionally, a fully charged shot fired straight up will kill all the melee units above the spider, and then fall and kill all the melee units below the spider. It is clunky against mass air units, however. S tier.
Shotgun
Found in Cubic, Starter, or Sponge zones [unconfirmed]. It can rapidly kill units up close such as the melee units, but its lack of range and low turning rate make it worse than the machine gun in most circumstances. D tier.
Laser Machine Gun
Found in the Ice zone. It has high accuracy, damage, fire rate, range, and turning speed. There isn’t much reason to use another weapon if you have it. SS Tier.
Railgun
Found in High-tech zone. UNTESTED.
Cluster Grenade Launcher
Found in Blood zone. Has most of the same problems as the Bomb Thrower, but by moving during a volley it covers the area better. B tier.
Singularity Generator
Found in Magma zone. Shoots a projectile that moves slowly and damages in an area. Without upgrades, the ball can’t reach the boss on the left of the screen, and it has very low base rate of fire. This would be a good swap-out, if weapon switching wasn’t so clunky. Being at the hardest tier and needing upgrades to be viable, it’s a hard sell. B tier.
High-tech/Energy Ice/Amethyst Cubic/Cubes Starter/Diamond Sponge/Pearl Blood/Cells Magma/Bones
Equipment
Equipment is obtained by freeing the equipment balls from the rocks within the caves. The type of equipment that you find depends on the zone that you found it in [unconfirmed].
Turret Replicator
Found in [unconfirmed]. Allows you to build turrets at each mine. This turret can help with the boss but is otherwise not that good since you move around a lot. C tier.
Docking Station
Found in [unconfirmed]. Grants a docking charge that you carry of the spider and into the mine to grant a boost. If you’re staying ahead of the curve with your mining upgrades, you’ll move fairly quickly through the mine, which gets out of range of the dock. So, to make effective use of this device, you have to keep shuttling it around, which cuts into the time saved. D tier.
Cluster Bomb
Found in [unconfirmed]. When the spider gets low health, bombs are released. D tier.
Overdrive
Found in [unconfirmed]. Activate for a temporary move speed boost. It’s decent early to squeeze more mining between waves, but it’s not really worth upgrading. C tier.
Drone system
Found in [unconfirmed]. Provides automated defense in the form of a bullet-shooting robot. It can compliment weapons and cover their weaknesses, and gives more opportunity for leave the spider early and entering it late, expending resource collection time. Not to mention that this device can solo waves if sufficiently graded. SS tier.
Repair Station Replicator
Found in [unconfirmed]. Lets you build repair towers that will provide some consistent healing for the spider, for the initial building costs. Later on, there is abundant resources for healing the spider, so the utility for this device is niche. B tier.
Barrage Mortar
Found in [unconfirmed]. Lays bombs at the start of a wave that can kill melee units coming towards the spider. B tier.
[MORE EQUIPMENT NOT LISTED]

Permanent Upgrades
There are two pages of permanent upgrades. The upgrades on the second page are blueprint-only, and you won’t have any when you’re starting out. Note that these blueprint upgrades require one blueprint per upgrade tier. The points that you spend for these permanent upgrades are acquired by mining in the caves during a run. You will get more of these points by mining in the harder zones.
Below is a tier list image for these permanent upgrades.


Enemies
[Unfinished]

Boss
Boss Mechanics
There is a timer at the top of the screen. When this timer reaches zero, the boss will attack you. There are three phases of this attack. (See below.) In the first two phases, there are boils on the boss that must be destroyed. When all the boils are destroyed, the phase will be over and the boss will hide and turn on the next timer.
Accurate long-ranged weapons such as the stake thrower and missles are recommended for hitting the boils. Enemies can continue to spawn, and finishing the attack phase destroys all remaining enemies, so generally your focus should be on killing the boils. Some enemies such as the suicide flyers are worth focusing, however.
The boss has a tentacle slap attack that will highlight an area in red and then attack you. You must avoid the attack at all costs, because it does extreme damage to the spider. With no spider upgrades, you’re out of luck, but having some spider movement speed will make dodging these attacks much easier. The upwards/downwards dash upgrades can be used to dodge the tentacle, but cooldowns and cast times make pure movement speed a better option. During phase 2, the boss will also use a fireball attack.
During phase 3, the boss will unsheath a laser beam eyeball and kill you. 🙂. (See below.)
Phase 1 & Phase 2

Phase 3


Beating the Game
[unconfirmed]
To actually avoid the third phase instakill and beat the game, you need to have all five of the crypto keys and unlock the gate at the top of the map, above the high-tech zone. These crypto keys are located within the caves of various zones.