Table of Contents Show
This guide strives to give a comprehensive understanding of skirmishing in War of Rights, and the tactics that can/should be used by the individual soldier or officer.
“Alright boys, let’s talk about skirmishing”
Skirmishing is one of the fundamental parts of the game that focuses on accuracy, effectiveness and agility. In the Civil War, skirmishers were used as an advanced force, to delay or inflict casualties on the enemy before the main group arrived. The role of the skirmisher is to dart from cover to cover while firing off accurate rounds to kill off the enemy one by one. Skirmishing can also be undertaken stationary as well, specifically when defending a point on a road, fenceline or forest. In stationary skirmishing, the objective is to focus on providing accurate fire, but also melee skills as well. The timing of the jab of a bayonet can mean life or death. A shot that you have to take at point blank will also mean life or death, for if you miss that shot, you are screwed.
For the duration of this guide, we will discuss the behavior of the skirmisher, his skills as a listener, and the ability to quickly react to the changing battlefield around him. A properly changed skirmisher can be utilized as a scout, a basic infantryman, a sharpshooter and be effective in forms of close range combat with the enemy. Anyone can pull the trigger of a gun, but a skirmisher needs to be able to do that, and much more in the heat of battle.
Note: Skirmishing does not just occur in small groups of men, the entire team could/should be skirmishing in specific instances.
“So you’re saying that standing behind an object can reduce my chances of being shot? Well whadda ya know”
We will start off our skirmishing section, by examining the various types of cover that exsist in a battlefield, and that the skirmisher should be able to utilize during combat. We will look at the cover, along with its benefits and downsides to the skirmisher.
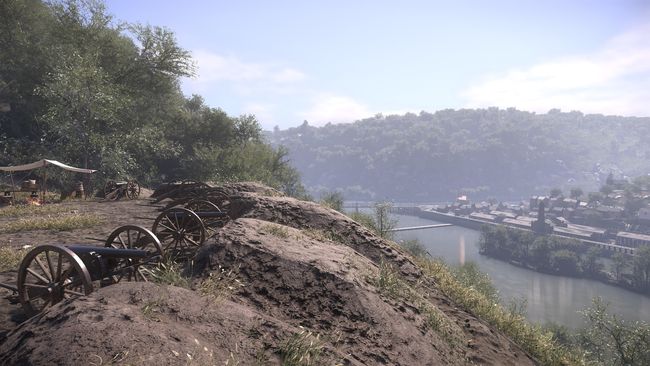
Hill or Small Elevation
Hills are on of the more important factors to look at when skirmishing, especially on maps with little to no standard cover. Besides stone fences or houses, hills are going to be one of the best ways to survive on the battlefield. In this case, I am not talking about a large mountain or hillside, I am talking about a small increase of elevation that is in the middle of the battlefield. One such example is that of the map “Dunker Church.” In front of the church, there is a small hill that if you are behind, you cannot get shot from the other side.
Shrubbery and Foliage
Your first question here may be “Well if bullets can pass through this, why is it considered cover?” The simple answer to that, is that this protects you from the enemy eyes, not the bullet, and are an important factor of stealth. Sure, a tree gives you actual cover from a bullet, but say you are being chased after by the enemy. If you cannot get out in time, foliage is the answer, for it will protect you from the prying eyes of the enemy. Just yesterday I was fighting as the Union on a slope, as the Confederates attacked us. I hid in a bush, not 20 yards parallel to the Confederates, picking off a couple without them realizing my presence. My point being, do not underestimate the bush and what may lie behind it.
Trees
This is one of the most important parts of cover that you will find on the battlefield. In any maps with forrests, groupings of trees, etc, this will be one of your main parts of cover. The tree is not by any means the best cover in game, typically because of the various sizes that can exsist within the game. Of course, your best option for trees is to find the most thick trees in base out in the battlefield and use them. If your entire body is positioned behind a tree, you cannot be shot. Of course, your flanks are completely exposed, so watch out for flankers.
Wooden Fence
The wooden fence is another common type of cover that you will see. They are of course littered all over Antietam, since farmers would mark their property with fences, along with their crops. Fences are in just about every map that you will find on Antietam, and some on Harper’s Ferry. The wooden fence is a good source of cover, don’t get me wrong, though it is most definitely not the best. Typically the fences have 3-4 cross pieces that have a good 3-4 inch openig between them. At distance combat, the fence will be a great piece of cover, though close quarter combat behind fences will lead to heavier casualties.
Houses/Stone Fences
These two are grouped together, since they provide the same type of cover as I would define as impenatrable. In this game, you cannot shoot through a stone fence or the wall of a house, meaning they are most likely the best cover in the game. The stone fences of course are exposed on the flanks, though any bullets coming straight at you, won’t hit you. Houses are better of course, since you do not have to worry about your flanks, except for the rebels entering the house.
“Sprint boys, sprint!”
One of the more important concepts when it comes to skirmishing, is controlling the stamina of your character in battle. When moving anywhere, your character will slowly and steadily become exhasuted, specifically by the speed of your movement. Quick time will use the least amount of stamina, while double quick will use a moderate. Sprinting will of course use up the most, and tires your character out quickly.
In the case of skirmishing, you will typically want to be moving at the double quick, whenever you are doing anything. Double quicking it will get you across the battlefield in a timely manner, while not exhausting your character that much. Sprinting can be used, but only if you are going a short distance, or need to support your comrades immediately. Of course when charging the enemy, you will be sprinting, I would not suggest a double quick charge.
If you have travelled a long distance to get to your objective and are tiring, I would suggest getting behind cover to replenish your stamina. You will notice that when you aim your rifle while exhausted, your heavy breathing will screw up your aim. This is why you should wait until you can barely hear your breathing before firing off rounds into the enemy, so-as that you are at the peak of your accuracy.
Ranged Combat
When skirmishing, ranged combat will be your main focus, with melee combat as a side focus. The entire objective of skirmishing is to pick enemies off and disorient them, therefore you must be ready in undertaking ranged combat.
The first note that I want to make about this combat, is the bayonet. When you spawn in, I suggest that you reload AND fix your bayonet. This way if you are on the way to your objective, you will be able to defend yourself if ambushed or if you find enemy troops. Bayonets are important when it comes to skirmishing since they effect your accuracy quite a bit, especially if you are tired. The concept of the game is that the bayonet adds another pound or so to the rifle, making it sway a little bit more than without a bayonet. My mentality when it comes to bayonets is to always start off with it equipped, and if the situation changes to where you will be firing at a range, then unfix. It is a better sacrafice to have a bayonet and a little less accuracy, than to not have one and get charged.
Now, let’s talk about the usage of cover, especially when it comes to reloading and spotting targets to take out. If you are in a large group of men, chances are the enemy knows where you are, and will be exchanging fire with you. In this case, cover will be your greatest ally, besides the man that is next to you. When taking up a position while skirmishing, you should ALWAYS find and use the best cover that is available to you. If there is a tree fatter than yours, use it, a stone fence rather than a wooden fence, use it. Those subtle differences in cover mean life or death in combat. We will talk more about cover while sneaking around in the later stealth section.
Once you have established good cover, you are now ready to seek out targets to kill. In this case, we will say that you are behind a tree. When seeking out targets, only poke your head out a little bit from the tree, and somewhat move back and forth. This is so if an enemy target sees you, you will be harder to hit. Once you have found a target, take aim and put a round into him. If you are engaged in heavy combat, do not I repeat, DO NOT wait for your smoke to clear to check if you killed him. Immediately get back behind cover. Remember too, that if you are crouched, you will have less weapong sway and be more accurate. So I would suggest that you try to stay crouched when firing your weapon at a target.
Remember, when you fire your round, the enemy can see the muzzle flash, and therefore pinpoint your location. This means that they will probably shoot at your muzzle flash, or at you if they can see you. This brings me to the next point of reloading. According to my own estimates, reloading in game takes approximately 14 seconds while standing, and 16 while crouching. During this time, the enemy has ample time to target your position and attempt to hit you. This is why you should ALWAYS get behind your cover while reloading. If you are caught out in the open, you are a stationary target, equivalent to a bullseye.
“They’re charging sir!”
This will happen more frequently if you are in smaller groups, and I will explain the different circumstances. A major concern that you should have when skirmishing, is if the enemy is going to charge/attack your position. This is especially prominent when you are behind cover and can’t see the enemy to the front while reloading. I will give you a couple of tips, and tell you what to do if you are charged.
Firstly, you should always be on guard while skirmishing. You may be picking enemies off, but you never know when they are going to flank you and maybe slaughter you and your comrades. My tip here, is that when you are reloading or searching for enemies, always look at your flanks, and your behind to see if they are flanking you. When you are reloading, you can use the free look camera (Left Alt) and look around. Always do this if you are unsure of the enemy’s intention, since you could spot a charging enemy. Also, if you can hear someone yelling charge, or hear a weird sounding yell coming towards you, that would pretty much signify a charge.
The next tip, is that if you are alone while skirmishing, and you cannot see very far on your flanks, always have your bayonet fixed. “But Lking, you said before that if you are fighting at range don’t have your bayonet fixed.” That only applies if you can see in all directions for at least 100 yards, and can see if you are being flanked. If you have limited sight on your flanks, keep that bayonet fixed. You will suffer in accuracy, but it is better safe than sorry.
Now let’s talk about what to do if you are being charged by the enemy. Depending on the person, you may have different instincts about what to do in this case. Some may fear and run, whilst others will stand and fight, and either solution is proper in certain circumstances.
If you are being charged by an enemy force much superior than your own, the best option is to fall back, until they are no longer chasing you. “But Lking, that’s cowardice.” No, it’s survival. If you are reloading when they charge you, cancel/break your reload (Press R while reloading) and run back. Do not try to finish reloading unless you know you can before they hit you. If you are loaded, I would suggest that you try to take a clean shot on the enemy, and then run. Once again, do not try to reload until you are in relative safety. Also, when running, try to zig zag/serpentine, running from cover to cover to reduce your chances of being hit.
Now, if the enemy force is probably equal to your own, or just a few men larger, I would suggest that you stand and fight. When doing so, make sure to cancel your reloads and fix your bayonets if they are not already fixed. Remember, when they are charging, they have not fired their shots off yet. Use this chance to put a bullet in one of them at the very least, and then go into melee combat with them. The object in a charge scenario, is to kill at least one of them with a bullet (If you are loaded), and one of them with your bayonet.
If your forces appear to have all died or close to dieing without winning, fall back and regroup.
“It’s over Rebels; I have the high ground!”
I had to make a really corny and pathetic joke in this title, so please don’t dislike this guide for that… So this short section will talk very briefly about the terrain that you will want to be fighting on, as a skirmisher, including higher elevation than your opponent.
The first factor you want to look at when finding the right terrain, is the visibility that you have, in comparison to the visibility that the enemy has. Of course, you want to have visibility of the enemies, since those are to be the targets that you are seeking out. Specifically, you want to make sure you have visibility on the approaches to your position, in other words, your flanks. You want to make sure that you have a clear view of your flanks, and understand whether or not the enemy can sneak up on you.
The other main factor of course, is cover which I the different types I covered (No pun intended) in the earlier section. You want to make sure that the cover you are behind protects you from fire from the front. If it protects you from the sides or rear, that is just a bonus. If you believe you are to be shot at by the enemy, definitely make sure your cover can withstand bullets (No bushes in this case).
Now the final factor of terrain depends specifically on the map that you are on, some maps are relatively flat. As a skirmisher, you will want to typically have a higher terrain than your opponent. Now this is for a couple of reasons. Firstly, if you are high enough, the cover that the enemy behind may be ineffective against your shots. For example, if an enemy is behind a fenceline. If you have a higher position than him, you may be able to fire over the fence directly into him, making his cover obsolete. The other reason is because of visibility. The higher up you are, the more visibility you will most likely have over the battlefield. This will aid you when planning your strategy.
Now, there are of course exceptions, in which the lower ground is acceptable/better than the high ground. For instance, if you are seeking cover in a ditch. The ditch is lower yes, but of course it stops you from getting shot… I would definitely sacrafice the high ground for not getting shot any day.
Stealth
We will wrap up this guide, with giving you a comprehensive idea for tactics to use while attempting to stealth attack the enemy. Being in stealth of course has many benefits: less chances of being shot, gathering intelligence on the enemies position, learning of their strategies if you get in close enough and picking off high value targets. When we are talking about stealth, I mean that there are probably going to be about 1-3 of you in this stealth group. This depends on your task of course, if trying to gather intelligence, 2-3 people would be your better bet.
In the last section, I said that bushes are not going to be your best bet at cover in comparison to other objects, though I will reverse that rule for stealth. Stealth uses any and everything that will enable the soldier to be unseen or more difficult to see. Bushes are especially important while executing stealth maneuvers, mainly because of their width. A bush has a larger width than that of a tree, and will therefore make you harder to see. I would suggest using bushes specifically if you are close to the enemy position and want to be at the peak of your stealth.
Stealth maneuvers typically involve being fast and efficient at your movements. If you are possibly going to be in the enemy’s line of sight for example, be fast about it. The idea is to quickly jump from cover to cover until you arrive at your destination. In this case, I would suggest sprinting rather than just double quicking it.
Trying to pick off targets while still remaining hidden can be a difficult task to achieve. You are firing a big, loud rifle with a muzzle flash. So, here are some tips for that. If you are closer to friendly lines, I would suggest that you stay as far as possible while mainting sight on the enemy to attack them. This way, your comrades will probably already be drawing the enemy’s fire, while you are undetected.
That is if you are far away from the enemy, what happens if you want to get within close range of the enemy to pick them off? The main factor that contributes to your success or failure, is your position. You want to stay concealed behind a bush, or tree if possible. A bush would be preferable at close ranges. I would say the best way to pick them off and still stay concealed, is to be parallel to where they are attacking/firing at. If you are parallel to them, and close enough, the enemy will most likely believe that you are a friendly. When you fire your shots, they won’t think much of it, since they expect that their men are being felled by your comrades. This only works if the enemy is engaged in combat with your comrades.
Targets can be another important aspect when it comes to shooting at close range or afar. You have two main targets when you are picking off the enemy: Officers and flagbearers. If you kill the enemy officer, they may become discombobulated, and you may cause a brief panic. Not only that, you may have just saved 6 of your comrades from being shot by the officer’s pistol. The flagbearer is of course a prime target, since he acts as a mobile spawnpoint. If you take him down, you can hamper their ability to receive reinforcements, while your own men wear them down gradually.
“Looks like we’re done here boys”
I made this guide in hopes that other will heed my tips and warnings while skirmishing on War of Rights. I am trying to get you guys to fight properly and effectively in the game. I thank any of you who have completely read this guide and understood the tips I have given to you.