Table of Contents Show
I’ve read that many Imperial Citizens are having issues with the hungry, hungry wildlife of Gladius Prime. Due to recent events, the Adeptus Arbites response time is slightly above average, so this guide was produced to be handed out alongside your uplifting Infantryman’s Primer this week.
Introduction
I’ve read that many Imperial Citizens are having issues with the hungry, hungry wildlife of Gladius Prime. Due to recent events, the Adeptus Arbites response time is slightly above average, so this guide was produced to be handed out alongside your uplifting Infantryman’s Primer this week.
The point of this little guide is to better inform you of what types of neutral creatures are present, their capabilities and how to best deal with them.
Unlike most other 4x games, where you begin with a scout and rush out to explore the map, you don’t do that in Gladius. The wildlife will devour lone squads, or even small groups if you aren’t careful.
You need to factor in potential wildlife shenanigans before you order your squads to move and explore the map. If that means moving one tile less to get line of sight into the fog of war, or only travelling in groups, then so be it. It’s part of the risk management and strategy.
Treat the locals as threatening as any other faction.
Wildlife Types
Here is a list of the current Neutral enemies you might encounter as you battle over the wartorn landscapes of this once pristine planet, and how to deal with them.
Kroot hounds
Kroot hounds aren’t scary, but if a group of them descends upon one of your squads, it can be painful, and they have high enough movement to do it. These creatures are the most common of all native wildlife. They have low health and armour, limited damage but high movement.
Easiest early game counter is frag grenades. One throw and a pack of doggos not in cover, all explode into tasty giblets.
Otherwise they are vulnerable to basic attacks. They are really only a threat in numbers, which they often have. Be mindful that the AI will try and surround your units, preventing their escape. If this happens, it almost certainly spells death for your squad.
Psychneuein
Psychneuein is a tongue twister.
As a neutral, it’s basically a flying Kroot Hound +1.
It behaves the same as the hounds, but is a fair bit stronger. But nothing to be feared early game, as long as you have kept your squads together.
It has two gimmicks that you need to be mindful of. One, if it kills a squad, a new unit of Psychneuein is born.
Two, it has an ability called space slip. When used, you will see a blue sheen wash over them as the animation. While active, they reduce incoming damage by a whopping 50%. So always check their unit card before throwing grenades or overly committing to attacking them.
One last thing to note, is that early game Orks really struggle against these, as you can’t punch things that fly. So if any flies attack your boyz, turn tail and get out of there. They will kill your squads and make more bugs while you pointlessly shoot pistols in the air. <Que not the bees .gif here>. Tankbustas deal with these very easily.
Ambulls
Ambulls are actually my most hated neutral. They are tough, regenerate and punch things really hard. But worst of all is they tend to hang out in small families and can be almost anywhere Kroot hounds can be. A family of these bad bois hiding out in forests can be painfully time consuming to remove.
They behave the same way as Kroot Hounds, and easiest counter is just overwhelming force, have several squads shoot them down.
Enslavers
Enslavers are scary ooohhh ahhhh. Super annoying if one gets the drop on you, steals a squad and then escapes into the wilderness cackling.
Basically they look like white, flying jellyfish. They have limited defences, but a decent health pool, and enough attack to fight off a single squad. But what makes them scary, is their ability to mind control a unit permanently.
If you see Enslavers, then there is a relic nearby. And they tend to stick within a certain radius of that relic unless engaged or the relic is stolen, at which point they run wild and free. Be mindful of their existence when sending lone squads, or even armies, that it’s possible for a jerk-sack to come out and abscond with your dudes. If you know where they are, and if you have something within reach of it’s movement, don’t be surprised if they come calling.
Easiest way to counter is have multiple squads (3 squads of basic infantry tends to work just fine). Grenades also take out significant portions of their health.
It is mentioned on the unit card, but just for completeness, if a unit is captured by Enslavers, when said Enslavers are eliminated all captured units return to their owners control.
Catachan Devils
Catachan Devils are glass cannons in the shape of tank sized scorpions. Decently armoured, but 12hp means that anything with strong armour penetration rips them in half. Krak grenades can get through their hides, but in general you don’t want to engage these grumpy arachnids unless you have some anti tank with you (devastator marines, heavy weapons teams ect), as the Devils deal serious damage. If you don’t have heavy hitters, if you can deal around 80% damage with whatever you have nearby, that should be enough to make them flee to heal – most of the time.
The biggest threat posed by the Devils is, where there is one, there is always more. Just like Huntsman spiders. If you see a Catachan Devil, then somewhere nearby is a nest which periodically spawns more Devils.
To counter, get several units – ideally with some kind of anti armour weapons and go in force, kill off the scorpions as you see them, then destroy the nest. FYI there can be multiple nests near each other, each spawning their own super friendly Devils.
Bastion
Neutral Bastions are annoying. Avoid until you have heavy anti tank weapons, unless your playing Necrons, as your humble Warriors can blast the building apart with contemptuous ease thanks to guass weaponry.
Bastions are loaded with heavy bolters, lots of health and enough armour to completely maul any silly squads of Guardsmen or Space Marines who think it’s a good idea to get within two squares of it.
Easiest counter is to get range 3 heavy weapons and shoot it down from a safe distance. Otherwise ignore it until your ready to take it out. It’s immobile.
If one is right next to a special resource deposit, feel free to capture it with a squad, weather it’s overwatch + shooting in it’s turn, then run off. The Bastion won’t go anywhere, but it will defend your resources from other players.
Wildlife Types Continued
Kastelan Robots
Kastelan Robots are a real threat. 4.2 meters of angry, armoured robot with flamethrowers and rapid firing incendiary guns.
Early game, your best bet is to avoid these monsters, as they will exterminate anything that tries to fight them. And more importantly, on higher wildlife settings they tend to roam in packs.
What makes them so fierce is, like your units, they have overwatch. If you move within range they will shoot you, which also triggers their aggro.
They can chase your units, and will 1v1 anything you can make until you are quite a ways through your tech tree.
If you have to engage them early game, try to lure them to your city via a fighting retreat. Your cities health pool and firepower will overpower the robots, atleast temporarily as they retreat to heal.
Otherwise wait until you have several units before tackling the robots, ideally with some sort of anti armour weapon. Go in, in force and destroy them quickly before they can injure your units too much, or their friends come running and join the party.
Tech Priests
The least threatening wildlife unit. They don’t have ranged weapons, and their cool looking axes are made of foam. About the only trick they have, is to throw grenades at you. The only thing to note about these techno religious crazies, is that these chaps only spawn alongside Kastelan Robots. If you see neutral Tech Priests, then there are robots near by.
Lord of Skulls
The Lord of Skulls is basically the Punisher. It’s not a unit, it’s an army, treat it as such.
If you have the DLC, late game there is a chance that a gigantic unit called a Lord of Skulls will invade the map.
This titanic unit is mindlessly aggressive, can kill just about anything in one hit with it’s melee weapon, and it’s guns are very powerful, able to exterminate squads of troops or deliver crippling blows to tanks if caught out in the open.
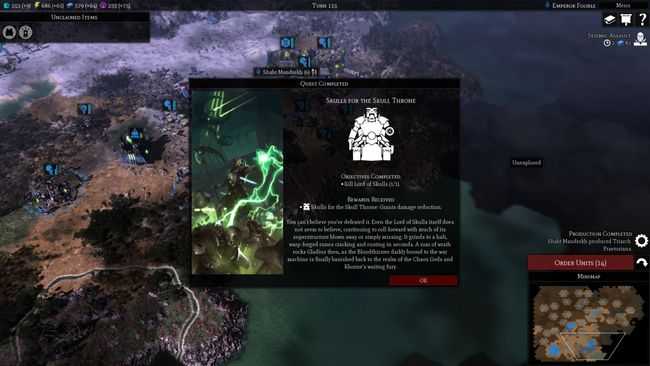
The good news, is that if you defeat this monstrosity, you get a very powerful buff for the rest of the match.
The two difficulties of defeating this beast are, is it’s absurd damage capabilities and its super thick armour that makes hurting it difficult. If you intend to try and claim its scalp, you need to go in hard. Bring as much anti tank as you can find, and more than a few disposable meatshields to take hits for the team. With several Heavy Destroyers,Devastator Marines and the like, he does go down fairly quickly.
If you don’t want to fight him, you can avoid the big boi, and eventually he will get bored and go back to the Realm of Chaos, only to return at a later date.
If he sees a unit though, he will try and murder it. If that ‘it’ happens to be a city, and you don’t have an appropriately strong defence force, he will smush that town like Godzilla in a doll house.
Extra caution is advised for Space Marines, if a Lord of Skulls is near your city, it might pay to have sacrificial lambs ready to lead him away.
Screenshot to show reward for defeating him.
Final Tips
So, in conclusion;
Don’t explore solo. Always travel in groups of 3-4 squads.
Know that the wildlife/Barbarians in this game are dangerous, and on higher wildlife settings, very numerous.
The natives are giving your opponents as much grief as they are giving you.
Several wildlife types tell you something – aka Enslavers = relic, Tech Priests = Robots nearby, Catachan Devils = nest nearby. Take these into account when exploring.
Just because you see them, doesn’t mean you have to fight them. If it’s better to wait, or if you don’t need to go in that direction, then don’t.
Utilize overwatch. Just because those four packs of Kroot Hounds are within range, doesn’t mean you should start shooting. Shoot once, to get their attention, and then wait. When the dogs move to attack your troops, overwatch will trigger. And most of the early game soldiers deal much more damage at range one.
The non ranged wildlife aren’t inherently aggressive at range 2. If you have squads adjacent to neutral creatures, then chances are they will attack. If however, you are two tiles away, but don’t attack them, they may (thats MAY, not won’t) not move in to attack you.
Take your time. Early game isn’t as super important as other 4x games. As long as your build order is ok, it’s far more important to conserve units than to lose them trying to temporarily capture special resource nodes. Slow and careful wins the day here.
Space Marine players be wary about how and where you place your Fortress of Redemption’s. While they are quite capable of defending themselves against Catachan Devils and Kastelan Robots, they are, somewhat ironically very vulnerable to Kroot Hounds, Pschneuein and Ambulls, as the fortress is armed only with heavy anti tank lasers.