Table of Contents Show
Band of Bastards is the third DLC launched for Kingdom Come: Deliverance. In it you are tasked by your liege lord the roam the Bohemian countryside with a bunch of mercenaries, to spread peace and order in a realm that is ravaged by war and filled with cutthroats, thieves and brigands.
To begin the quest you will need to have completed Baptism by Fire. Sometime afterwards you’ll get a prompt that you can see Sir Radzig regarding these dangers lurking on the provincial roads. Go see him at his usual residence in Pirkstein Castle (or if he’s in his battle camp: near Merhojed).
He’ll tell you how he doesn’t have enough men to keep the roads safe, however, he did recently meet up with an old acquaintance—Sir Kuno of Rychwald—and his mercenary band consisting mainly of former convicts. All capable men, they just need a guide to keep them from becoming too disorderly. Seems like you’re the right guy for the right job, so head out to the mercenary camp that is located between Rattay and Ledetchko.
As with any reference guide and walkthrough, this place is heavily packed with spoilers. Don’t read if you want to savour the game on your own.
Here be spoilers, beware!
Band of Bastards DLC Walkthrough & Achievement Guide
Band of Bastards
Band of Bastards is the overarching quest for this DLC that provides the framework for five smaller, separate, side-quests. The progression of the quest is as follows:
- 1. Go to Kuno’s encampment
- 2. Prove you’ve got what it takes by beating Dangler in combat
- 3. Ride out on the first mission. Kuno wants to leave during daylight → Bad Blood
- 4. Meet with Kuno in the encampment
- 5. Ride out one the second mission → Uninvited Guests
- 6. Meet with Kuno in the encampment
- 7. Ride out one the third mission → A Tight Spot
- 8. Meet with Kuno in the encampment
- 9. Ask about Jakey at the Inn in the Glade → Thirty Pieces
- 10. Meet with Kuno in the encampment
- 11. Ride against Hagen Zoul! → What Price Honour?
- 12. Report to Sir Radzig
The beginning and end
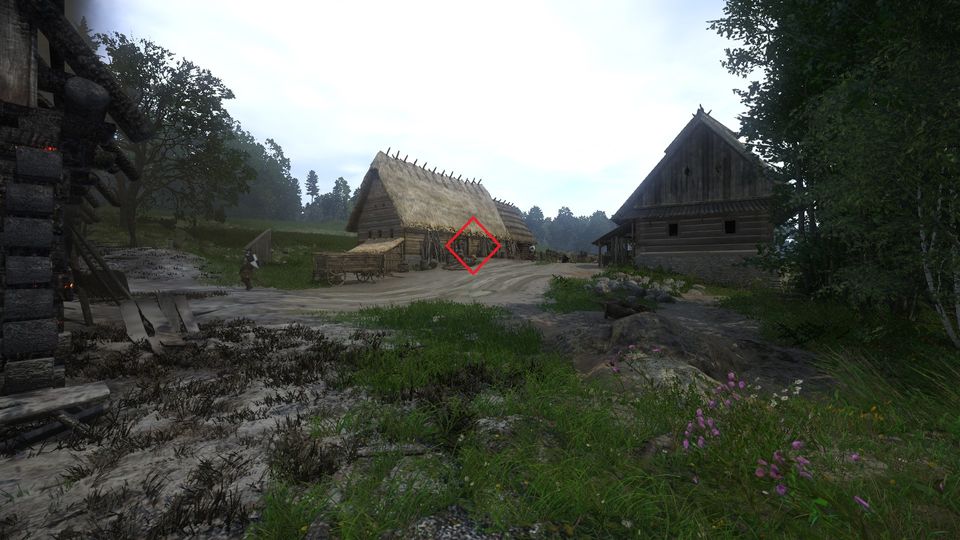
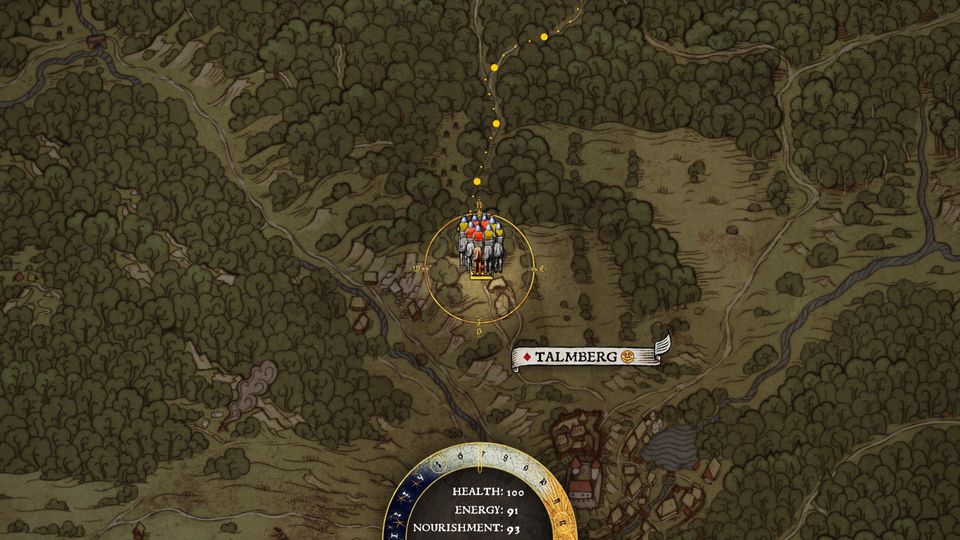
The first objective is to Go to Kuno’s encampment. Not to difficult, just head out of Rattay, cross the river at the Mill, take the first or the second road to the left and after a short while you should see Sir Kuno’s tents. Approach the encampment and a cutscene starts.
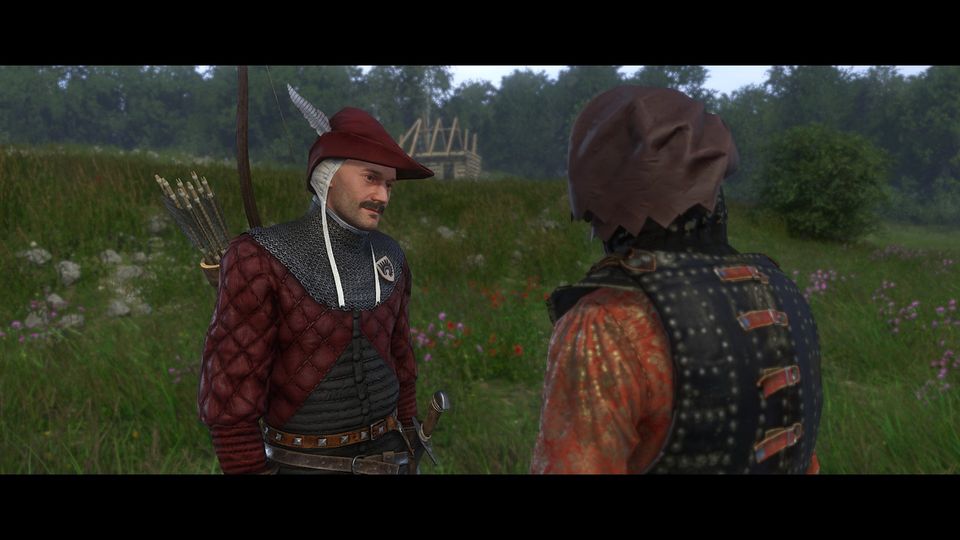
Heinrich approaches The Stone but doesn’t seem able to get too much out of him. Luckily, Jakey comes to the rescue and leads him across camp, introducing Heinrich to the Bearman brothers, Petr and Jan, and eventually The Chief. However, Sir Kuno doesn’t like taking dead weight so first Harold Heinrich has to prove his mettle against Dangler.
Proving what you’ve got by beating Dangler isn’t as hard as it sounds. Just keep your guard up and hit hit him a couple of times and he should yield. Make sure not to give him time to get a Master Strike at you, or you might loose. If you do, just talk to Sir Kuno again for a rematch against the Dangler. Once you beat him you can talk to the people around camp or go on a mission by talking to Sir Kuno.
Be sure to finish any outstanding business (such as the Ring of Bacchus business) before the last mission. Whereas your companions are marked essential during most of the Band of Bastards quest they can die during the last mission. Also: if all your companions get incapacitated during any mission the Band of Bastards quest will fail and you have to reload.
Quest overview
You can earn a total of seven achievements. Two are associated with the Ring of Bacchus game and the other five are quest-related. Two of the achievement—Pinky Promise and Torturer—are mutually exclusive.
1. Ring of Bacchus: Help the companions to gain possession in this game concerning the fabulous Ring of Bacchus.
- Lost Trinket, Game Over
2. Bad Blood: Patrol the area near Merhojed with Sir Kuno and his band and investigate the goings-on at a local farm
- Tracker
3. Uninvited Guests: Go on a night patrol near Uzhitz with Sir Kuno and his band and protect a local mill
- Chivalrous Soul
4. A Tight Spot: Ride out to Sasau with Sir Kuno and his band and investigate the unfamiliar horsemen
5. Thirty Pieces: Go find Jakey at the Inn in the Glade and find out what he knows
- Pinky Promise, Torturer
6. What Price Honour?: Ride out with Sir Kuno against Hagen Zoul near Samopesh!
- Mercenary’s Honour
Achievement overview
Chivalrous Soul
Persuade Kuno to attack the mill right away
◘ Hints: During the 2nd mission (Uninvited Guests) the company is approached by a refugee from an ongoing attack. Sir Kuno wants to wait till the attackers are drunk. For the achievement you need to convince him to attack right away (speech 7 or charisma 10).
Game Over
The Ring of Bacchus made its way back to its original owner
◘ Hints: Just play through all stages of the Ring of Bacchus activity. After giving someone the ring rest for two or three hours and another contender should call for you. Repeat this with several companions and the achievement will eventually unlock.
Lost Trinket
You’re not the only one playing the Ring of Bacchus game, so watch out for the others!
◘ Hints: Instead of directly giving the ring to one of the players in the Ring of Bacchus game, keep the ring and go to sleep in Sir Kuno’s camp. Once you wake up (around 7 am) the ring is gone and you get the achievement.
Mercenary’s Honour
Arouse the mercenary’s sense of honour
◘ Hints: During the 5th mission (What Price Honour?) you will need to convince Sir Kuno (speech check 7) to stand and fight. Do so and to get the achievement.
Pinky Promise
Keep your word at any cost
◘ Exlusive: Yes (with Torturer)
◘ Hints: In the 4th mission (Thirty Pieces) you get the to interrogate Jakey. At a certain point you should be get an option to persuade Jakey do not pick that option instead answer “I’ll untie you” and the achievement will unlock after the dialogue. Note: you cannot unlock this together with Torturer anymore. They’re 100% exclusive now, so make a save before interrogating Jakey.
Torturer
Leave Jakey to consider the error of his ways
◘ Exlusive: Yes (with Pinky Promise)
◘ Hints: In the 4th mission (Thirty Pieces) you get the to interrogate Jakey. At a certain point you should be get an option to persuade Jakey do not pick that option instead answer “You don’t want to talk? Alright.” Return after a day and the achievement will unlock after the dialogue. Note: you cannot unlock this together with Pinky Promise anymore. They’re 100% exclusive now, so make a save before interrogating Jakey.
Tracker
Track down the raiders who attacked the mill
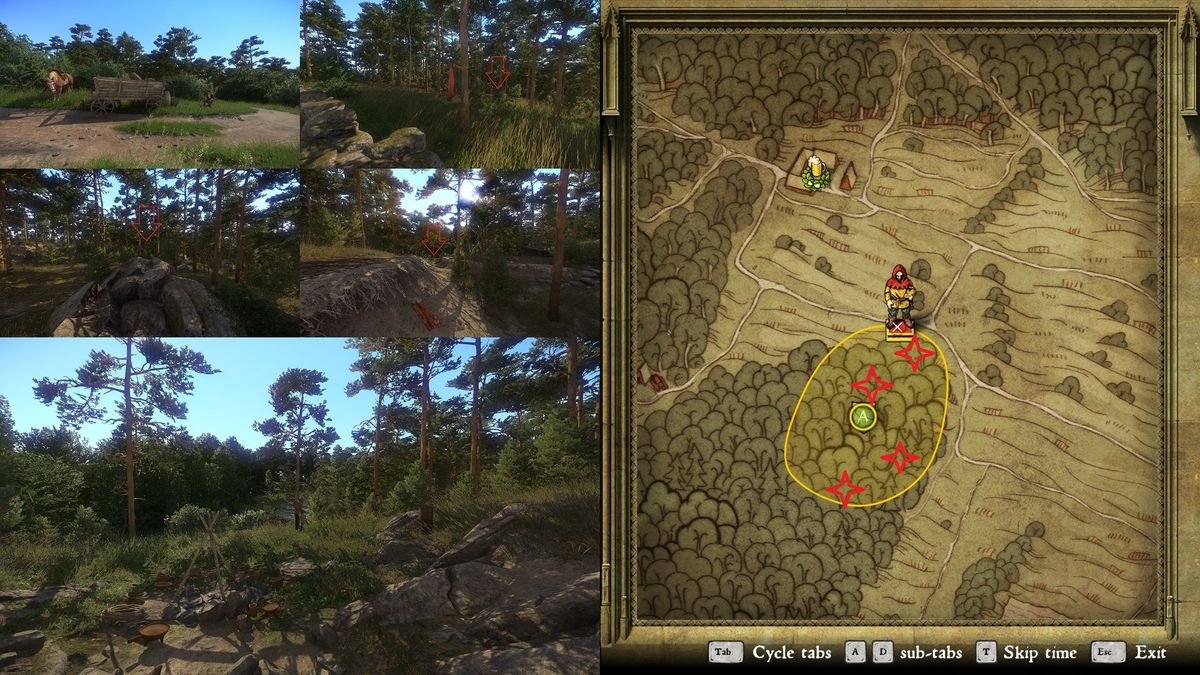
◘ Hints: When you ride out with the band on your 1st mission (Bad Blood) you will come across an attacked farm (I’m quite sure there’s no mill there). Investigate the goings-on and head into the forest. Eventually you should find the raiders’ hideout. Once you do the achievement unlocks.
Bad Blood Quest Walkthrough
Achievement: Tracker (missable)
- 1. Follow Kuno and his band
- 2. Search the burnt-out farm
- 3. (Optional) Try and find traces of the attackers
- 3a. (Optional) Track the raiders
- 3b. (Optional) Deal with the raiders
- 4. Tell Kuno what you’ve found
- 5. Report to Sir Radzig
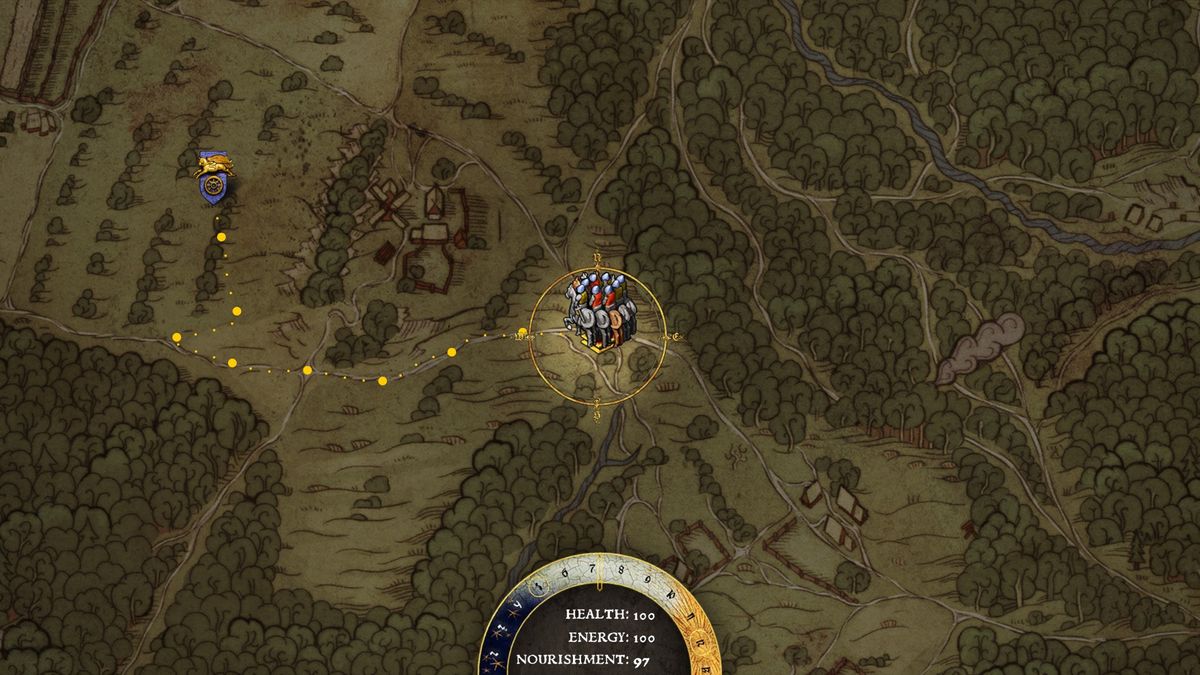
Once you’re done cavorting around camp, go and talk with Sir Kuno again and tell him you’re ready to go on patrol and the quest Bad Blood should start. You’ll automatically ride out with the band and’ll find yourself in the countryside between Samopesh and Merhojed.

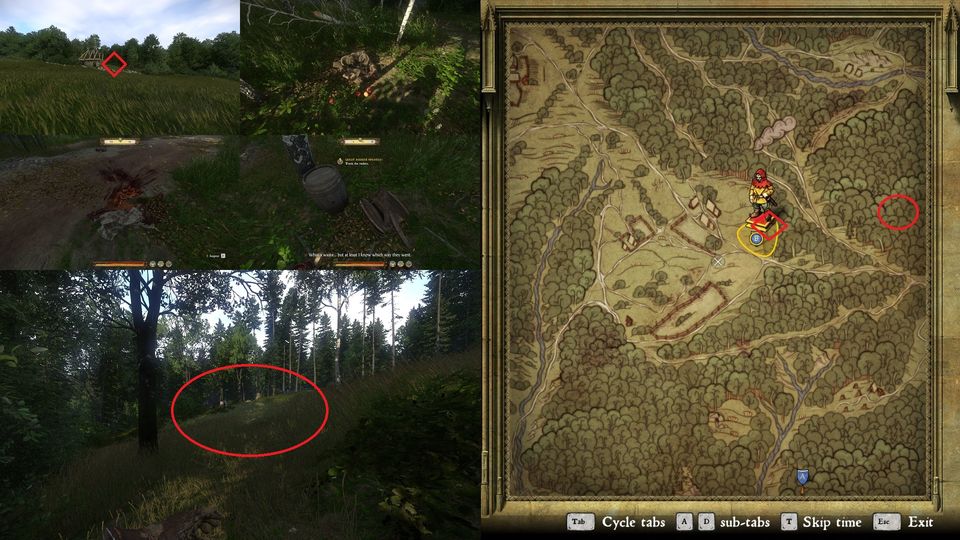
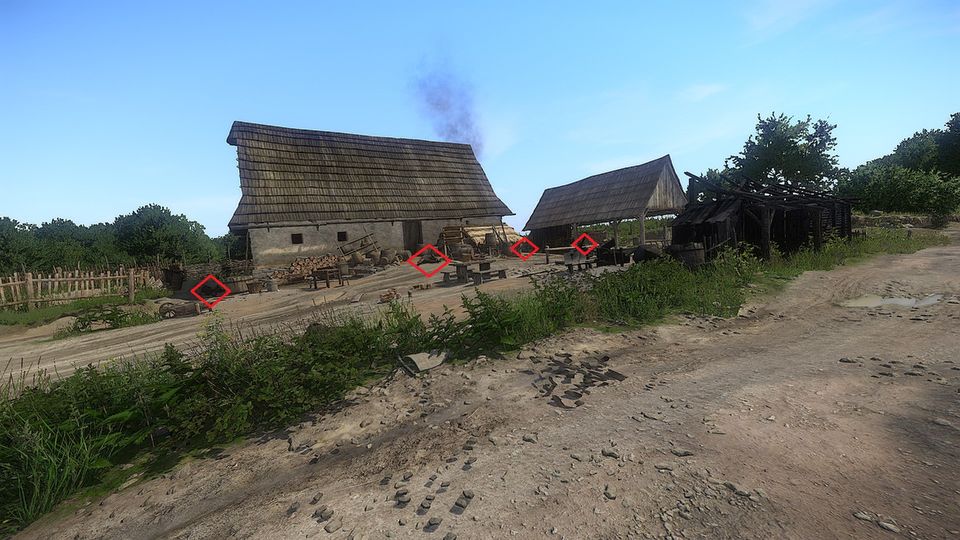
There’s not a whole lot you can do here except roam the countryside with the horse train and listen to the banter of your mercenary friends while enjoying the countryside. Eventually, the band will come across a burned down farm between Merhojed and the Inn in the Glade. The train stops, and you’re prompted to search for clues and traces of the attackers.
You can search around for clues by examining different places, objects and people but not much will come from it. Also watch how some mercenaries seem more interested in the loot people carry than in investigating who’s behind the attack. Once you’ve had enough head into the hovel that’s located towards the forest-side of the farm. Go inside and open the first door to your right. In the pantry you’ll see blood-besmirched oil lamp shining it’s light on a blue shield with a note attached to it.
Grab the shield and note, read them, and report to Sir Kuno. He’ll want to send you off to Sir Radzig immediately, but hold on for now—especially if you want the Tracker achievement. Tell him you still want to investigate who’s done this. Head into the meadow towards the east (heading towards the Inn in the Glade) and you should see Stephan Fletching skulking through the wheats. Approach him and ask if he’s found anything.
Turns out he has. He sees tracks of two riders, a dozen or so foot-folk with heavy burdens, and someone who’s losing a lot of blood. They went towards the sun at dawn (east). Investigate the little bothy at the eastern forest edge, there should be a dead horse right next to it. Go inside the forest there and you should see a faint pathway leading you through the forest. Along it’s course you’ll find various goods the raiders dropped: apples, bloodies clothing, barrels, more blood and offal.
Eventually you’ll end up at a clearing with seven or eight raiders. Approach a little and the Tracker achievement should unlock. Deal with them as you wish and afterwards go and report to Sir Radzig to finish the quest. He doesn’t seem to surprised, and tells you the story of him and House of Zoan. After giving you the order to return to Sir Kuno and take care of Hagen of Zoan for him the quest concludes.
Uninvited Guests Quest Walkthrough
Achievement: Chivalrous Soul (missable)
- 1. Ride out on the second mission
- 2. Mount an attack on the mill with Kuno
- 3. (Optional) Talk to the members of Kuno’s band
- 4. (Optional) Finish of the drunks at the farm
Once you’ve reported to Sir Radzig, return to the camp and talk with Sir Kuno when you’re ready to go on another mission. This’ll start Uninvited Guests and you’ll automatically ride out with the band and find yourself doing a night patrol in the countryside near Uzhitz.
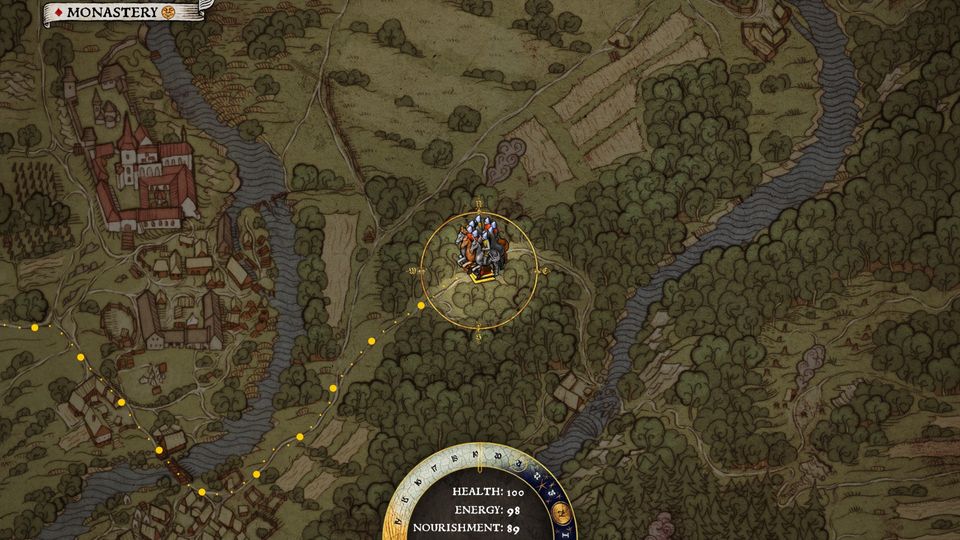
(The Band of Bastards on patrol through Talmberg forest)
All seems good and well until you leave the Talmberg Forest to make lodgings for the night at Uzhitz. The company gets approached by a lantern-wielding damsel-in-distress from a nearby mill. She relates that all the men fled when raiders approached. Now the brigands are having their way with the local stores of liquor and they will undoubtedly do god-knows-what with the women who remained behind at the mill.
(Menage à trois under the starry night)
She begs Sir Kuno to launch an attack immediately, however The Chief (always the master tactician) advises caution and would much rather attack the mill when the marauders have had their fair share (and more) of drink. You can either agree, or you can attempt to persuade (speech check 7) or bluff (charisma check 10) Sir Kuno to mount an immediate counter-attack—doing either of the latter will unlock Chivalrous Soul.
Chivalrous Soul
If you did press Sir Kuno into attacking immediately (and got the Chivalrous Soul achievement), you will rush straight at the mill in the pitch black of night.
(It sure is dark going on a night raid)
Get ready for some tough resistance, because you will encounter a dozen or so enemy soldiers. And while the members of your outfit can’t permanently die, it is possible to fail the quest if all of them get incapacitated. Kill the resistance and after doing so (all your knocked out friends will get up) it’s time for some rest and relaxation.
Unfortunately for Jan and Petr all the women seem to have fled, so that means you’ll have to entertain yourself. You’ll get prompted to Talk to the members of Kuno’s band. You can challenge Jan to a brawl, play dice against Stephan (for three items), or share a story with the other lads at the tables—with a well-deserved pint that is. Don’t go looting bodies now, because there’s only a limited time to cavort with the lads. You can still loot afterwards.
(Play some dice with Stephan at the mill)
When fighting Jan, you can challenge him to an additional wager (200 Groschen). Seeing how he seems to be a degenerate gambler (among others) he really likes the idea. When playing dice against Stephan, you’ll be able to play for three items—which you can only win as long as he’s at the mill—a shield with the Rychwald coat-of-arms, a jupon with charisma 19, and a hat with charisma 20. You’ll have to wager 400 Groschen each time.
Once you put Stephan out of business, head out to the table with Sir Kuno, Jakey and Dangler. Sit and share a story or three and sing shanties afterwards.
(Seven tankards of ale and a bottle of spirits on the wall, yo ho ho)
Come to you senses at morning and collect whatever loot you wish, then return to Sir Kuno’s camp.
Not-so-Chivalrous Soul
Choosing the less sensitive option (for the plight of medieval women) means the company waits until dawn to mount it’s attack. The time should skip ahead automatically for the band to wait until the raiders at the mill got good and wasted.
(The Band of Bastards launches it’s dawn raid)
You’ll launch your raid at dawn and immediately notice how the resistance seems to be lackluster at best—Sir Kuno was sure right about his goulash. After you mopped up whatever petty resistance you’ve encountered the company is ready for some rest and relaxation. However, not before you mopped up whatever drunken filth is remaining around the mill. There’s four of them lying passed out on the floor and shouldn’t prove too difficult to find.
Once again you’ll get prompted to Talk to the members of Kuno’s band. You can challenge Jan to a brawl, play dice against Stephan (for three unique items), or share a story with the other lads at the table. Wait with looting the corpses if you want to spend some quality time with the band because you’re on a timer.
Return to the camp afterwards.
A Tight Spot Quest Walkthrough
Achievements: none
- 1. Ride out on the third mission
- 2. Fight your way out of there with Kuno and the others!
- 3. Talk to Kuno
When you’re back at the camp approach Sir Kuno. He’ll tell you Jakey heard some news in the Ledetchko tavern about a band of unfamiliar horsemen skulking through the Sasau area—could be Hagen Zoul’s or just the guard train of a wealthy merchant—anyway it’s off thataway for your third mission.
Seems like quite the uneventful patrol though. Because it’s Jakey’s mission he’s sent out to scout ahead and look for a suitable site to make camp. Meanwhile the company is enjoying the countryside, singing carols, and generally having a good time. What could possibly go wrong on a day like this, right?
(The company is enjoying the sun on a lush hillside sward)
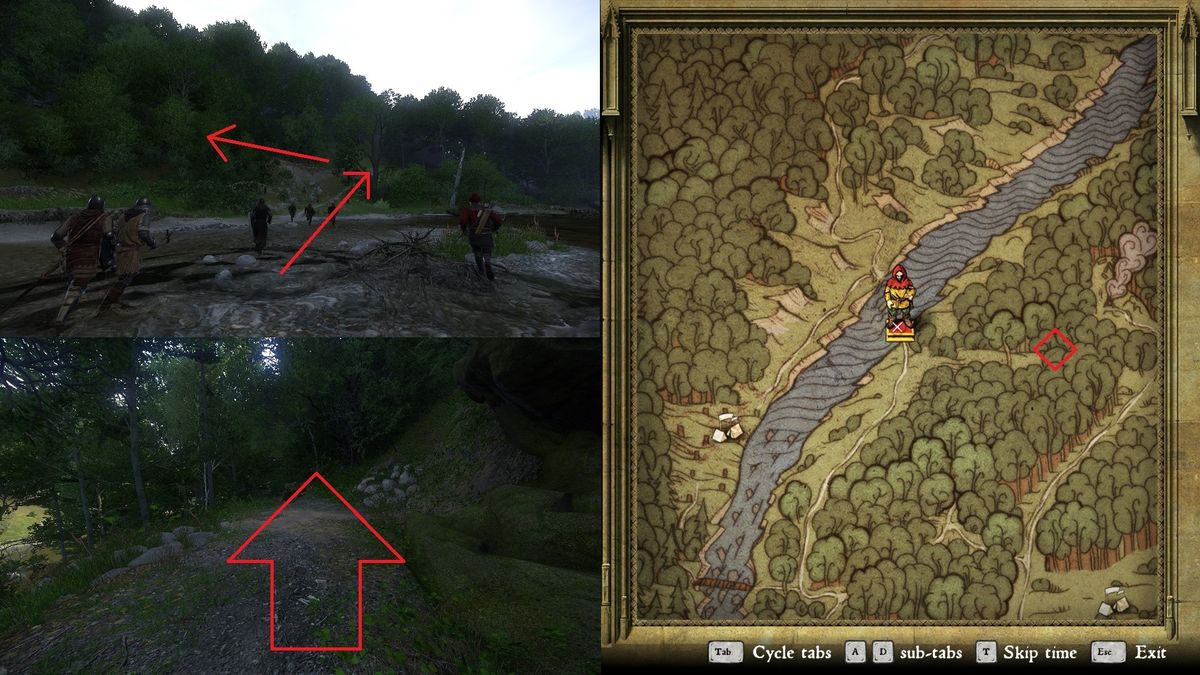
Well, turns out quite a lot. Because when crossing a river ford you get ambushed. Arrows are flying everywhere—good thing those bandit archers are having the aim of an Imperial Stormtrooper—and the horses bolt away. You’re definitely in a tight spot now, so get ready to defend yourself! The battle plan is pretty simple for this one: kill everything that stands in your way. Time to get that war hammer swinging!
(I would call this a tight spot indeed)
Remember that second mission in Skalitz (Run!), this one is kinda like that only now you get to actually kill some raider scum. There is about a score of enemies to take care of so get some buffs up and help your companions out as much as you can. Press onto the ledge and go left following the path deeper into the woods. Take care of any resistance and meet up in a clearing in the woods. Seems Jakey is missing, curious. Anyhow, it’s time for a tactical retreat. That means back to camp.
Thirty Pieces Quest Walkthrough
Achievements: Pinky Promise, Torturer (missable)
- 1. Ask about Jakey at the Inn in the Glade
- 2. Track down Jakey, beginning at the northern edge of the woods
- 3. Find out what happened to Maria, the merchant Ernest’s daughter
- 4. Question Jakey
- 5. Tell Ernest what happened to Maria
When you return to the camp from the ambush, everybody seems to have made it back in one piece. Everbody, except Jakey of course. He’s still in hiding—curiously Jakey’s horse Lucifer is still seen around camp, even though he rode off on her—but Sir Kuno happens to know exactly where he is hiding. Jakey is drinking away his thirty pieces of silver at the Inn on the Meadow or something like that. Sir Kuno asks you to find Jakey and press him for information, while the company goes on patrol, without you (they sure know how to make you feel unwanted).
So of with you to the Inn in the Glade! Seems like Jakey isn’t on the premise anymore, so approach the maid (Andrew, the proprietor, had met an untimely death in my playthrough) and ask her if she’s seen Jakey. Short answer? Yes. Long answer? 150 Groschen or a speech check level 1. Turns out he met quite a lovely lass named Maria—daughter of a travelling merchant—and was last seen going towards the southern forest with her.
Turn south from the Inn and at the forest’s edge you should see the hapless merchant, loaded wagon ready to go, calling for his daughter. Speak to him and he’ll tell you he found her scarf hanging just inside the forest. When you press him on why he’s not off searching for his daughter in the forest, he’ll tell you this is not the first time she wanders of with a stranger and she always came back! Oh, and he’s really in a hurry to go on to Sternberg and afraid he’ll gets robbed if he leaves his carriage (I suppose that explains why he didn’t leave his wain at the Inn).
Be a good Christian (or ask for money) and tell him you’ll search for his lovely Maria—it isn’t as if you weren’t going to do so anyhow. Head into the forest behind the cart and you’ll notice her scarf. Press on for about 20 yards and you’ll see the lovebirds had a nice rock-side dinner with two tankards of ale. Head to south-east and you’d see more evidence of the romantic meeting: a blue bruoch on the ground, a flask of wine hanging from a tree, a garland against a tree, and eventually an orange undergarment against a sandy bluff. Look along the bluff from here and you should see the lovers’ camp.
Make sure to drink a Saviour Schnapps before speaking to Jakey if you want both the Torturer and the Pinky Promise achievements. Now for either achievement none of your choices matter until you see a speech check option. So go on and interrogate the rat. First though, he’ll mention how he ended up where he did.
(Heinrich interrogating Jakey)
Seems like Jakey got himself a bit in a pickle as he’s bound to a tree and Maria is nowhere to be seen. She hit him with a rock and ran with his money (if you pickpocket him, he still has a couple of Groschen on him—worst thief ever). Good riddance for him. Now to the matter at hand. Jakey will tell you that he got threatened by Hagen and his men and that they later offered a significant amount of coin to snitch on his companions. Seeing hows he was treated really bad in camp and never even got half a Groschen from Kuno he decided to sell out.
Ask Jakey about Hagen and it seems like Jakey is ready to speak, however, he firsts wants you to untie him and promise to let him go if he tells you all about Hagen Zoul. As soon as you see the speech check, you got four options. Ask him “Why did you snitch?” for another rant on Sir Kuno. For the Torturer achievement choose “You don’t want to talk? Alright.” and leave him be for a day. Return and he’s ready to spill the beans without further ado, unlocking Torturer.
(I know that some guides on the internet will tell you that you can also get Pinky Promise with the Torturer achievement but… you can’t (anymore at least). I tried all options and it won’t unlock along Torturer. Your only sensible option after letting him rot for a day is “You can go” and it does not lead to the Pinky Promise achievement. The other options are “Not a chance” and “I’ll untie you and take you to jail” that’ll both end dialogue immediatly.)
(Jakey asks Heinrich to pinky promise to let him go)
For the Pinky Promise achievement instead, don’t go for the speech check (“I understand. Kuno’s a swine”) but choose “I’ll untie you”. He tells you the same story as with the other options: Hagen plans on raiding Samopesh—in person nonetheless—and torch the whole village. Since you kept your word, however, he’ll give you a bit of extra information. Jakey told Hagen how Sir Kuno was fed up with being Sir Radzig’s errand boy and Hagen is planning on bribing Sir Kuno to switch sides against Sir Radzig. Now that’s quite some intel! And you got the Pinky Promise achievement to show for it.
Now head out of the forest again and tell Merchant Ernest what his precious Maria did. He doesn’t seem to surprised to hear she stole some poor lad’s money, he just really wants to know what happened to Maria. Tell him once again you don’t know, and he doesn’t seem so worried and anxious anymore—he seems rather… p-ssed. Guess there’s another fellow feeling robbed.
(Merchant Ernest really wants to know where the money… eh where his little princess is)
What Price Honour Quest Walkthrough
Achievement: Mercenary’s Honour (missable)
- 1. Ride against Hagen Zoul!
- 2. Defeat Hagen’s men
- 3. Beat Hagen Zoul
- 4. Report to Sir Radzig
Return to camp and report to Sir Kuno that you found Jakey. You will proceed to tell him that an attack on Samopesh, lead by Sir Hagen himself, is imminent. Tell him what you want about how you handled Jakey. If you left him alive, Sir Kuno will give you a scolding no matter what.
If you promised Jakey to let him go if he told you everything, Heinrich will press Sir Kuno about his backtalking against Sir Radzig. The Chief will assure Heinrich that he won’t turn his back on his lord. This will also lead to an extra option during the battle ahead, in which Heinrich can remind Sir Kuno of what he promised.
And so the company departs for Samopesh. On the hills near Merhojed, however, they’re greeted by Sir Hagen’s war band and they’re here to parley. Watch the scene unfold an eventually you’ll be left to deal with the situation. You can either persuade (speech check 7), bribe (15.000 Groschen), or—if you spared Jakey—remind Sir Kuno of his earlier promise. Alternatively, you can tell Sir Kuno to go as a traitor, in which case he’ll accept the Sir Hagen’s offer and rides off.
Sir Kuno of Rychwald
If you (successfully) persuaded Sir Kuno you’ll get the Mercenary’s Honour achievement. However, whether you persuaded, bribed or reminded Sir Kuno, the rest plays out the same and your party will attack Sir Hagen’s outfit. It’s a pretty even battle, so just get your buffs up and rush into the fray. The endings for the DLC differ slightly on the outcome of the battle but not much. Be sure to loot Sir Hagen for some nice custom armour and pick up his sword and shield from the battlefield.
(The company is ready to do some buttkicking for goodness and to chew bubblegum—if only there was bubblegum in mediaeval Bohemia)
Sir Kuno the Traitor
If you somehow failed to convince Sir Kuno, however, not all is lost. Heinrich will challenge Sir Hagen to single combat, which our robber baron is bound to accept. Sir Hagen can be a tough opponent, riposting your attack and landing master strike after master strike so press him hard and counter him good and the battle should be yours. You can either spare his life or kill him, but if you do the latter his cronies will attack you.
(Sir Kuno wishes Heinrich good luck… he’ll sure need it)
No matter the path you choose and no matter the outcome, after all is done return to Sir Radzig for your report and get your well-earned reward.
Lost Trinket Achievement Guide
Getting the Lost Trinket achievement is quite easy, however, it’s also very easy to miss. Once you got the Ring of Bacchus in your possession make sure to keep it. Don’t return it to whoever asked you to get it. Wait till it’s evening and go to sleep in the camp (all beds are owned so make sure the rest is already sleeping or they’ll kick you out). Sleep till 6 or 7 am and once you wake up you’ll notice the ring is gone and the achievement is yours.

Don’t reload, because there is a small quest associated with the missing ring, which will get the ring back in your possession. After doing so you can still complete the Game Over achievement. The would-be thief did not only take the ring, but he also slipped a note containing a Mysterious poem in your inventory. Go on and read the note, and the hideous poem in it:
Truly no one is outstanding without me, nor fortunate; I embrace all those whose hearts ask for me. He who goes without me goes about in the company of death; and he who bears me will remain lucky for ever. But I stand lower than earth and higher than heaven.
Obviously, our culprit is a man of letters. If only Sir Kuno had such a man in his outfit. Go and ask the others and they’ll either tell you they all run away from a monastery or that the culprit must be you. Now go ask the strong silent type. If you’ve completed the first mission, you probably noticed The Stone standing over the victims in prayer.
Turns out he is our runaway missionary. He won’t give you the ring unless you solve the riddle though, and failing to do so means no ring.
The answer to the riddle is Humility.
Game Over Achievement Guide
1. Ask The Stone about the Ring of Bacchus
Go to The Stone and tell him you’ve heard about the game and want to help him out. He’ll point you to the Dangler as the current owner of the ring. You can pickpocket the ring from him, but it’s much more honourable to challenge him to a duel. Beat him and deliver the ring to The Stone and watch the quality conversation between the two of you progress. For a reward he’ll hand you the book Silence is Golden and Other Myths IV.
2. Take the Ring of Bacchus to Stephan
Seems like you are a very popular fellow in the Game of Bacchus, if only Heinrich would think of keeping the ring for himself. Oh well, wait a couple or three hours after handing The Stone the ring and Stephan Fletching will call you. Approach and he’ll tell you he knows you got the ring from Dangler to The Stone and he wants your help in getting the ring.
You can tell him you don’t want to steal, or tell him you’re okay to help. Both options lead to the Fletch telling you he wants to get the ring when The Stone is sleeping only… The Stone doesn’t sleep like his namesake. If only you could get Stephan a Lullaby Potion.
(For a Lullaby Potion you’ll need oil, poppy, herb paris and thistle)
Get Stephan the potion and get 100 Groschen for a reward. Once again wait a couple of hours (Stephan wants to steal the ring during the night, but the activity progresses as though he immediately got it in his possession) and the next participant will call you.
3. Take the Ring of Bacchus to Jan Bearman
After giving the ring to Stephan Jan Bearman will approach you and ask you to get the ring for him—he warns you though that Fletch doesn’t have it on him. Go to Stephan and ask him to give you the ring back. Yeah, not a chance in hell, but he’ll give you a riddle:
- Find the dead standing among the living, and turn your eyes heavenwards!
Great, thanks for nothing! If Jakey is in camp you can ask him for more information. The information comes at a price (20 Groschen), or you need to pass a charisma check (level 7). He’ll tell you the ring is in a kestrel’s nest. You can see the (partly dead) tree when standing on the mount near the camp and looking north (towards Ledetchko).

Go to the tree and shoot the nest out (it’ll fall in tall grass and can clip through the ground so pay attention to where it falls). Get the ring to Jan to claim your 120 Groschen reward.
4. Take the Ring of Bacchus to Petr Bearman
The next contender in the game is Petr Bearman, he wants you to get the ring from his brother Jan, saying it’s best to just “pinch” it from him. Either pickpocket the ring directly from Jan, or fail an intimidation check (level 20), which will get Jan to brawl you (and earn you a reputation loss to boot).
(Winning a brawl from Jan will get you the ring)
After you’re done return to Petr and get 150 Groschen for the trouble.
5. Take the Ring of Bacchus to Sir Kuno
This time it’s The Chief who approaches you. Instead of raising moral the Ring of Bacchus now has the mercenaries going at each others throats so Sir Kuno wants to end the game once and for all. However, he can’t get the ring back himself, so do him a favour and get it for him, okay?
(Sir Kuno wants a word with the player)
Go to Petr and he’ll throw in a riddle for free (seriously is this a roving band of minstrels or why’s every single member a frickin’ poet sh-tting in verse):
Steeples guard the fields in a line, on one of them a cross you’ll find. Off you go from east to west. Find the steeple, that’s your test.
Not to hard isn’t it? Just gotta find steeples going from east the west and one with a cross on top. Look around the camp and you should find rows of hay drying poles. Find the one going east to west and the last one should have the cross-shaped wooden frame sticking out.
(Hay drying racks going from east to west)
If you don’t feel like searching you can also wager him over a game of dice. Once you got the ring in your possession head over to Sir Kuno, he won’t give you a well-deserved ice-cold ale, but he’ll hand you the book Hercules and His Diet IV. You also just unlocked Game Over.