Table of Contents Show
Bosses in Remnant: From the Ashes covers a compendium of these various special type of Enemies that a player will encounter in the game. Unlike normal Enemies, bosses have a higher amount of health and are distinctively unique with their own set of moves. Defeating a dungeon boss will surely reward players with various items that can be useful when it comes to character progression. Not only do they provide special loot upon defeat, but they also serve as a key to unlocking more areas and quests for story progression.
Other Remnant From the Ashes Guides:
- Remnant From the Ashes Ring List
- Remnant From the Ashes Amulet List
- Remnant From the Ashes Weapon List
- Remnant From the Ashes Armor List
- Remnant From the Ashes Key Items
- Remnant From the Ashes Traits Guide
- Remnant From the Ashes Character Stats
Remnant From the Ashes Boss Guide
There are two types of bosses that you can encounter as you travel to different realms, the following are:
Dungeon Boss – this type of boss is considered as a mini-boss which are superior, stronger versions of an elite enemy. Dungeon bosses have a high amount of health, a set of attacks, and have special passive or active abilities. To identify if you are about to enter an arena for a dungeon boss, you’ll find the entrance of the arena will be engulfed in fog and a checkpoint. Upon entering the arena, the battle will begin.
World Boss – World bosses are considered as the main bosses of the game, currently, there is no confirmation on how these bosses are encountered but it is safe to assume that these bosses may appear during an event or at the end of it, upon nearing the completion of a realm.
Dynamic Generation
Dynamic Generation will be applied to bosses. Whenever a player enters a realm, the game dynamically generates a unique layout for pretty much everything, from area layouts, loots will be randomly scattered, NPC locations, enemies, and of course the bosses. As mentioned, each boss has its own unique passive or active ability, and in conjunction with the dynamic generation mechanic, every time a player enters a realm and by chance encounters a boss they’ve already encountered, its abilities and stats also change, making each encounter a challenge.
How to Kill The Ent

Alternative Kill Method
Destroy Ent’s legs before it dies. Any damage works. Focus legs, not feet.
Reward
Spore Gland
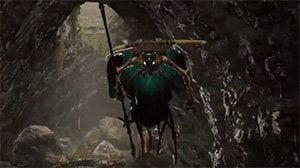
This boss enemy will be encountered in one of the more open areas in the game in The Choking Hollow. The boss fight has multiple phases whereby The Ent will change its moves and attack patterns. The Ent has a huge health pool so it’ll take quite a lot of hits to whittle his health down to zero. This enemy will inflict the Infected status effect, so stock up on those Oilskin Tonics.
The fight starts with a stomp attack from The Ent which sends out shockwaves. You can deal with them by rolling through the first wave of this attack. You get a brief window where you can shoot down at The Ent. Deal with the smaller enemies by shooting the pink guys so they don’t explode near you. Make sure to collect ammunition from them as this will be a long fight.
The next phases see The Ent send out an explosive foe who comes charging at you. Dodge out of the way at the earliest to avoid getting hit by the explosion. Now, wait for his ground slam attack where he uses both his hands. Time your dodge and then immediately focus fire on the red cluster on its back for bonus damage.
You now enter the final phase, where The Ent wreaks havoc via mortars and explosive enemies. Thankfully, you can circle around The Ent and use the impact of the mortars to get rid of the smaller foes. After dodging his mortar attacks, concentrate fire again on the boss enemy to bring it down.
How to Kill The Undying King

Alternative Kill Method
Refuse to give the king the heart or give it to the queen.
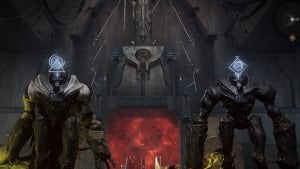
One of the more tougher bosses, The Undying King is encountered in The Undying Court on Rhom. Unlike the other bosses, you have a choice either to serve his needs or fight him. Before you can focus your fire on The Undying King, take care of his summoned minions and turrets. The latter will especially deal chunks of damage from far away as they continue to fire at you.
As for the King himself, he summons the might of the lethal scythes. Once he wields the weapon, he will charge at you or jump to close the distance for a powerful melee attack. In such a case, it’s best to roll over towards The Undying King and move behind his back to unleash your attacks and deal damage.
He’ll regenerate health a couple of times when he sits on his throne and resorts to summoning the minions again. Keep focusing fire on it to eliminate The Undying King.
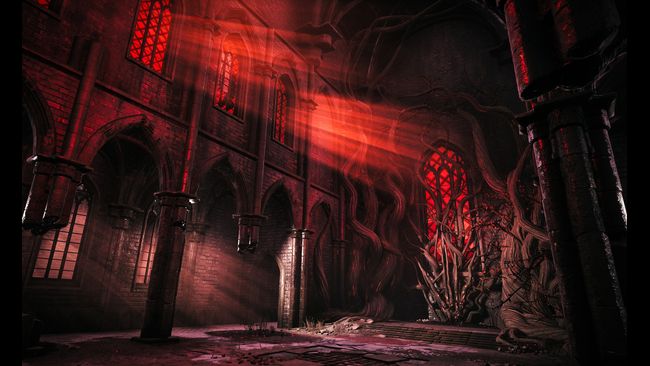
How to Kill Shroud
This is the first boss you’ll encounter in Remnant From the Ashes. The level is within the sewers region after you cross the subway. Shroud is a double-threat because not only will be you tackling it but also its spawned Roots. Thankfully these are your standard foes with regular melee and ranged attacks, so you can dispose off them easily.
Before taking on the battle with the Shroud, gather healing tonics and bandages, which will help you regenerate health quicker throughout the fight. These items can be acquired from the vendor, Reggie in Ward 13. When facing Shroud, you need to be wary of his bow and arrow attacks. These come from a long-range or from above, with arrows inflicting a Bleed status that continues to drain your health.
We advise you to dodge these attacks and be constantly in motion, as the boss teleports around and covers itself with clouds of smoke. Rolling over is key here as you don’t wanna get cornered or overwhelmed by enemies.
In terms of dealing damage, focus fire on the head region of the Shroud especially when it’s stationary. Before initiating an attack, there will a window of opportunity when you can shoot at Shroud, so deal damage this way.
Normal Drop Material:
Shadewood
Shroud Rewards
472 Scrap
Normal Crafted Item:
Rattle Weed
How to Kill Gorefist
This is a heavy-hitting boss who deals an insane amount of melee damage. Thus, the name of the game is to keep your distance and dodge Gorefist’s attacks at all costs. You can predict them when you see him readying his blade for an attack or charging at you. Moreover, you’ll need to deal with Gorefist’s minions throughout the fight, which are easy to deal with.
These small glowing guys explode when near you. So either you can dodge these explosions, or if you’re really clever, use them against Gorefist to stagger it. This gives you a window to inflict some good damage. Use ranged weapons and make use of the obstacles in the large room to the right, in order to keep Gorefist at bay.
Normal Drop Material:
Flesh Barb
Lumenite Crystal
Scrap
Normal Crafted Item:
Mantle of Thorns
How to Kill Ixillis
Alternative Kill Method
Defeat both bosses at the same time, before one enrages solo.
The encounter takes place in a swampy region, on a bridge in Crosus. Ixillis XV can fly a bit and perform attacks with his spear. The perfect time to dodge is when you see this spear light up green. There’s also another move where Ixillis XV mediates and summons white orbs which will home in on you. Shoot them before they reach you.
Now deal with the minions as you would by quickly firing at them before they’re up close and may explode. Once you’re midway through the battle with the boss, a second phase arrives and with it a second identical boss. So at the same time, you’ll be facing two boss enemies near the swampy bridge. At this point, prepare for a lethal screaming attack unleashed by the two bosses in conjunction. This whittles a lot of your health, so shoot multiple times at the heads of the two bosses to interrupt the attack.
Though the most reliable method is to shoot at the head region and the locks on the boss enemies, you can cleverly lure them off the bridge for an easier time. If you have high-impact weapons like a shotgun, you can use it at close range to push back Ixillis XV and his pal off the bridge.
Normal Crafted Item:
Hivestone
Alternative Drop Material:
Guardian Tentacle
Alternative Crafted Item:
Guardian Ax
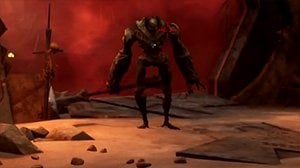
How to Kill Scourge
You’ll encounter Scourge once you reach The Hive, in the dungeons of The Scouring Waste. Before the fight, we highly encourage you to stock up on the Heavy Water Elixir from the vendor in Ward 13 to combat the Radiation status effect of the Scourge attacks. Moreover, keep your distance from the Scourge unless you want the Radiation meter to go up like crazy. You should focus fire on the torso of the Scourge, since shooting his mask will send out homing projectiles.
You’ll also need to deal with the minions, like any other boss. Make sure to dodge Scourge’s attacks, which are easily predicted thanks to how slow their start-up is. In addition to the projectiles, he’ll move closer for a winding punch attack which is also easily evaded.
How to Kill The Harrow
Alternative Kill Method
Shoot his legs to stagger him. Do this 3-4 times and he will crouch on the ground. When its crouched, run to its back and interact to get the spear.
The Harrow is a bit different from the other bosses since the focus this time around is on eliminating the minions to get to the main boss. The Harrow is a nimble foe that will deal decent damage with his clawy melee attacks up close. Once you eliminate the first wave of the minions, the skeleton-like boss, will emerge and rush at you.
Dodge his attacks and keep your distance while focusing fire on him. Now rinse and repeat with the second wave of the minions until you’re able to put down The Harrow for good.
How to Kill The Unclean One

After making your way to a swampy region in Corsus, you’ll come across a deserted shack with The Unclean One boss inside. The Unclean One uses his huge hammer to deal immense melee damage up close so keep your distance at all costs. Be ready to roll away when you see the boss climb the walls of the area or leap high into the air for a slam attack. Also, if you’re far away, the boss will charge at you and can attack you through walls. Beware of this attack.
When the minions spawn, The Unclean will perform a 360-degree spin attack with his hammer that covers a wide radius. Be sure to back up by rolling away from The Unclean One. This will cause The Unclean One to cause damage to the minions, while you can shoot at the boss enemy from a range. Focus fire on the head and the posterior region of the boss as they’re the most vulnerable parts of it.
How to Kill Thrall

In the Musk Forge region of Corsus, The Thrall is encountered. The main threat of the boss is the Corrosion status effect. This comes in the form of toxic green clouds which he inflicts causing the player’s armor to lose effectiveness. Thankfully, this debuff can be removed by applying the Greenleaf cure which you can obtain from Reggie in Ward 13.
There’s also the matter of his teleportation when he performs a projectile attack that can be easily dodged but will mark the emergence of the minions. Quickly deal with the minions while ensuring you don’t step in the Corrosion-ridden territory. Then focus fire on the Thrall to get rid of the boss enemy.
How to Kill Brabus

Alternative Kill Method
Kill your friend when prompted to get a trait.
Alternative Kill Method
Trade a Pocket Watch before the fight.
This is one of the human bosses in the game who employs the help of his goons. You encounter him in the Depot area. His pals can shoot from long-ranges and though they can be put down by a few shotgun shells, dealing with Brabus isn’t easy. He likes to move in and out to deal massive damage with his burst shotgun. He takes cover momentarily as well.
It’s up to you to get rid of the goons quickly and find windows of opportunity between Brabus attacking and hiding in cover. You can move past the doors to keep both the boss enemy and his comrades at bay, so they won’t rush you.
Carry a lot of healing and ammunition consumables since you might need to empty your SMG on these enemies. For Brabus himself, a shotgun to his face will be the most effective choice in dealing with him quickly.
How to Kill Singe

Alternative Kill Method
Destroy Singe’s tail before it dies. Any damage works.
This is the last boss you’ll face on Earth before you depart for a different planet. It’s a large fire-breathing dragon situated in The Ashe Yard right after crossing the subway near The Root Church. You’ll want to boost your Fire resistance by applying the corresponding consumable.
The name of the game is to move around quite a beat as you don’t want to get engulfed by the flames. There are two attacks to be vary of at first, a fire blast and a fireball attack from Singe. If you get too close, it will try to swing its giant head towards you to deal decent damage. Thankfully, you can shoot down at the head of Singe between all these attacks.
Singe’s legs and tails are vulnerable parts as well, so rolling behind it and focusing fire on these spots deal additional damage. There’s another attack you need to be careful about. Once you see Singe hover in the air for a bit, immediately roll sideways unless you want to get hit by a long-ranged fire wave attack in a straight line.
When its health is roughly half of the max HP, it will become more aggressive as it swipes with its long claws and tries to close the distance quickly. This includes a quick jump attack where Singe charges forward very quickly. Always roll side-ways and most of its attacks are in straight lines.
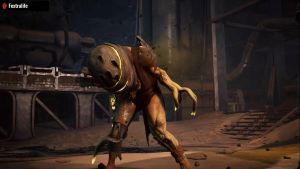
How to Beat The Mangler
The Mangler is encountered in The Artery region on planet Earth. Covered in strong roots, the tips glow red as well as three ominous glowing red dots at the black abyss where its face is supposed to be. It will be accompanied by the minions who’ll continue to charge at you.
The Mangler is an annoying boss as it continues to roll over in a Sonic the Hedgehog manner, and close distance quickly. It’s also difficult to hit Mangler during this roll move. We recommend using incendiary/fire ammunition to deal more damage when you’ve got the chance, which are rather few.
When you’ve entered the second phase of the fight, you need to be extra careful as The Mangler gets more aggressive and increases in size. This allows the boss to cover more range with its attacks so roll sideways at the earliest. It will also grant The Mangler new abilities, like a jumping slam attack and being able to move into the ground and then emerge with a surprise attack. Then there’s the matter of a swipe attack when The Mangler is too close to you.
Use a precise and accurate weapon to get some shots while The Mangler rolls towards or away from you. You’ll eventually whittle its health down to none.
How to Kill Shatter and Shade
These is a duo you face in the Hall of Faithful on planet Rhom. This is an interesting fight because both wield a weapon but Shade will shoot projectiles out of it while Shatter will use it to perform melee strikes. If this wasn’t enough, there will be the minions who’ll spawn and make this fight tougher.
Shade will then slam his weapon down to create a green forcefield protecting him while also emitting projectiles that will follow a downward arch from where they’re released. It’s best to find cover in this situation and continue to damage the shield so the move is halted.
There’s an additional attack by Shade, where he once again sticks his weapon into the ground to send out a highly damaging green blowing orb at your direction. Roll sideways quickly when the orb is released. All the while, keep aware of Shatter who will rush at you with his melee weapon.
It’s best to focus damage at the head regions of the two bosses to deal the most damage. If you’re carrying explosives or grenade launchers, you can whittle down the health of the duo very quickly.
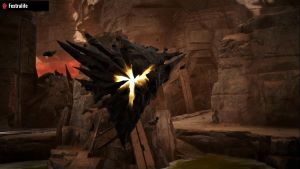
How to Kill Ancient Construct
To trigger the boss fight with the Ancient Construct, you’ll need to interact with the figure shown in the image below. You can do this outside the Wasteland Merchant’s shop by inserting Control Rod into the inanimate creature.
The boss itself is slow and weak, but the turrets helping him are numerous. These continue to fire at you chipping away at your health. Thus, our advice is to shoot down these turrets first. Since there are many turrets, you can deal with them methodologically by taking cover behind the metal sheets and taking them off one by one.
The Ancient Construct yields a long cleaver like weapon which it can use to hurl projectiles at you. It can also charge at you with a running melee attack so dodge accordingly. A slightly ranged attack is when it swings the blade while leaving hold of it. Roll backwards when this attack is initiated. Deal damage when he completes performing an attack, as you have an opportune moment at these points.
How to Kill Maul
Alternative Kill Method:
Shoot the NPC caster in the head, grab the module.
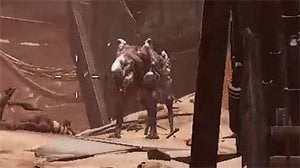
Upon entering the Stalker’s Den region, you encounter Maul and his abominable dog-like beasts who rush at you. This is not such a tricky fight but rather simple. Maul is a nimble foe which charges forwards and tries to ram you with its head. Occasionally it will use the claw attacks.
Dodge appropriately and inflict damage whenever you can. The only problem you might have is that if you get cornered, you’ll be overwhelmed by the four-legged creatures. Otherwise, you’re fine as long as you have a fast-firing assault rifle or SMG to finish these off along with Maul.
Normal Drop Material:
Hound Choker
Normal Crafted Item:
Howler’s Immunity
Alternative Drop Material:
Control Rod: Break the Houndmaster’s “horn”, a couple of shots or a shotgun blast will do the trick and when it starts to glow, the control rod should be visible. Maul will then attack it’s master. If you die the Houndmaster will not respawn and you will receive the Control Rod when Maul is defeated provided that the device has been broken before.
How to Kill Claviger
Alternative Kill Method
Defeat the boss before it absorbs any of the other enemies.
Situated in The Spindle past The Scouring Waste, Claviger is a root boss which can inflict Radiation status effect. This calls for carrying Heavy Water Elixir consumable in your inventory to remove the Irradiated status effect and boost resistance to Radiation.
At the start of the fight, Claviger will be shielded thanks to the two pillars at each of its side. Shoot down the orbs at the centre of these two pillars to bring down the protective shield. Now empty as many bullets as you can to take out a chunk of Claviger’s HP.
Immediately retreat when you see Claviger hold its hand over the heart region as it charges a laser beam. Roll to your side when the beam is unleashed. This is followed by a slam attack that can be dodged by rolling backwards. The shield is restored and you’ll have to repeat the process of destroying the pillars again.
In the process of fighting Claviger, the boss will rotate the circular platform you’re fighting on to make you lose balance. Stand on your feet at the earliest to continue shooting at the boss enemy. Take cover behind the obstacles on the platform when projectiles are released by Claviger.
Now take care of the guardians of Claviger as they shoot at you. Continue disabling the shield that protects Claviger and dish damage until you’ve brought down the boss for good.
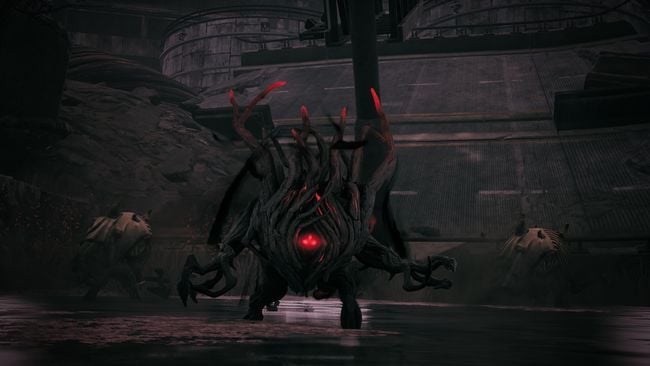
How to Kill Canker

Canker is encountered in Mire Hollow on the optional planet of Corsus. The enemy inflicts Corrosion status effect, so best stock up on Greenleaf which can be acquired from the vendor at Ward 13. It will help you get rid of the effects of debuffs on armour effectiveness, as well as resist Corrosion attacks better.
This is kind of a rush-down boss who will charge at you while releasing mini-balls of poison. The most difficult move to counter is the wave attack which can only be avoided if you’re to the side of the arena. So make sure to leave the red water body as soon as the wave attack is initiated.
Helping Canker are the mini-versions of itself which are just a nuisance, more than anything else. Use a few bullets to get rid of them. At half it’s life, Canker will become more aggressive as it closes distance quickly and performs a variety of close-ranged slam attacks. It’s best to use shotguns at this stage while keeping the optimum distance from Canker to eliminate it.
How to Kill Raze
Find Raze at the Lair of Eyless on Rhom. While fighting this flying projectile-shooting root boss, you will have to deal with skeleton adds. Make sure to maintain your distance as you keep away from its fire attacks and avoid the Burning status effect. You can utilise the pillars in the arena to take cover from the fire breath.
Dealing damage is most effective at the glowing-yellow spots on Raze. By being at a decent range, you can also avoid Raze’s screaming attack that can stagger you leaving you vulnerable to follow up attacks by the boss or his accomplices.
It’s useful to go with ranged firearms instead of shotguns since you’ll never be up-close with Raze. Moreover, equip a fire-resistant armour and bring lots of healing consumables just in case you’re caught in flames.
How to Kill Onslaught
This is more of a mini-boss than an actual one and is encountered in Noble’s Rest on Yaesha. He’s not alone as his flying companions swarm in on you from all directions. Onslaught himself can use his teleportation ability to move in close.
He can then shoot projectiles or perform melee attacks, depending on the distance he is from you. The melee attack is a swing of the weapon which deals decent damage. One of the attacks is a powerful blast which has a good knockback effect on hit. Thankfully, the arena you fight him in is huge so you can continue to move around rendering his teleportation ability less-effective. Continue to dish damage as he walks towards you without teleporting, this is your best moment to take chunks of its health out.
How to Kill The Warden
In the Ring of Trials arena on Yaesha, is a rather aggressive foe named The Warden. If we would like to compare it to a Soulsborne boss, it would be Father Gascoigne from Bloodborne or Capra Demon from Dark Souls, who constantly stick up in your face and deal damaging strikes.
The Warden also has a weird projectile he can unleash. It travels downwards like a volley and has bells attached on the tip of the spear. Of course this doesn’t mean he can’t hurl his ordinary spears with great ferocity at you. These can be difficult to predict so be on the lookout for the moment The Warden draws his hand back to throw the spear outwards.
When you’ve brought to half its life, a bunch of his minions will spawn and charge at you for melee attacks. A few bullets of your firearm would do fine in eliminating them. Lastly, be vary of The Warden’s lethal shockwave attack when he remains stationary for a second or two and sends out a deadly blast. Move away to a safe distance when this happens. Focus fire and inflict him with status effects if you can, to drain its life overtime since it’s not easy to hit a moving target. Especially not one that moves like The Warden.
How to Beat Scald and Sear
In Warden’s Pit on Yaesha, you will be facing two lethal enemies, one a flaming dragon that shoots horizontal projectiles (Sear) and the other a crossbow wielder (Scald). Attacks from both of these inflict Burn damage so it’s good to come prepared with fire-resistant armour.
Even though this is a duo, you don’t have to face both Scald and Sear at the same time. Once you traverse the fog, you can take on Sear and bring down it’s full health while dodging the projectiles and focusing fire on it. Then you can go onto fight Scald. This is when you’re greeted by hostile reptile-like creatures. These can be brought down by some few rounds of your firearm.
Since it’s a large arena with lots of narrow areas, you risk of coming directly in contact with Scald so stick to the high ground and let him approach you. You won’t see the sight of Scald much so whenever you do, inflict a status effect on him like Poison. Otherwise, you’ll need to prepare for rather a long fight.
How to Kill Stormcaller
The boss is encountered in Martyr’s Garden on Yaesha. It will send out electric projectiles at you while remaining in one spot. Meanwhile, smaller enemies will continue to throw fire projectiles and molotovs to inflict burn damage.
Stormcaller will then leave its throne and teleport to move closer to your location. There’s an aerial projectile and one that travels on the ground. Both will take a chunk of your life so be careful to dodge sideways at the correct time. These are telegraphic, especially the ground one, so it won’t be difficult to react to it.
This is a rather easy boss fight. If you can roll away from the projectiles, you’ll be successful. Use ranged firearms like SMGs or assault rifles to deal damage and whittle Stormcaller’s health down. Take care of the smaller enemies first though.
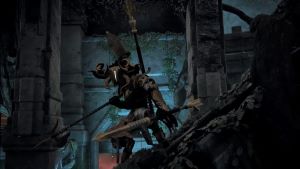
How to Kill The Ravager

Alternative Kill Method
Play the lullaby to cause the boss to fall asleep.
The wolf-like boss isn’t encountered straightaway. Once you enter The Ravager’s Haunt, move to the west region of the arena and look for a dark cave. Guarding the entrance would be The Ravager itself. Shoot it to trigger the start of the boss fight.
The Ravager will charge at you with its claw attacks and ram you with its head. While it rushes, The Ravager will crash down pillars and walls in its wake. Wait for it to pace patiently while you shoot at it, then when you see a start-up of an attack, dodge to the side to avoid getting hit.
Smaller enemies from high above will shoot arrows at you so use a ranged firearm to take them out quickly. Some will occasionally mount The Ravager and shoot from there, so eliminate such foes at the earliest.
At roughly half its health, The Ravager will be electrically powered so it can produce shockwaves with its ground pound attack. Keep moving and avoid hiding in cover, since everything around you will be destructible and it’ll be useless against The Ravager. Keep firing at the head of The Ravager to eliminate it.
How to Kill Totem Father

Alternative Kill Method
Totem before the boss area. Blue rewards with gun, red with spear.
The final boss that you’ll be facing on Yaesha, you can encounter The Totem Father in The Tempest Court. Playing similarly to Stormcaller above, he will utilise the power of electric-powered projectiles which are slow and telegraphic, so can be predicted and reacted to.
However, things don’t stop here because Totem Father can jump from pillar to pillar while occasionally crashing from above to perform a deadly slam attack. When you bring a chunk of his health down, smaller enemies will rush at you with mild melee strikes. Take care of them quickly before focusing your attention back to Totem Father.
At a later stage of the fight, Totem Father gets access to an even more lethal projectile. The rock he hurls at you from the pillars, has a large hitbox so sometimes if you don’t roll preemptively, you might get caught. He carries a large health pool, so focus fire on its head region to keep the battle efficient.
He’s much more dangerous on the ground so when you see him plant his electric spear, he’s willing to charge at you. Quickly destroy the spear so that you send Totem Father back to jumping from platform to platform, where it’s much easier to anticipate and react to his projectile attacks. Get rid of the minions twice or thrice in the fight and keep firing at Totem Father to bring him down.
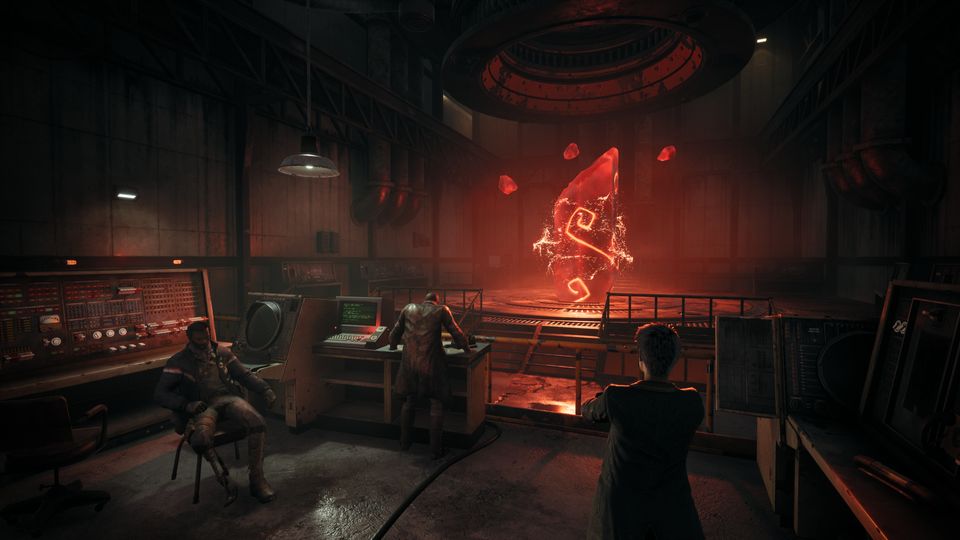
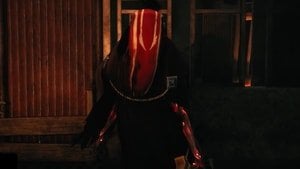
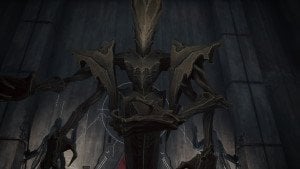
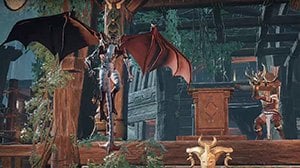
How to Beat Dreamer and Nightmare
The final boss you’ll face in Remnant: From the Ashes is accessible via the key obtained by the Founder. This will allow you to unlock a secret area in B3 area of Ward 13. Here, enter the Research Lab and interact with the mirror to reach Ward 17 and the Dreamer boss.
The Dreamer, as pictured above, is a hovering boss that will send out fast moving clusters of projectiles and will often do it from far away. For such a fight, it’s encouraged to use a high-calibre sniper rifle and if possible, employ the aid of a friend in co-op to make the fight easier. While he’s on the ground, a swipe attack with the cables will cover a large radius so roll backwards.
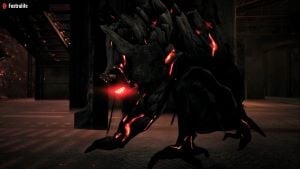
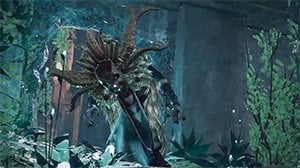
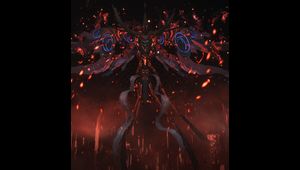
Then there’s a ground slam attack which causes a mini-explosion. Deal with the smaller goons, as usual while focusing fire on the cybernetic helmet of the Dreamer. Once you bring his health down to zero, Dreamer transforms into a much larger beast, Nightmare (pictured below).
From the circular blue spirals on its wings, the Nightmare will send out fireballs one by one in quick succession, however these projectiles are slower than Dreamer’s and easier to dodge. It also takes a while to charge so you can always predict these fireball attacks.
The Nightmare will then initiate a sequence whereby your visibilty is fogged and smaller minions appear which you can fight or flee from. During this sequence, you cannot see or fight The Nightmare. Find an archaic symbol in the darkness to get back to the normal fight with The Nightmare.
The final boss has perhaps the largest health pool, understandably so. So give it everything you got, from ranged weapons to incendiary ammo to applying poison status effects. If aren’t carrying any powerful weapons or an ally to help you, this will be a very long fight indeed.
There’s an additional attack where The Nightmare marks you as the target and focuses an instant telepathic attack. This is when the same archaic symbol appears on the boss enemy. You can dodge it by moving away at the right instant.
You have to play this fight slow and methodological. With patience and dishing damage here and there, you’ll be brought to the end of the fight. There are no tricks up Nightmare’s sleeves (if it has some). Eliminate it and bring an end to your hellish journey in Remnant: From the Ashes.
Normal Drop Material:
Nothing. The Dreamer does not give a reward until you beat his second phase, Nightmare
Normal Drop Material:
Orb of Undoing
Mind’s Eye