Table of Contents Show
Left 4 Dead 2: The Passing Map Secrets
This guide relates to The Passing, and future guides will each relate to a different campaign.
Chapter 1: The Riverbank

The Passing is one of only 3 official campaigns to not give the survivors immediate access to T1 starter weapons; the others being Hard Rain and Dead Center. Of the 3, The Passing requires the survivors to travel the second longest distance before they can find T1 weapons.

The L4D1 survivors can’t be hurt by friendly fire. However, it’s possible to give them secondary healing items in chapter 3, and a notification will appear.

In addition, it’s also possible to kick the L4D1 survivors via console.

Two stores are found at the start of the chapter: a convenience store, and what looks to be an internet cafe or office of sorts. The convenience store has been completely picked clean of all food items, whilst the computers in the office are untouched. The residents in the area prioritised their immediate survival, and didn’t take advantage of the chaotic situation by looting unnecessary goods.

Most L4D maps feature 2 types of vending machines. Drinks vending machines almost always have power, whilst food vending machines never have power and are always empty. The glass on the food vending machines is also broken, showing they were smashed open and looted.

A particularly gruesome scene. This person has been cut in half, and blood is spread across several nearby surfaces. It was most likely a tank who killed them; there’s very little reason for a survivor to go to this much effort to dismember an infected, and the area that the blood covers suggests that a tank may have picked them up and thrown them around several times.

A suicide victim, with a clear bullet wound to the neck. The gun that was used is not present, likely having been looted already. Curiously, there are two blood splatters on the wall to the right. The suicide victim may have killed an infected in the room, then killed himself to avoid turning into an infected.

This plant appears to have been dead for quite some time. Either watering it wasn’t a top priority during the outbreak, or the local population had been infected/killed/evacuated for several weeks.

Two of the office chairs are knocked over, as if the workers had to leave in a desperate hurry. If they were present in the building when the tank ripped apart the man next door, this would explain why they left so quickly, potentially out the window as it’s broken. This would also explain the suicide victim, who decided to take the easy way out rather than deal with the tank or 2 story jump.

Several item caches can be found around the map. The ones that contain pills and adrenaline are likely stolen CEDA property, whilst the ones that contain grenades would’ve been put together by groups of survivors.

A pile of dead infected right in front of the bar. The patrons may have made a last stand behind the counter, killing the infected as they got close. The missing beer bottles could’ve also been used to make molotovs.

Despite most doors and windows being boarded up with plywood, there are still some lights on. It’s unlikely CEDA would lock people inside their homes, so they are likely abandoned.

These infected bodies have been dumped from the second floor onto the ground floor. The presence of weapons and other items on the second floor also indicates that some survivors held out here, and wanted to keep their home base free of dead infected.

A very likely suicide victim, with the weapon already looted.

This person was shot in the stomach. Either it was an attempted suicide, or they were killed by another survivor who left the weapon there.

This area is accessible by jumping over the railing, but there’s nothing noteworthy there.

Several helpful items are stashed at the back left of the park relative to the entrance. This area is almost never looted, since people run straight to the bride witch.

The bride witch implies some of the best witch related lore in the game, suggesting that infected can turn into witches due to significant emotional trauma. The survivors can also comment on this after killing her, saying they feel bad or uncomfortable about it.

Interacting with the radio will anger the witch as if someone was standing near her.

The microphone on this stage works, just like the one in Dark Carnivals finale.
Chapter 2: The Underground

Flyers in the safe room say that the use of deadly force against the infected is authorised. The safe room also contains no graffiti. This is somewhat unusual, since the safe rooms in the sacrifice contain graffiti and are in the same area.

Jules Fresh Crayfish also appears in the Parish. This makes sense given that both campaigns take place in locations near large water sources, where seafood is likely popular.

A very faded advertisement for a hardware store.

This clothing store was having a clearance sale, yet still appears to have been ransacked. With no access to clean, running water to wash dirty clothes, fresh clothing would’ve been in high demand during the outbreak.

This person succumbed to the infection whilst getting a tattoo.

The infected attempted to break through the front door of the pool hall, which has been barricaded with a pool table. The hall itself was almost certainly used as a holdout location for the surviving residents of the area.

The pool hall contains posters of the Midnight Riders and Jimmy Gibbs. The town The Passing is set in, Rayford, is in Georgia. It seems that both the Riders and Jimmy and very popular in Georgia, but relatively unheard of elsewhere.

The entire street has been excavated to lay new sewer pipes. If work was being done on this area, it was likely also happening to other parts of the sewers, which explains why so many infected are present there later in the chapter.

The Midnight Riders can rarely be seen driving past this area.

The shelves in this bar are broken, a possible sign of looting.

Several interesting pieces of graffiti are present in the pool room of this bar. These two appear to reference Crazy Dave from the Plants vs Zombies series, and the evacuation center at the mall in Dead Center.

This graffiti contains many references to the game Dead Rising. The protagonist, Frank West, is a journalist trapped in a mall full of zombies. The message is left for Otis, another character in Dead Rising who gives Frank updates on missions. Being out of film refers to the camera mechanic, wherein Frank can take photos of zombies to score additional points. The helicopter refers to Frank being rescued from the mall by a helicopter, and the mention of the zombies being fast is due to Dead Risings zombies being quite slow compared to the sprinting L4D2 zombies.

Plenty of graffiti is in this bathroom. Several of the towns residents are mentioned by name, such as a local prostitute who turned into a boomer or one who was killed by zombies. Theres also mentions of toilet paper shortages, and CEDA doing nothing to help.

This is a reference to the Midnight Riders song “One Bad Man”, which features the line “a suitcase full of pistols and money”. Coach will sometimes sing this voiceline when looking at the suitcase.

Many of the apartment rooms here have makeshift beds and sleeping bags in them. Given how old the sign outside it looks, they may have been abandoned by the property manager a while ago, and only used now as shelter by the survivors.

The historic buildings in the area are undergoing restorations, likely coinciding with the main sewer construction.

Just like The Vannah hotel, this abandoned apartment block has caught fire recently. The building itself is intact, so the fire likely started from an electrical or gas fault not long before the L4D2 survivors arrived.

You can see into the under the river tour through this drainage grate.

A number of dead bodies are present outside the Jazz Club. The lack of blood on the ground indicates they succumbed to the infection rather than being killed by a survivor.

Tickets for the historic under the river tour are $5 per adult, and $2 per senior and child. The sign also states that phase 1 doesn’t go under the river. In addition, tours are run every hour, which could explain the abundance of infected in the sewers.

The wooden door to the Jazz Club has been broken down from the outside, likely by a fire axe, and the security gate appears forced open. Some survivors may have tried to break in to escape under the river.

Boxes belonging to the Midnight Riders are present in the Jazz Club. They may have been performing there at the time of the outbreak, which would also explain the tour bus that can drive past. There is also a microphone on the stage, though it isn’t functional.

A CEDA safety checklist has been vandalised to say the virus is not airborne, though we know from the Sacrifice comic that this isn’t entirely true. The checklist advises securing rooms with plastic and duct tape, which would make it airtight.

An old advertisement for an electrical wholesalers company in the under the river tour. As evidenced by the presence of doors and window frames in the tour, this entire section used to be the main part of the town. The newer parts of the town have been built over the top of the old sections.
(Continued) The Underground

Only $3000 have been raised for phase 2 of the tour.

Part of the staircase has collapsed, and the infected appear to have fallen to their deaths. This is unusual, as it doesn’t happen in gameplay.

Standing and jumping on this rubble behind the drop down area will cause the survivor to say their falling voiceline again.

This section of water can be avoided by jumping on the edge of the pipes.

The sewer is one of the largest open areas in the game, with the explorable area extending well outside what your flashlight reveals initially.

A boat can be found in the sewer, suggesting some survivors used it to travel through the water and reach the safe room instead of walking.
Chapter 3: The Port

Kicking either Zoey or Francis via console in chapter 1 will cause them to reappear in chapter 3.

All the L4D1 survivors can be kicked in chapter 3, but doing so means they can’t help you during the finale.

Bills body can be found near the generator. His M16 has a unique skin, with blood splatters on the side.

This box of fragile goods has been stored upside down, a common joke in many forms of media.

A red variant of the armoured truck model seen in various maps.

A Burger Tank billboard on top of the shipping building.

Despite the power lines appearing to be intact, not all the lights have power.

The door the L4D1 survivors came through has been barricaded with a shelf. Canonically, they may have done this to stop any infected catching up to them.

Fuel can continue to be poured into the generator even if it’s already full. It’s theoretically possible to put up to 20 cans in; 16 from the finale, and 4 if you carry them through the previous 2 chapters.

The generator itself is not wired to the bridge in any way.

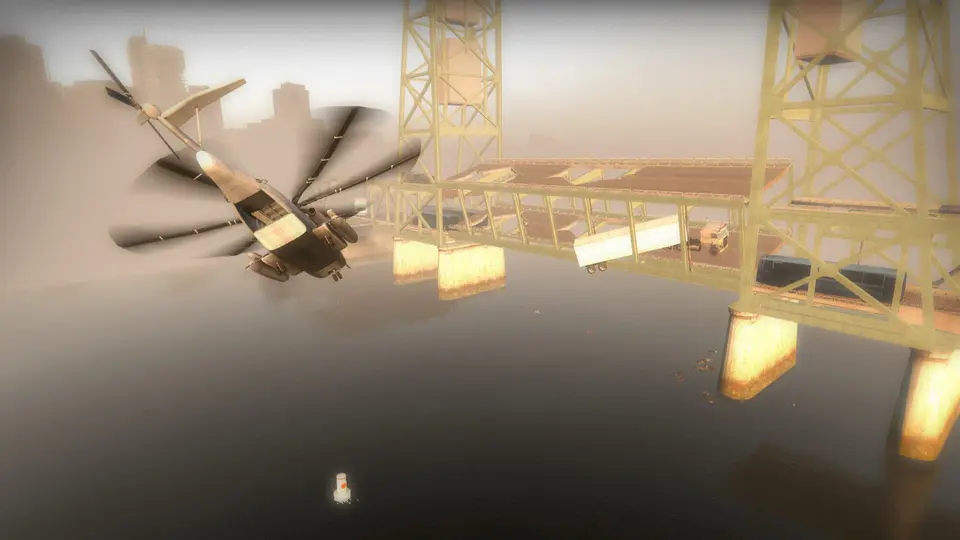
The L4D1 survivors boat is visible next to the bridge. It appears to be a similar model to the one seen in the Sacrifice comic. The name on the boat, “One4All” is not only a reference to the use of a 4 in Left 4 Deads name, but also to the idea of the game itself; each player contributes to the common goal of making it to the end of the campaign, and they all help each other out.