
Table of Contents Show
After two games spent in the claustrophobic gloom of the Moscow Metro, it’s a strange sensation, at least for a Metro game, to suddenly be staring across a vast, sun-bleached desert. Exodus is a post-apocalyptic road trip through a nuke-blasted Russia, and an arid expanse of what was once the Caspian Sea is one of a number of locations visited by Artyom and his band of survivors. But even with blue skies and the closest thing you can get to clean air in this grim, dead world, survival is still an everyday struggle.
Other Metro Exodus Guides:
- Metro Exodus Body Armor Upgrades
- Metro Exodus All Helmet Upgrades
- Metro Exodus All Electronics Upgrades
- Metro Exodus Tips and Tricks for Beginners
Metro Exodus Achievements & Trophies
You will get these achievements by simply playing the game.
Ending Achievements
As per the previous Metro games, there is a morality point system which affects the outcome of the game’s ending. You get morality points by doing certain things such as playing through areas of the game without killing anyone and freeing innocent prisoners.
There are also three achievements; Duke, Damir and Alyosha, which also seem to have a fair bit of weighting regarding whether you get the good ending. You can get these after completing certain areas throughout the story. You will also get an additional achievement for getting all three in one playthrough.
Duke
Duke survives.
You will get this at the end of the mission to lower the bridge in the level VOLGA as long as Duke is alive. I personally got to the end of this mission in stealth, so didn’t have a problem with Duke getting killed.
Damir
Damir stays with crew.
You will get this after fighting off Baron’s assault at the top of the tower. I’m pretty sure for this one, you want to make sure none of the innocent slaves are killed in the previous couple areas. Guil and Damir mention it a fair bit as you enter the areas, so keep an ear out.
It sounds like there are a few additional things that will also help to determine this. For example, retrieving Guil’s photo when looking for the maps and freeing villagers from a couple areas across the CASPIAN level.
Alyosha
Alyoshga doesn’t get wounded.
Full Strength
Duke and Damir stay with the crew, Alyosha doesn’t get wounded.
Story Achievements
You will get these achievements by simply playing through the main story of the game.
Exodus
Complete the MOSCOW level.
You’ll get this one just after detonating the bomb on the enemy train.
Aurora
Name the locomotive.
You actually get this one right near the start of the following level. During the opening cutscene of this level, the train is given a name and you’ll get this achievement then.
Regatta
Get into a boat.
Near the start of the next mission, where you need to go to the Church. Anna will lead you to a boat you can use to get there. Jump in and you’ll get this.
Fisherman
Kill the Catfish.
While on your way to Krest’s railcar, you’l’ find yourself in a compound filled with mutant humans. Go through this area to the railcar on the other side. You’ll need to drop some debris to free the track.
Lure the catfish in by dropping one of the bodies in the water, then pull the lever to free the railcar and kill the catfish in one fell swoop.
Railwayman
Get into the Trolley.
After dispatching the catfish, you can now enter the railcar to continue with the story.
Long distance passenger
Find the passenger train car.
Shortly after getting the rail car, you will drive it to a bandit camp. After dealing with the bandits, you can use a lever at the top of the building to open up the gate. Once it’s open, you can drive the railcar through the gate and connect up the passenger car.
Lower the Bridge
Complete the VOLGA level.
You will get this after lowering the bridge and jumping back onto the Aurora.
Spoiled dinner
Complete the YAMANTAU level.
You’ll get this once you find Anna and get on out of there.
Driver
Drive the Bukhanka.
Fairly shortly after getting to the CASPIAN level, you will come across a thug who you can neutralise and take a car key. Go back to the car, and after a short cutscene you’ll be able to get into the car and get this achievement.
Complete road map
Find maps in the laboratory.
Not long before the end of the CASPIAN level, Guil will guide you into the laboratory. You will eventually come across an archive with years highlighted at the edge of each shelf. After interacting with the shelf labeled 2019, a short animation will play, then you will unlock this one.
New order
Complete the CASPIAN level.
After confronting “the baron” and defeating his forces, you will get this after a short cutscene.
Gor’ko!
Attend the wedding on the SUMMER level.
Following the CASPIAN level, there will be a wedding on the Aurora for Stepan and Katya. You will get this when you toast to their vows. Man, everything sure is great… right?
Kill Achievements
Silent marksman
Kill 30 enemies with Tikhar.
The Tikhar is a pressurized steel ball rifle, which you will need to charge up to use.
After rescuing Katya from the church in the level VOLGA, you will return back to the train to continue the story. After talking to Colonel Miller, enter the Aurora and you’ll be given a Tikhar which you can find on the left as you enter.
The kills do not need to be stealth kills, and you can kill both mutants and humans to get progress for it.
Firebird
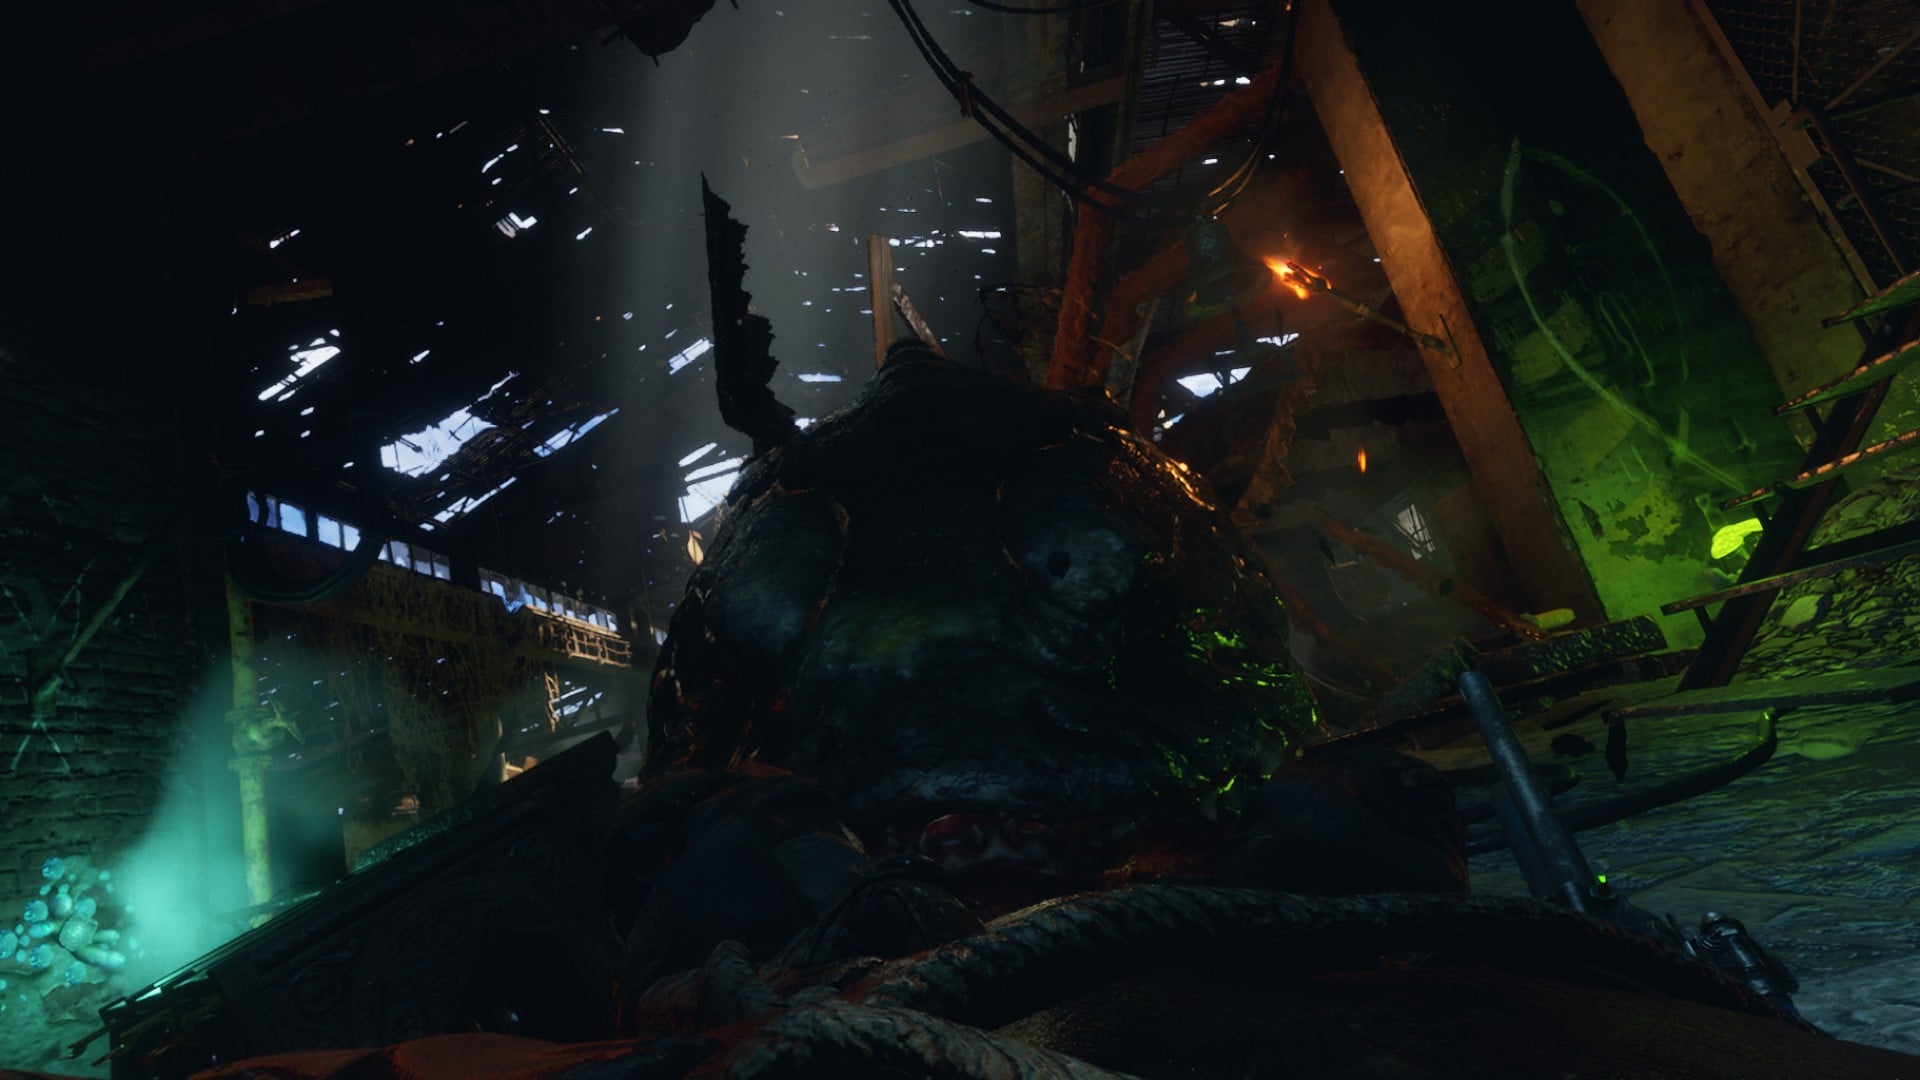
Kill a demon with fire.
For this one I found a demon hanging upside down under a bridge, which made it a very easy target.
I threw one molotov at it, and got the achievement immediately, so they’re pretty weak to fire.
Kaleidoscope
Kill 3 enemies using sniper scope while wearing the Gas mask and using the Night Vision goggles.
To get the Night Vision goggles, you can go past the catfish before you get the railcar in VOLGA and enter a room in the back to find the goggles at the other end of the room.
If you saved the villagers near Duke before coming here, they will reward you with a key that lets you open a door at the start of this area. This means you can get the goggle a little earlier.
Once you have them, wear them alongside your gasmask and take out three enemies with a weapon that has a sniper scope equipped. I found that the Night Vision scope I had for my Tikhar counted for this as well.
Righteous vengeance
Kill 90 cannibals.
You will get this during YAMANTAU, after Anna is taken and you break free. There will be swarms of enemies at certain parts, so this will tick up pretty fast.
Carmaheddon
Make 50 kills with the Bukhanka.
During CASPIAN, you will find a car that you can drive around during this level. You can drive through enemies to kill them very easily. At night, there are more mutants around, so it could be worth driving around then.
Antibiotic
Kill 300 mutants.
This will just tick up over time. Mutants include nosalises, watchmen, demons, etc. as well as the human mutants.
Headhunter
Kill 300 human enemies.
This will just tick up over time. Human enemies include bandits and cannibals.
Saboteur
Melee-kill or stun 50 enemies.
This only applies to contextual stealth kills where you can perform either a lethal or non-lethal takedown. If you just melee an enemy to death in-game or during a QTE, then it is not counted.
Professional
Make at least one kill with every ranged weapon.
There are ten ranged weapons that apply for this.
1. Kalash
2. Ashot
3. Revolver
4. Bastard
5. Tikhar
6. Gatling
7. Valve
8. Bulldog
9. Shambler
10. Crossbow
You shouldn’t have much trouble finding each of these. Keep in mind you won’t get the crossbow until the level TAIGA.
Robin Hood
Kill 30 enemies with Crossbow.
As mentioned above, you won’t get the crossbow until the level TAIGA. Once you do, just ensure you use it for a while and rack up the 30 kills.
Misc. Achievements
Gunsmith
Install a modification of each category on a single weapon.
Simples. You can find weapon modifications by getting them from weapons found in the world. Then you can place them on your weapons at a workbench or from your backpack.
Generally, it looks like standard weapons will have the following categories:
- Stock/Grip
- Barrel
- Sight
- Magazine
- Gadget
You’ll need to equip one from each category to unlock this.
Friend of the Crew
Find the guitar and teddy bear on the VOLGA level.
Before you head out to find Krest’s railcar, talk to Nastya and your squadmates regarding their Teddy Bear and a guitar respectively. They will each give you a location to find those items, and there will be special icons on the map for them. Go to each location and retrieve the items.
As the achievement suggests, you only need to find these items, you don’t actually need to take them back to the requester. Though… you still should.
Handyman
Spend 500 consumable resources on crafting.
You should get this fairly easily just in your normal playthrough. You can find resources all over the place, just check buildings and bodies of guards. Then you can spend those resources on crafting ammo, throwables, filters, medkits, etc.
Tidyman
Spend 500 chemical resources on cleaning weapons.
This one will take a bit longer than the above. Cleaning weapons does not require as many resources as crafting and can only be done at a fixed workbench. Go splash around in some puddles to muddy up your weapons.
Join us on air
Find a tune on the radio.
You can get this during the short levels that take place on the Aurora, like SPRING and SUMMER. Sit down at the desk in your room and interact with the radio. Cycle through the tuning fairly slowly until you come across a station just playing some music.

This is what I had it set to when I got it.
Last Breath
After running out of filters in a hazard zone, craft a new one while suffocating.
This one isn’t too difficult if you’re ready for it. If you have a big stockpile of filters, you can dismantle them at a workbench first. Then while in an area where the gas mask is required, wait for the time for you current filter to drop down to zero.

Then you can bring out your backpack and craft yourself a filter. You’ll get the achievement as soon as you craft it.
The Rest (for now)
Martian
Patch the Gasmask.
Sword of Damocles
Complete the TAIGA level.
Eternal Voyage
Save Anna by paying the ultimate price.
Putrification
Pass the putrid tunnel.
Master of the Forest
Stand your ground against the Bear at the first encounter.
Brakeman
Detach all train cars on the MOSCOW level.
Your Destination
Assume command of the Order.
Guide
Pass the Research Facility without killing a Blind One on the DEAD CITY level.
5 o’clock
Take part in the Admiral’s tea party on the TAIGA level.
Roller coaster
Use the bucket lift on the CASPIAN level to reach the Oasis.
Decommunization
Destroy the biggest statue in front of the children’s camp on the TAIGA level.
Hardcore
Complete the game in Ranger Hardcore mode.
Forest child
Complete the TAIGA level without attacking anyone or getting noticed.
Stand back
Kill 50 enemies at long distance.
Collectible Achievements
Librarian
Find all 70 hidden Diary pages.
Old world pictures
Find all 21 post cards.
Dressed for Success
Find all upgrades for Artyom’s suit.
There are a few of each of these in most chapters. If you look in the collectibles menu, you can see which you’ve missed in the order they can generally be found.
As for the suit upgrades, there are 12 in total, but no way to see a list of ones you’ve missed in-game. I will instead list them here and include them in the following walkthrough.
I’ll put a walkthrough in the following sections with each collectible’s location.
All Postcard Locations
Where to find all postcards in Metro Exodus.
Moscow
You can find two postcards in the first chapter:
1. When you wake up in the infirmary, go into the next room and pick up a postcard from the cupboard on the right. Do this before going to Anna and Miller.
2. When you follow Anna on the way down, examine the apartment on the floor below. Go to the kitchen and pick up a postcard to the right of the window.

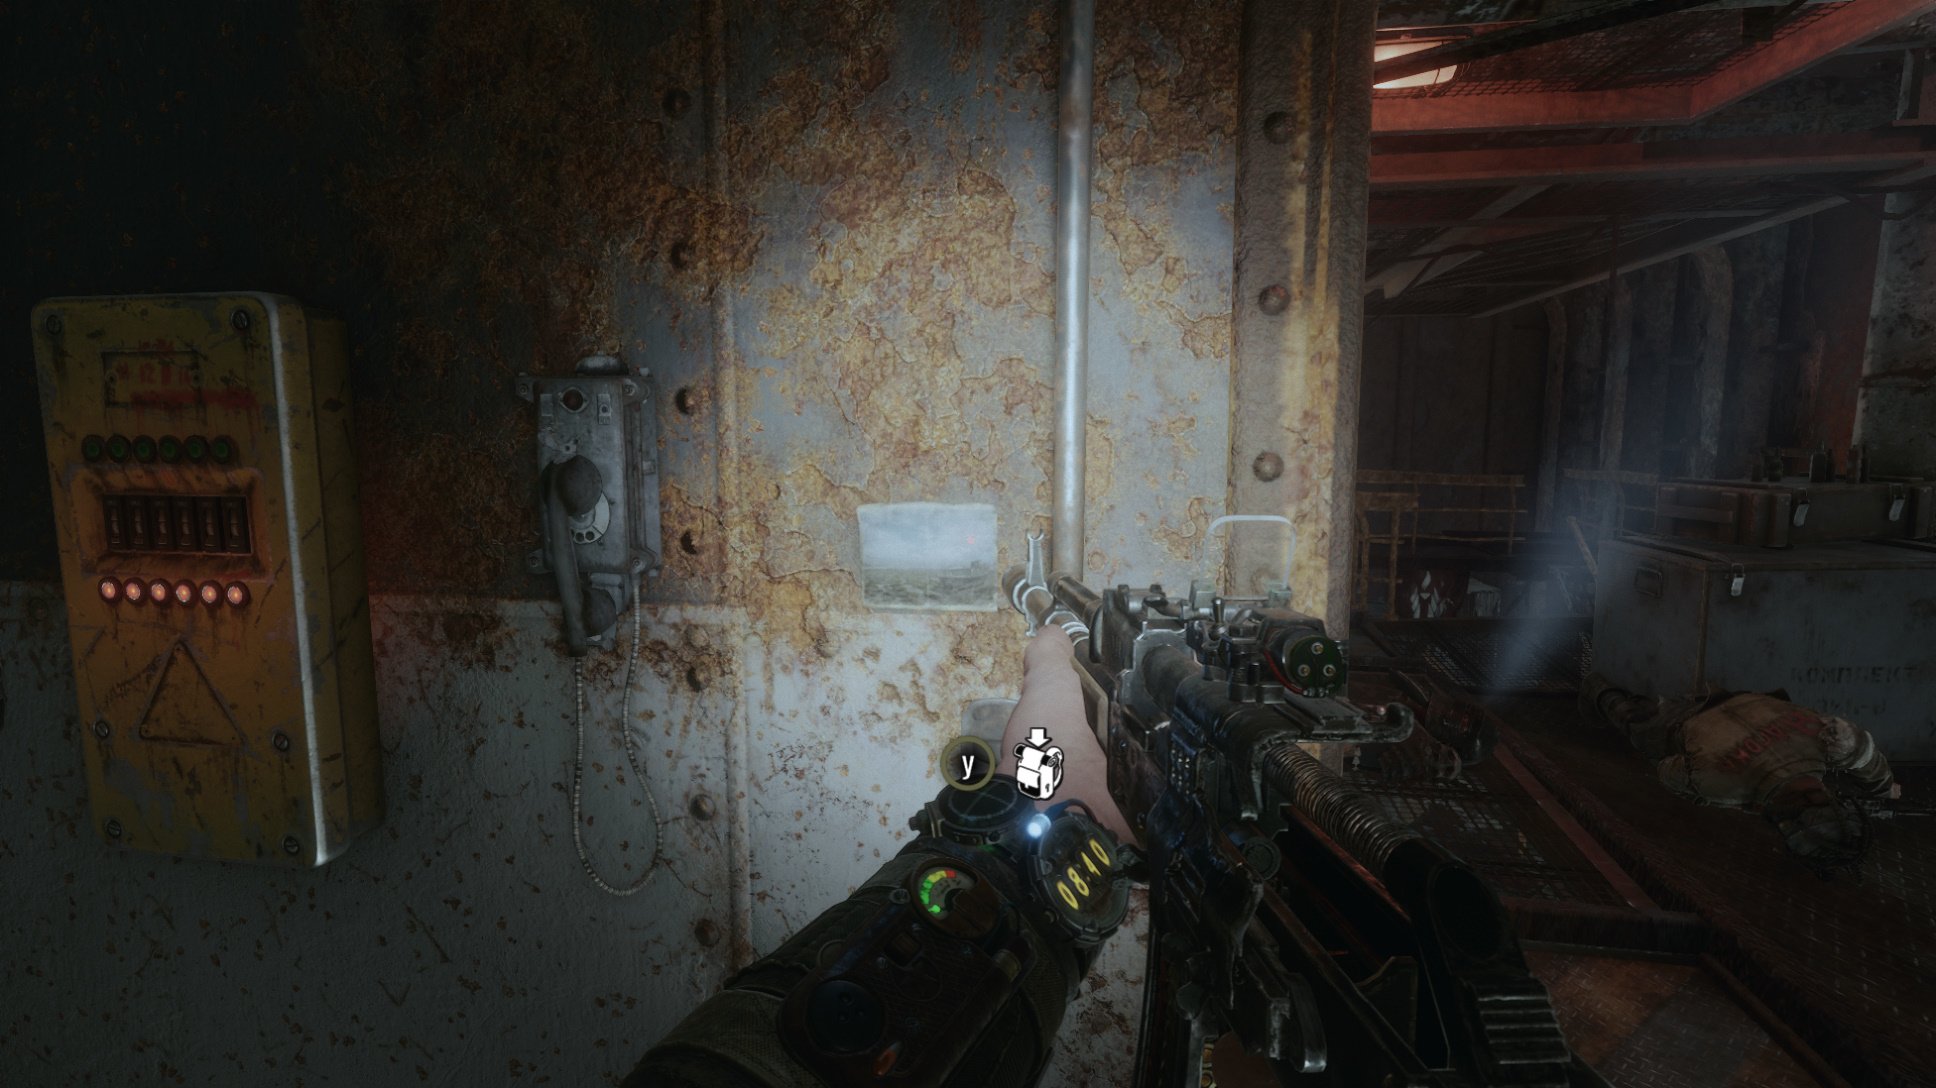
The Volga
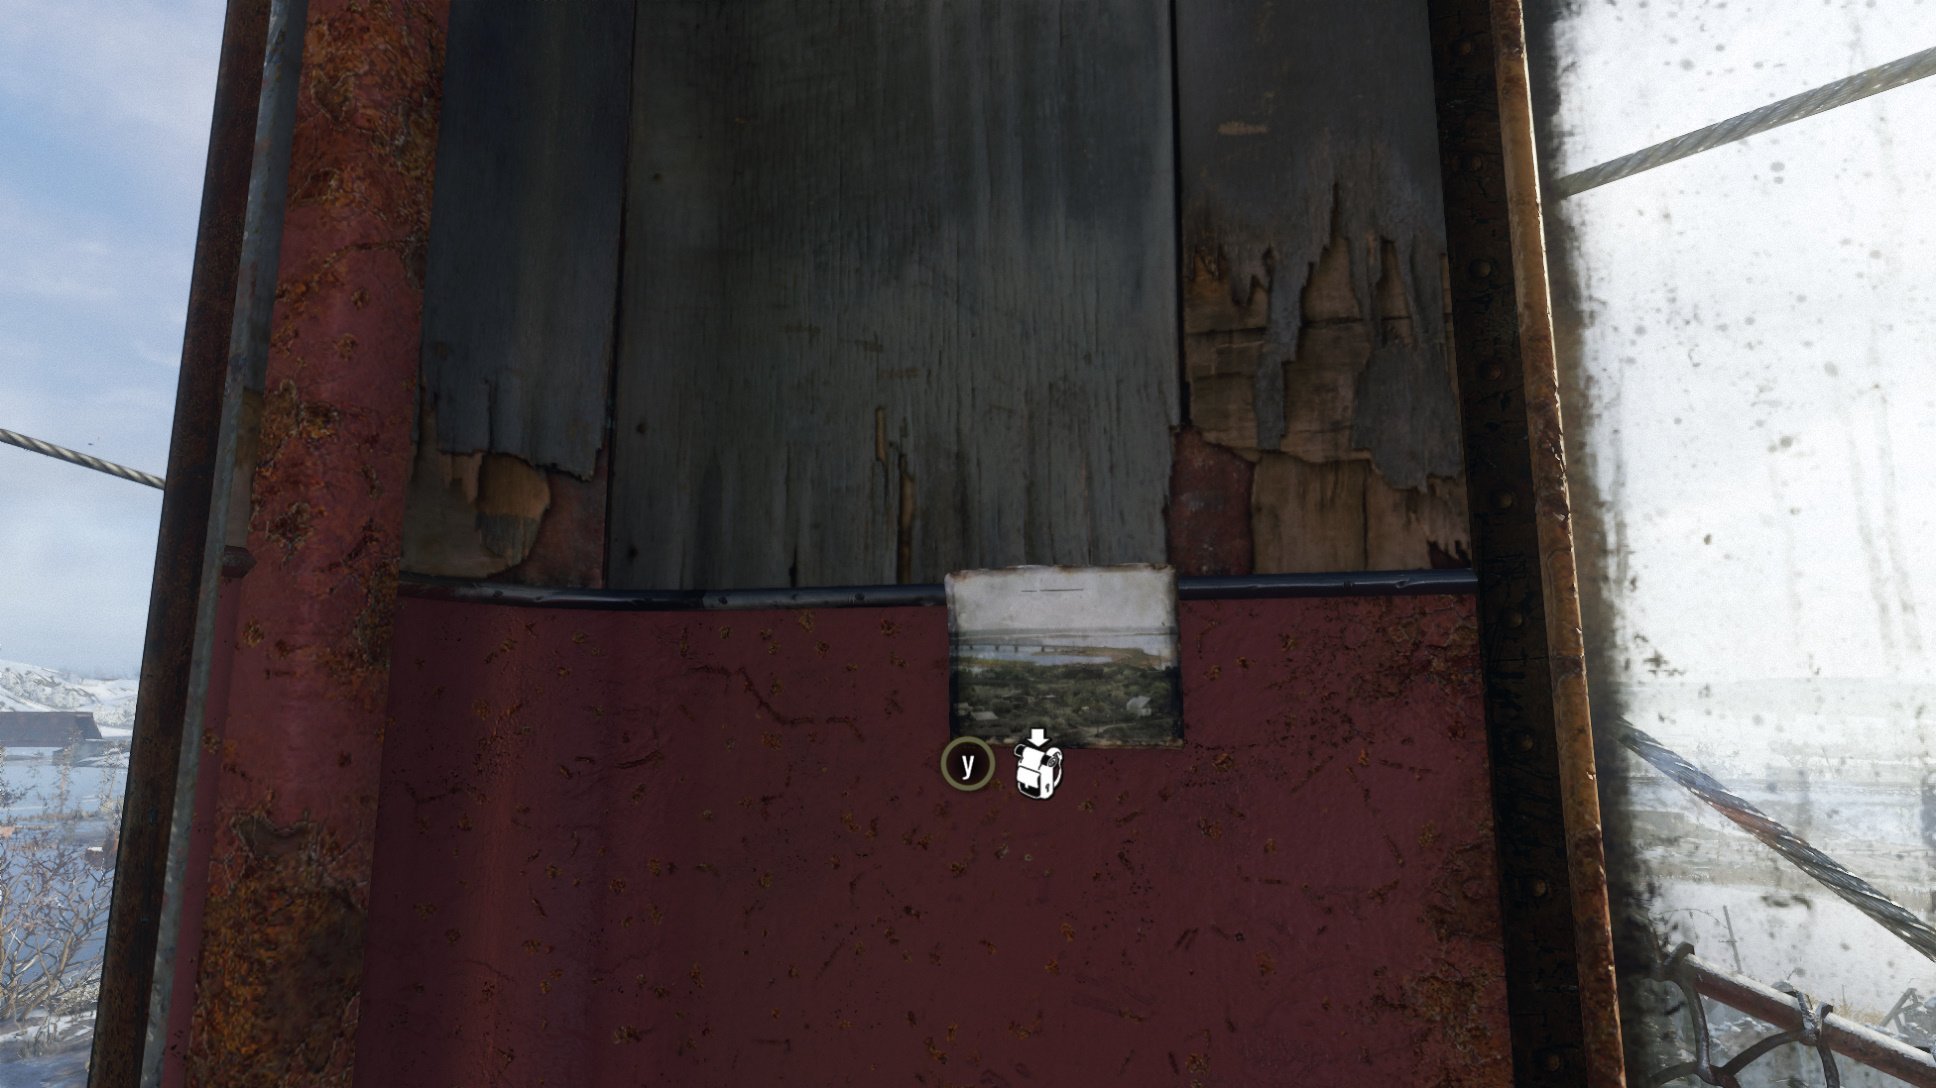
There are five postcards in this chapter. Here’s the location of each:
1. When you get to Krest and go down to his room with a workbench, take a postcard from the wall to the right of the door.
2. Stand next to the terminal where the trolley was and walk along the tracks, going straight and then to the left. There will be a small building on your right. Go inside and take a postcard hanging on the wall above the workbench.
Yamantau
There are just two postcards to be found in Yamantau:
1. The second postcard is hanging on the target next to the diary page 2. But you can get there only after the freezer, through a hole next to the electric panel that turns the light on.
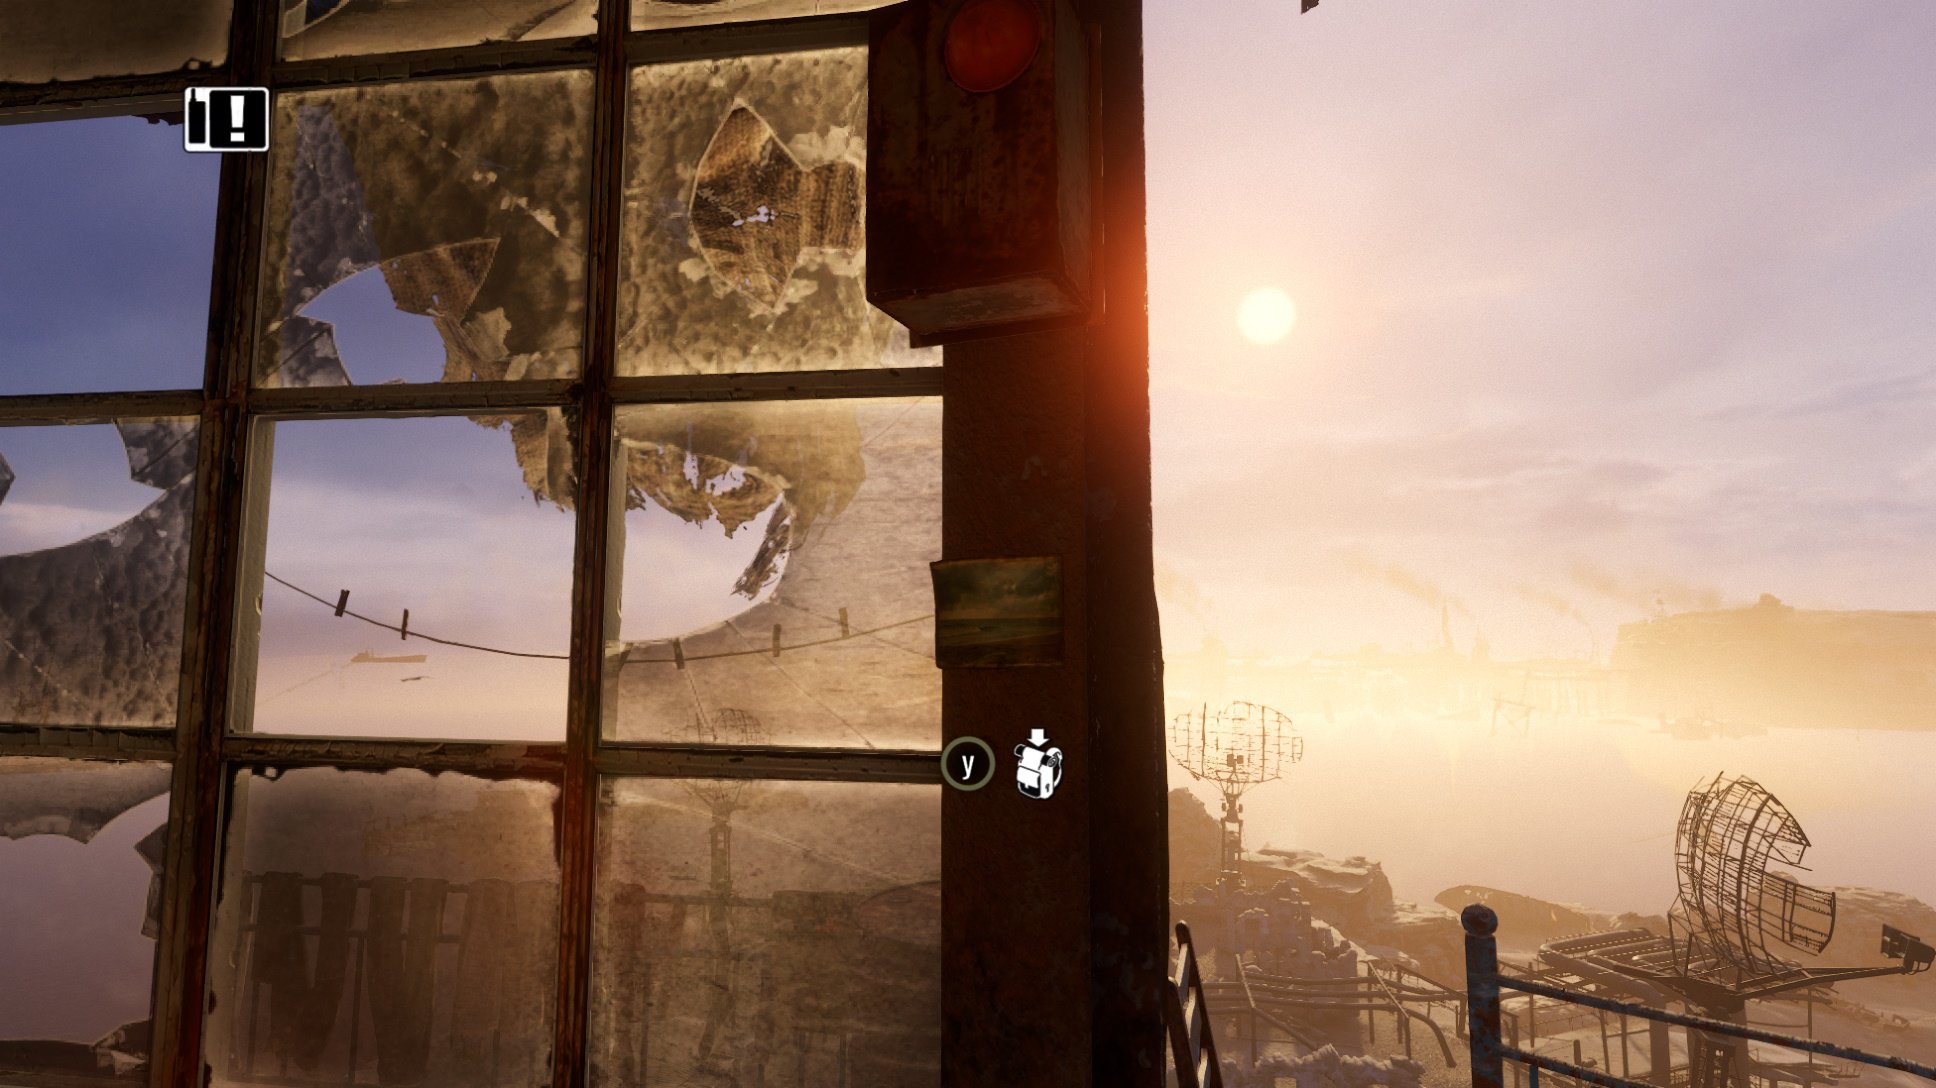
The Caspian
There are five postcards in this chapter:
1. After getting control of the character, go inside the building next to the train and look at the wall near the doorway.
2. After meeting with Giul at the lighthouse, look for a postcard near the door passage.
3. When you get to a dismantled ship where you can save hostages (one of the points of interest that Anna will point at), go to the captain’s cabin and pick up a postcard from the wall near the doorway.

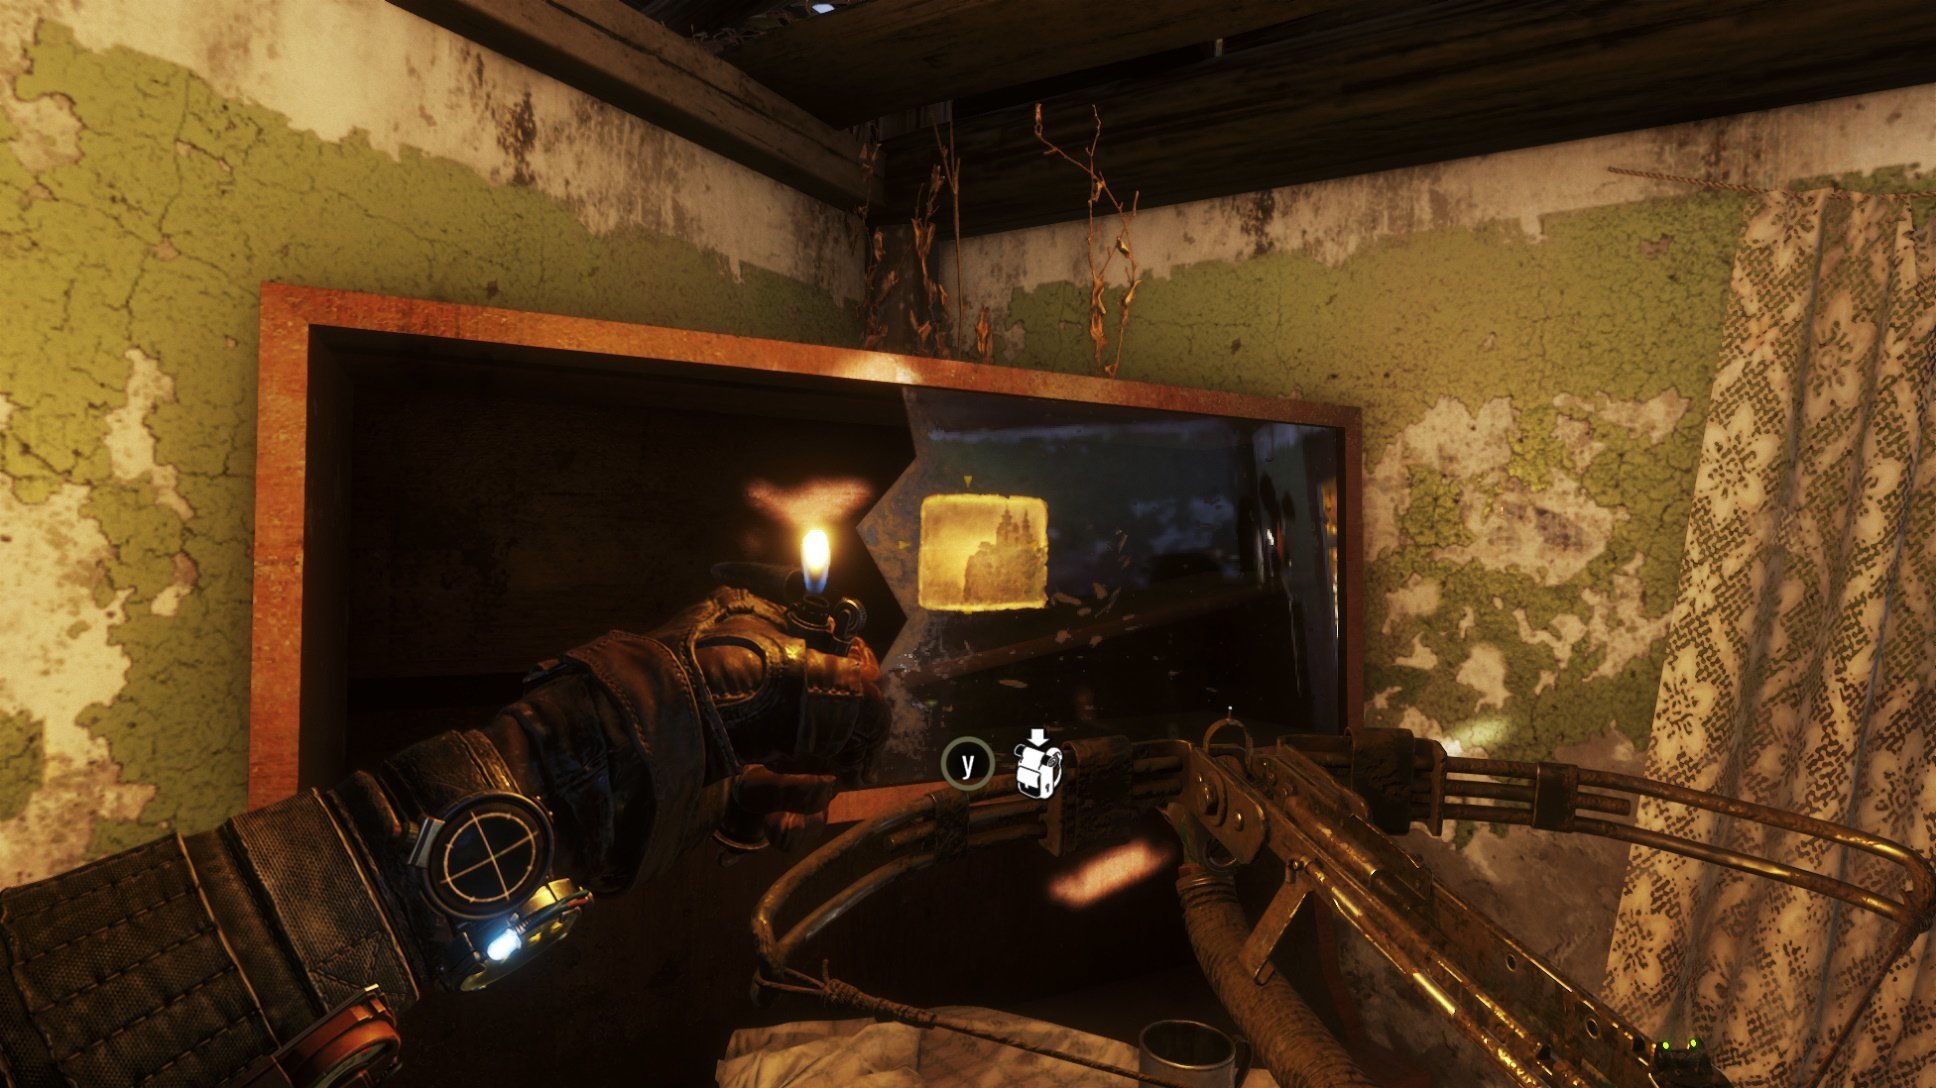
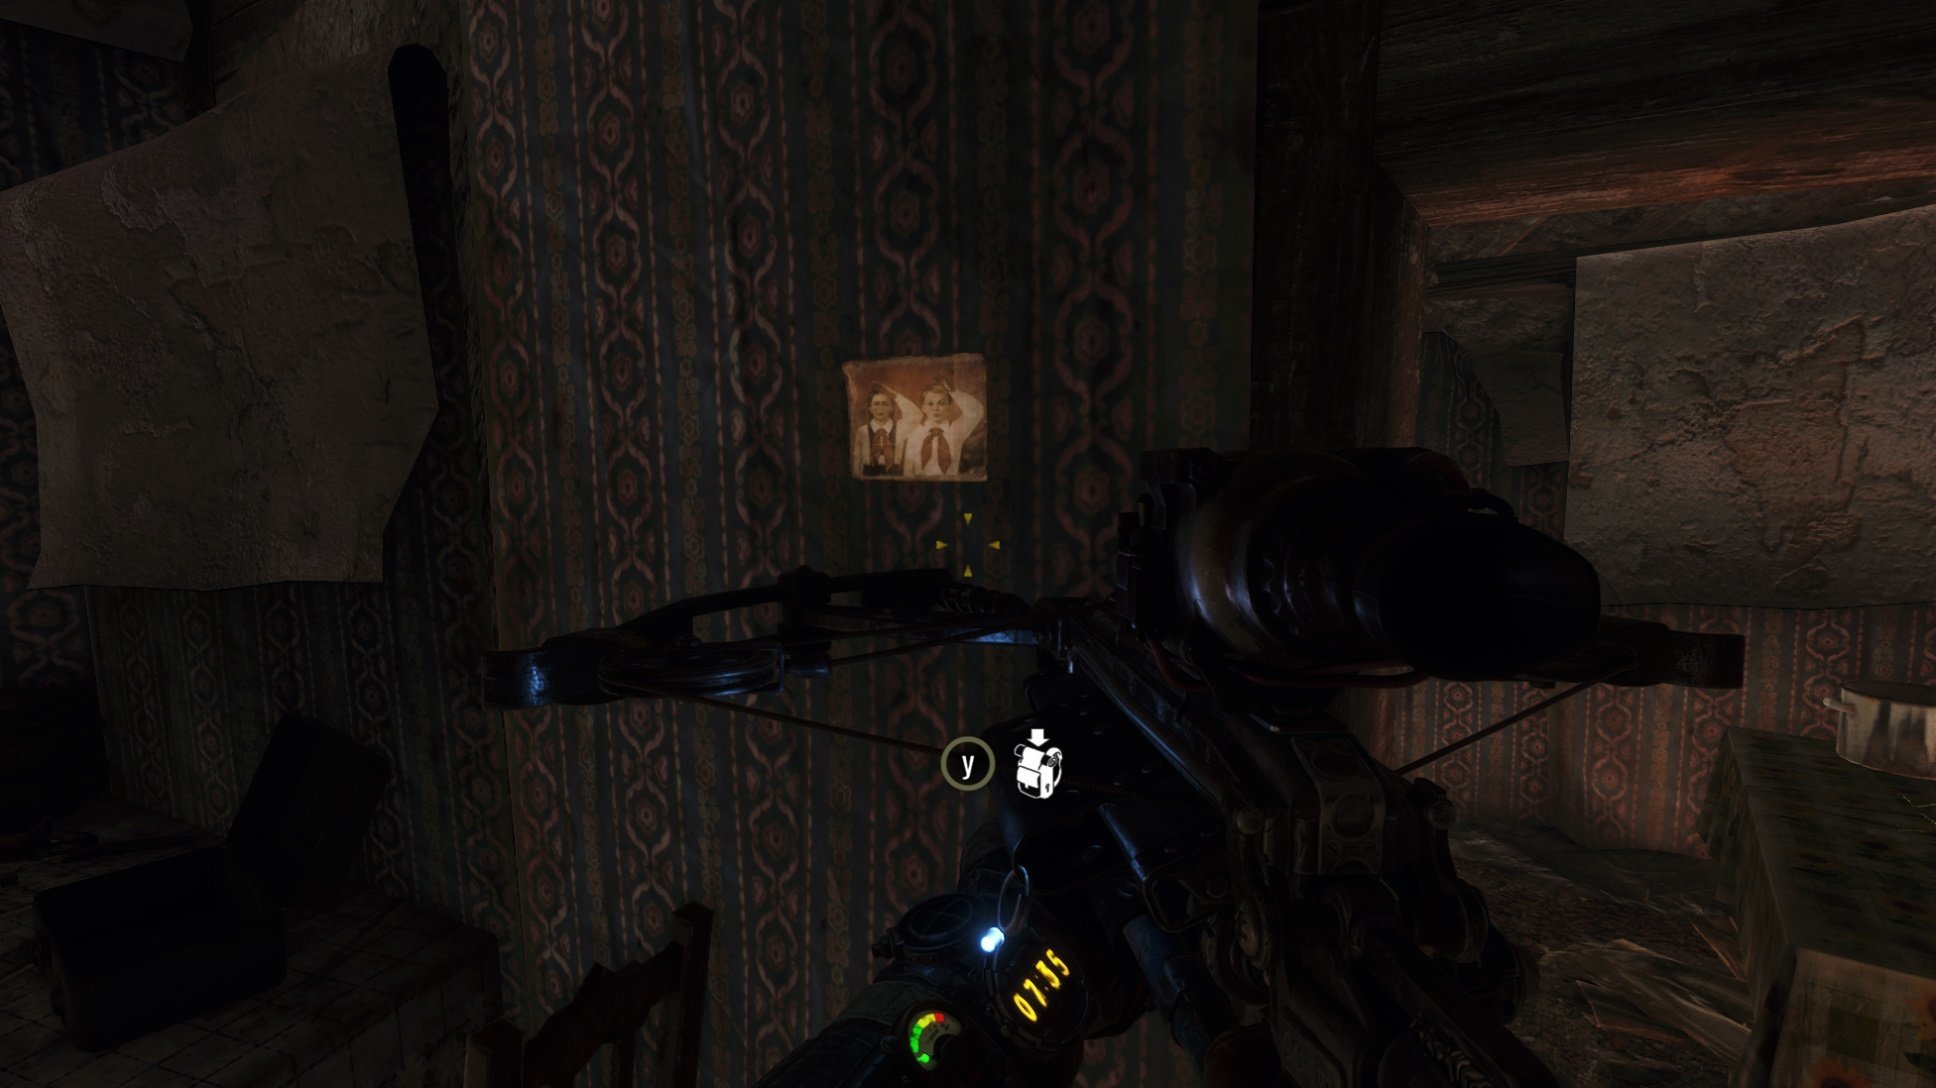
The Taiga
There are five postcards in this chapter:
1. After a cutscene, you will find yourself in the courtyard not far from the river. There are two houses here. You need a smaller one, which is on your right. Examine the cupboard in the left corner to find a postcard.
2. After leaving the summer camp, go through a cave to get to the bandit camp. Once there, get to the other side to a house in green thickets. You will find a postcard on the wall to the left of the doorway leading to the room with a furnace.
3. Having met with Alyosha, enter one of the houses on the right, where you can also find an unfinished letter. Go inside the room on the left and take a postcard from the wall next to the doorway.
Autumn
There are no postcards in this chapter.
Summer
There are no postcards in this chapter.
Spring
There are no postcards in this chapter.
Winter
There are no postcards in this chapter.
Dead City
There are two postcards in Dead City.
- After your first encounter with mutants, go through the door at the end of the tunnel to find ‘Postcard 20’ on the right next to a blue locker.
- After finding Kirill and being taken to his room, you can find the final postcard ‘Postcard 21’ on the left pillar. Old world pictures trophy and achievement unlocked!
All Note Locations
Moscow
You can find ten notes in the first chapter:
- Going through the subway tunnels, you will find a half-torn notebook on the table to the right after you have killed the first enemy (and before the encounter with two other opponents).
- When you wake up in the hospital, examine the table near the wall on the right. Take the patient file.
- While descending through the building with Anna, go to the apartment that is located on the floor below. In the hall with a coach, the dusty diary lies on the bedside table on the right.
- Before you go down the escalator, find a bookstore on the left. A corpse with a stalker’s note is located near the entrance.
- Having got out of the building, you will have to go through a bus. Shura’s note will lie on one of the seats.
- When Artyom is shot, go through the ditch and crawl below wooden boards. You need to move forward, but there is a blocked passage on the right (a parallel path). A corpse with a crumpled letter is buried between two passages in the snow.
- Once you meet Anna and get into the control room, take the official note from the console.
- When you bypass enemies in the courtyard and find yourself in the hangar, you will find a memo on the table on the left.
- During the episode with the cruiser, once inside the car, turn through the hole in the wall on the left. There are two enemies in this car, while the official letter lies near the hole on the table.
- When the shooting begins, take the crumpled note from the box on the right before entering the head car.
Winter
You can find only one note in the second chapter — a survey report. This note is located below the steps. Go to Anna and wait until she goes away, then descend and take the item from the box.
The Volga
In this location, you can find 13 diaries:
- When you gain control over the character, go over the bridge in the opposite direction, turn to the right to descend and pay attention to a concrete structure resembling a stop. There are corpses under this structure, while a moldy log lies on the mattress.
- When you follow Krest to the port, go around the building on the right side and find the stairs leading down not far from the rails and the fence. Go downstairs and inspect shelves in the room near the door to find a water-logged note.
- In the warehouse where bandits keep hostages (there’s also a key for the room with the night vision goggles), there’s a suitcase standing near the fireplace – the folded letterlies on it.
- In the barn near the tower in which you can find a teddy bear for Nastya, you can take a dirty letter beside the metal detector.
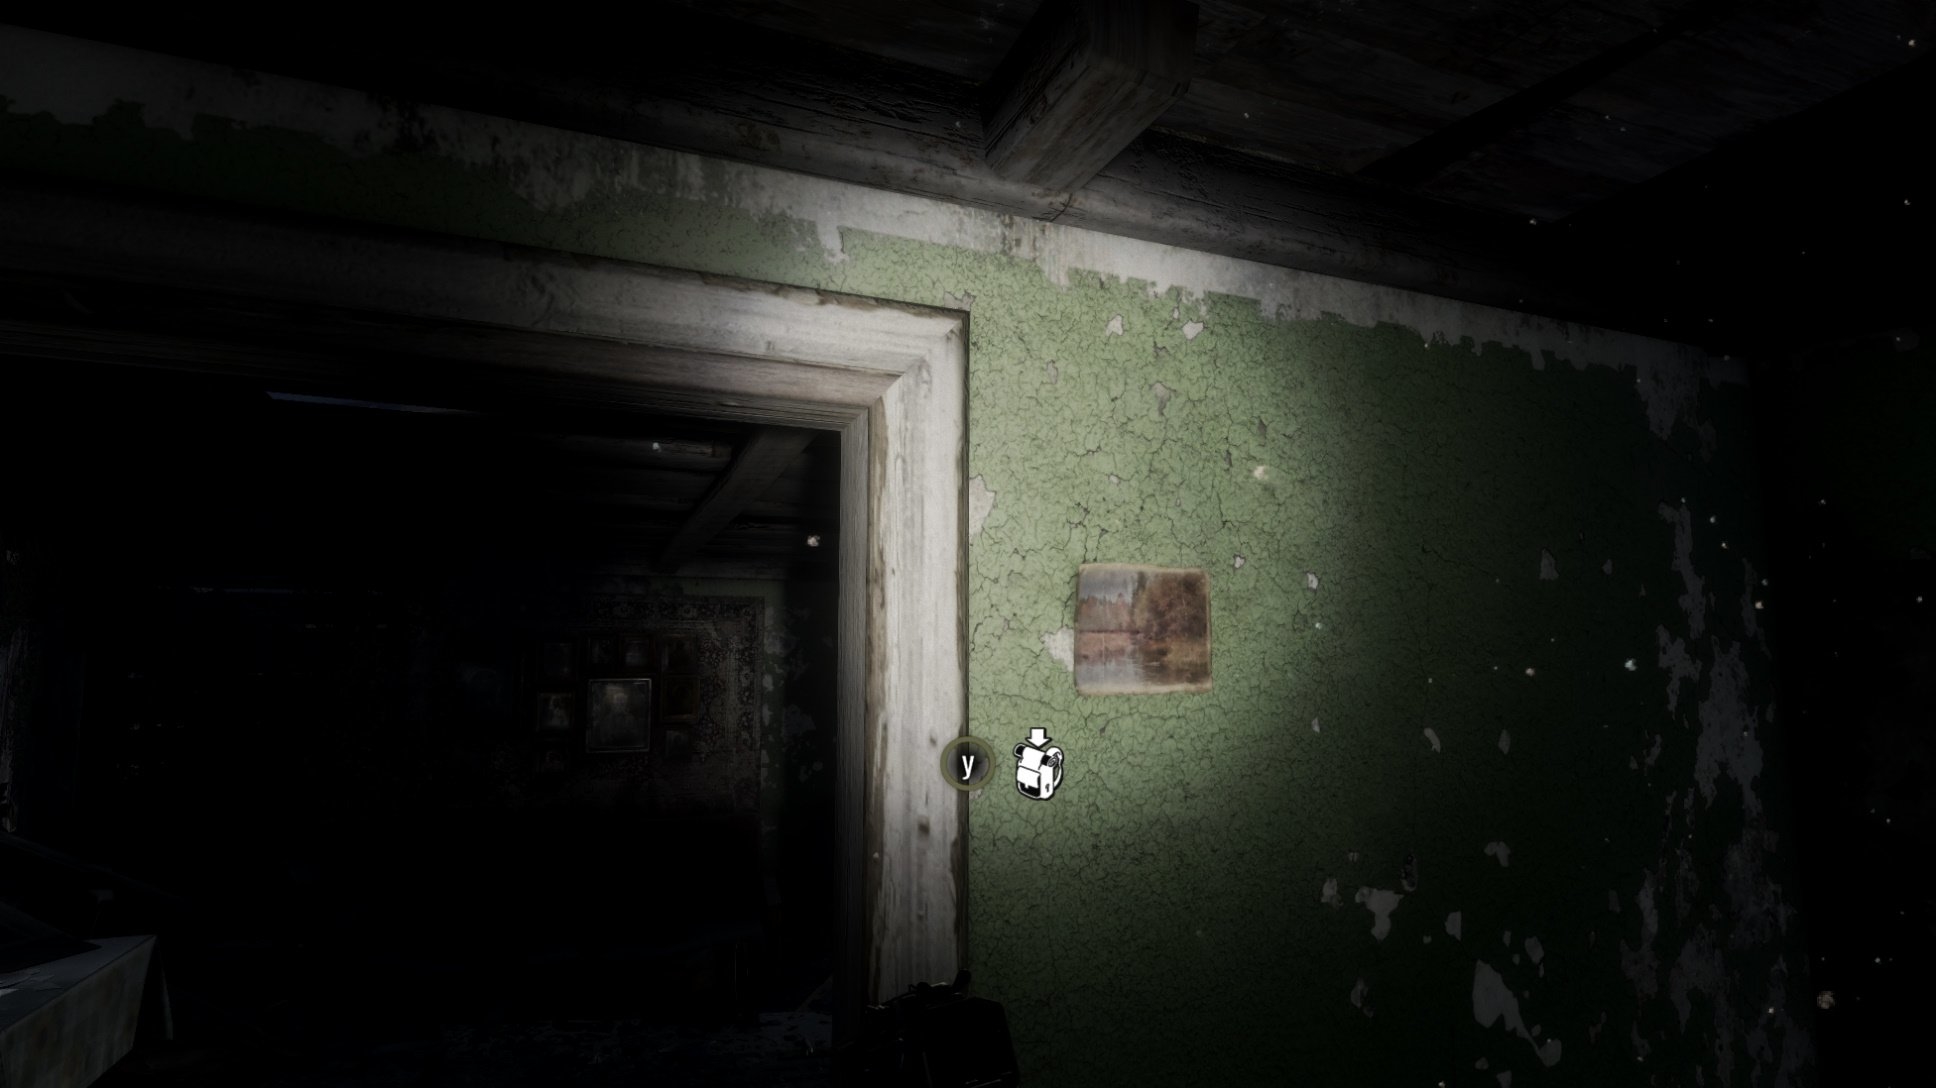
- The screenshot below shows the place where you need to go. Go upstairs from the neighboring building and find a wooden structure at the top. You need to get there moving along the beams that are placed on the roof of the building. Having climbed, you will find a faded note inside the structure.
- There is a black mark on the map to the northwest of the terminal with a carriage occupied by bandits. Come to the water and you will see a flooded building. If you reach it (for instance, using a boat from the middle island), you will find a log book there.
- Pick up a dusty notebook in the building where you found the enlarged filter
- Go east from the railroad car where Duke hides. In the building with high-level radioactivity, you will find a thick envelope.
- There is one more remote island in this area. It’s smaller than the previous, where you found the generator and new equipment. When you get in the boat to head to the terminal with the railcar, row to the right to reach this island. There, you will find a bandit’s note.
Spring
You can find only one document in the fourth chapter. When travelling by train, leave the compartment and look into the next room on the right near which Artyom will be stopped by Nastya. Her letter lies on the table.
Yamantau
In the bunker on Mount Yamantau you will find six notes:
- Having dealt with the cannibals and having taken the elevator, Artyom will part with the team. The diary page lies before the door in front, on the table on the left.
- When you go through the freezers, pay attention to the switchboard on the wall. Launch it and crawl through the bottom hole to find a diary page on the barrel.
- The diary page 3 may be found in front of the concrete pipe which Artem should use. Climb up and go to the right to find a new room. The note is on the box.
- Following the battle with the machine gunner, you will find yourself in the corridor with rooms. The officer’s diary 1 is in the room 2.
- When you meet Anna, take the officer’s diary 2 from the barrel on the left before entering the elevator.
- Finally, when you go to the elevator with Miller and other comrades, you will find the officer’s diary 3 halfway on the left.
The Caspian
You can find twelve notes in the Caspian:
- When you get the car, take the road to the lighthouse. Halfway you will find a broken barge under which you need to go. Slaves work in the nearby. Go inside the barge, go up the stairs and find the foreman’s diary on the table near the container on the right (near the stairs).
- Once on the same barge, move forward and higher. Deal with enemies and find the leader’s letter in the far room.
- When you will be going to the lighthouse through the cave (to help Gulnara), you will see many corpses in one of the galleries. This place resembles a stone bridge. Near one of them there’s a letter to the son.
- When inspecting the bunker on behalf of Gulnara, you will find yourself in office rooms with many tables, cobwebs and the first spiders. To open the door, you need to go to the far room and use the switchboard. The memo lies in the other part of the office, on one of the tables.
- In the same bunker, near the room with spiders through which you go to the broken ventilation, there is a room with one table in the corner. The image analysis lies on this table.
- When you get to the map archive, go to the next room which resembles a command post. The ‘’last orders’’ file lies on the table.
- Inside the disassembled ship about which you’ll learn from Anna, there’s a product list on the table on the right.
- A yellow truck stands before the entrance to the canyon (you will learn about it from the Baron – a question mark will appear). There’s a table with Baron’s letter in the nearby.
- Inside this canyon, after you have got to the suicide using the rope ladder, pick up his suicide note.
Summer
You can find the TT note on the table in the car where the auto is located.
The Taiga
As many as eighteen notes can be found in the Taiga chapter:
- Once you have control over the character, exit the courtyard and remove the arrow with the note from the gates.
- At the Solnechny children’s camp, go to the house on the right side and find Larissa’s letter on the desk.
- There’s a brick building in the nearby. Climb the stairs to the top to find a solemn oath.
- After you have found the previous note, move along the river (on the left side) to find another building for small kids. Child’s scribbles can be found in the room on the right.
- Having got to the other side and having seen the bear for the first time, go forward and find a house on the tree on the left. Go there and take a dusty diary that lies near the fireplace.
- You can descend from the tree house using the rope that leads to the fireplace near the rock. You will face an enemy there and find an alchemist’s diary in the nearby.
- Return to the road and follow the marker (after the tree house) to find a house near the river on the right. One of the pioneers will be there. The lost diary is inside the house.
- Use the same road and go forward, then turn to the left. To continue moving along the storyline, you will need to climb the stones and the rope ladder. On the left from them, there’s a small cave with a dusty notebook.
- When you return your backpack, you will find yourself near the pioneer camp. Do not go there. Instead, find a lonely hut on the left side. Another pioneer will be near, but he will do nothing to you. Enter the hut and take a neat letter from the stove.
- Near the central entrance to the pioneer camp, there’s a building in the inner part. If you enter the camp through the main entrance, it is located on the left. Inside, you can find a casual letter.
- When you leave the pioneer camp, you will find yourself in a gorge. Do not go forward. Instead, find a passage to the cave on the right. Moving through this cave, you will find a battered letter.
- There’s a crumpled note at the end of the same cave. This route leads directly to the bandit camp.
- From the bandit camp, go down the road towards the river, turn to the right and find a small pier. There, you will find a corpse under which lies a dirty diary.
- In the pirate camp, you will need to raise the gates using a lever to sail further. In the same building with the lever (it is on the second floor), go down to the first floor to get a folded note (it lies on the table).
- When you start the generator in the hangar having driven away spiders and having opened the door above, go through this door and find a bloody letter on the ground.
- When you meet Alyosha, descend to the village and find an unfinished letter in one of the houses on the right side (where a front door is open).
Autumn
To get Katya’s note, you need to come to Miller’s meeting in the head car and then go to Tokarev’s workbench. Katya’s note lies on the table in the nearby.
Dead City
In the dead city of Novosibirsk, you can find eight notes:
- Moving with Miller through the flooded tunnel, go into the room full of bodies and find radiogram text on the right table near the door.
- When you go to the new room where Miller proposes to look around, pick up a tattered report from the table on the left.
- When you find yourself in Kirill’s shelter, take the order from the map on the board.
- Having parted ways with Miller, you will find yourself in the metro. Move forward and up until you get into the top car. There, you will see a notebook on the seat on the right.
- When you begin to sail in the boat, stop near the open door on the left. Enter and get to the far room. You will get there through a hole in the wall. Take the shabby diary.
- After you have finished the sailing part and seen Anna for the first time, go forward, go up the escalator and turn to the room on the left in the corridor. You will listen to the conversation between Kirill and Miller, while a darkened note lies in the nearby.
- Having jumped into the tunnel (after a vision with tanks), do not rush to follow the monster to the right and instead turn to the left. You will come to a dead end but find a dusty notebook.
- Having jumped into the next building after you have seen a vision with Anna (Artyom will put a gas mask on her), turn to the right and jump down to the stairs. Having opened the door, you will find a cargo list on the front table.