Table of Contents Show
Darkest Dungeon 2 Act 3 Boss Guide – Has been changed a lot. I’ve fought it once so far and the new strategies provided do seem to work well.
Darkest Dungeon 2 Act 3 Boss Guide
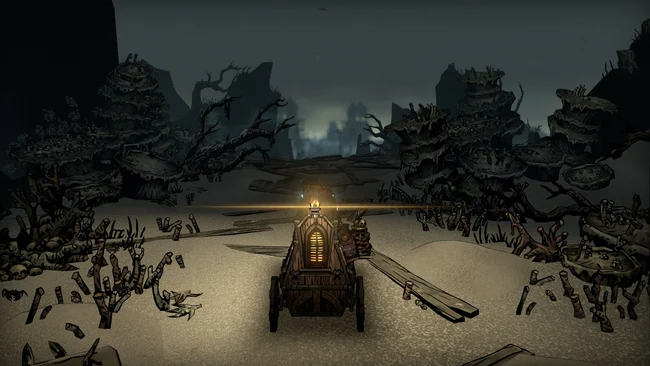
The Focused Fault
Aka Lil Limerence
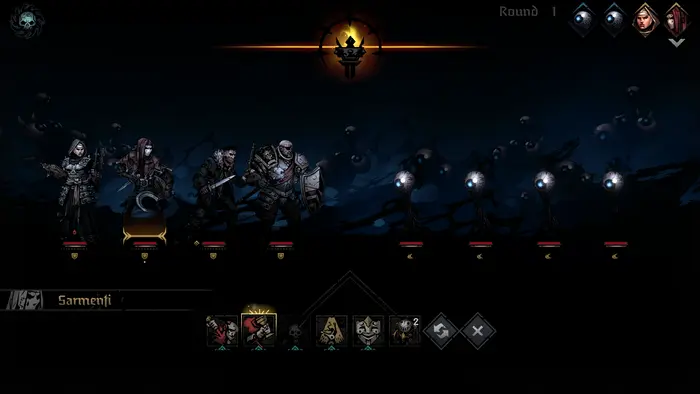
The fight starts with 4 small eyeballs. They have 6 HP each and 8 speed, and they all start with Dodge. They respawn at their first stage at the start of every round if killed. Higher stage eyeballs revert one stage when killed, rather than dying. When they all reach Stage 3, they disappear and the Focused Fault spawns in and attacks immediately.
Phase 1 Moveset
Small eyes: 6 HP, 8 Speed
Observe: Targets mirrored rank, ignoring stealth and taunt. Applies a special seen token on hit and 1 stress, and evolves the eye to stage 2 or 3 (sometimes). The evolution isn’t random and is based on factors that I don’t know, but I do know it will tend to happen more later in the fight, so that you can’t stall forever. Won’t evolve to 3 instantly in the first two rounds.
Gaze: targets the hero with their seen token. Does 2-4 damage at 30 crit, applies weak or vuln or daze on crit. Ignores stealth and taunt. Evolves him.
Medium Eyes: 8 HP, 6 Speed
Detect: Same as Observe, but deals 2 stress. Does not evolve him. You mainly see this if Observe missed or was dodged or if someone dies.
Glare: Same targeting as Gaze. Deals 4-8 damage at 30 crit. Evolves him, gives him dodge and strength, and has the same debuff effects as Gaze. Also ignores stealth and taunt.
Big Eyes: 12 HP, 4 Speed
Detect: Same as above. Same use case as above.
Glower: Same as glare, but with a 6-12 damage range. Gives dodge+ instead of Dodge
When every eye is a big eye, the fight will immediately go to Phase 2.
Phase 2 Boss and Moveset
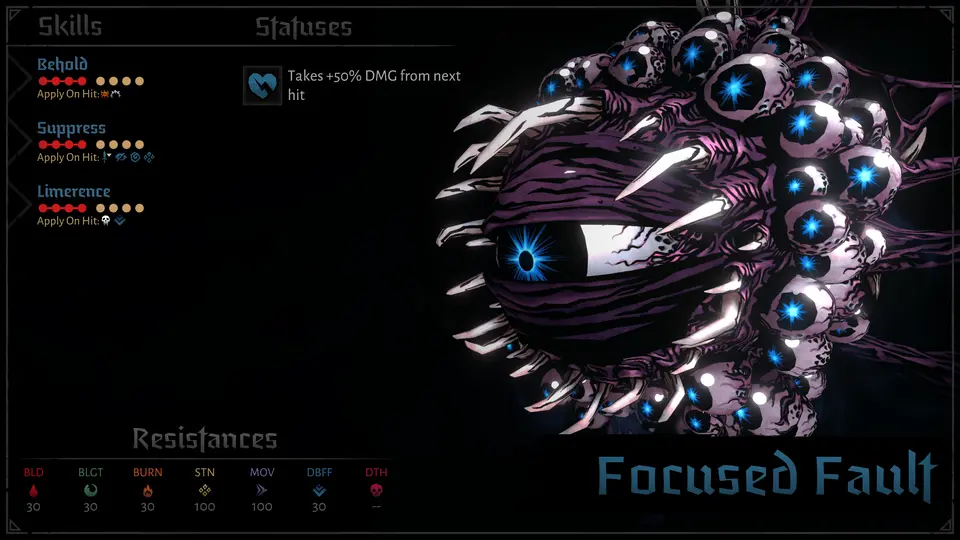
Focused Fault has 250 HP, 8 Speed, and 0 DBR. He has low resists to everything except stun and move (which are 100%, though you can’t move him anywhere, he’s Size 4). He gains a free action when he spawns and copies positive tokens whenever he crits, for some truly god forsaken reason. Has 2 turns per round. If a hero without a seen token crits Captain Limerence, they get a combo token placed on them.
Behold: He uses this if no heroes have any Seen tokens. It deals 4 stress and places 1 seen token on everyone. Which is very bad. Can be dodged or can miss though. If it does miss, he’ll just use it again.
Limerence: Deals 16 damage, and 25% more per seen token, at 30% crit. Targets any hero with Seen tokens, all at the same time. So this will deal 20 without critting or mitigation at the very least, as his targets will have at least 1 token. Applies a vuln and a special debuff that permanently reduces healing received by 25%. Also may apply horror. Ignores Stealth and Blind.
Suppress: Used when at least 2 heroes have a combo token, and targets them. Applies… Some amount of debuffs. Patch notes weren’t clear.
Focused Fault is a two phase fight where the gimmick is that you want to get the Seen tokens onto as few heroes as possible. Before the change this was mainly accomplished with high speed and taunt, but now it’s mainly accomplished through using comparable speed with guard, by moving heroes, or by moving enemies. Eyeballs will always detect their mirrored hero, so if you can move heroes or them around, you can control who they target. Guard will also redirect any targeting to the defending hero. So in phase 1 you want to kill eyes that place tokens on characters you don’t want them on, and set the turn up so that when they revive they lock on to people you do want them to. Dodge and blind can be used to accomplish this more easily by making them miss their initial casts; otherwise, you have to kill them completely to make the token go away. Your early focus should therefore be on killing the eyes that place bad tokens, and on building up dodge and blind to prevent more bad tokens, while getting the tokens onto good targets. Omni-cleaves are very good for wiping off dodge here, as are any moves that ignore dodge completely. Their debuffs can be annoying but they’re typically squishy enough that they aren’t the end of the world. They can sometimes stack considerable damage themselves if you drag phase 1 on for very long. In the past phase 1 usually ended at around the Round 4 mark, but that may be different now.
So once they all hit Stage 3, they disappear and the Focused Fault flies in. If you did a good job with the tokens, they should all be on a beefy tank like Barristan or Leper. He will immediately hit Limerence, and from then on mainly just use limerence twice per round until you’re all dead.
The strategy at this point becomes all out damage. Smack the absolute living ♥♥♥♥ out of the eyeball, while focusing as much defense as you can on the tank. Stand fast on Barristan is particularly good here, as it allows him to develop more block to resist Limerence with. Withstand on Leper also does well, as does Intimidate and weak application. If you crit a lot he’ll use suppress, which is probably bad but we don’t know what it does currently. Behold just exists so that he can start killing everyone else if he chews through the tank.
That about sums up the whole fight. It’s very simple, he doesn’t have any special tricks other than just nuking dudes to death. It is a very demanding fight despite that. Phase 1 needs to be close to perfect, and phase 2 should result in you doing very high damage to quickly burst him down. 250 is still a lot of HP, though it is hampered by the lack of DBR and the lack of Dot resist. DoT characters and Cause of Death do very well here, as do general high damage dealers.
Act 3 Boss (II)
Barristan, Leper, and Vestal are key picks here. Vestal will almost always have access to Conviction as Chaplain, and can guard with Sanctuary for 3 defensive tokens. Barristan’s Stand Fast does a lot of work tanking, and he also has a guard. Leper is a great tank, held back mainly by his lack of guard skills. Hellion is a bit weaker as a tank outside of Carcass, due to her lack of block tokens and reliance on healing for mitigation. She can still work but generally not as well, due to the healing debuff and high output of the boss. Good tanks will likely get low due to meltdowns before HP damage, so you still have an effective time limit.
High damage is a must on your other characters. That can be high DoT damage from the likes of PD and Runaway, or high direct damage from characters like Audrey and Dismas, or both. It just needs to be high. Despite his 2 actions per round, Cause of Death can still do a lot to accelerate the fight if used near the end. Ideally your damage should be able to kill him in 3-4 rounds (preferably less, but that’s a reasonable mark), which means you would have to deal a total of 60-75 damage per turn with your dealers. Being a little slower than this isn’t the end of the world, but this fight does need to be wrapped up quickly.
Damage Dealing Combat items with high impact do well here. That means DoT and direct damage items. The shards from the studies in particular do a ton of damage in one throw to the boss, dealing 10 DoT (meaning 30 damage). healing items can give your tank more longevity especially in the face of a meltdown, as can stress cures, though it needs to be used before the healing debuff sets in. Laudanum will cure horror here. Omni-throwables are nice in phase 1 in particular, and holy water should theoretically cure the suppress debuffs. Smelling Salts will cure the stuns and dazes of Suppress (if those still exist), and offer some dodge which is very useful. Finally, Invigorating Intoxicant can be very useful in a pinch. Most everything else is pretty low impact.
This fight gets much easier if you use the purple herb inn item and the stimulating poultice. The former keeps the healing debuff at bay, and the latter allows you to compete more readily in speed with eyes, which is helpful. The inn item that increases DBR is also nice. Anything that increases the resolute rate of your main tank is extremely helpful, as it will greatly increase their potential survivability, as is anything that increases damage on damage dealers.